ARI’s Touchscreen manager#
One of the features of ARI is its capability to interact with users through its touchscreen. This is specially useful to enhance the user experience with end-users, where it is often necessary to either provide visual input to the user (e.g. displaying images or videos), or to obtain input through interactive screens.
The Touchscreen Manager is a webapp that allows you to create such interactive screens (through web pages) and publish them on the ARI’s touchscreen.
The Touchscreen Manager consists of
a list the pages to display and
an editor, where you can create new pages using some predefined templates, edit existing ones, or load your own HTML files.
Let’s get started on learning how to create a new page!
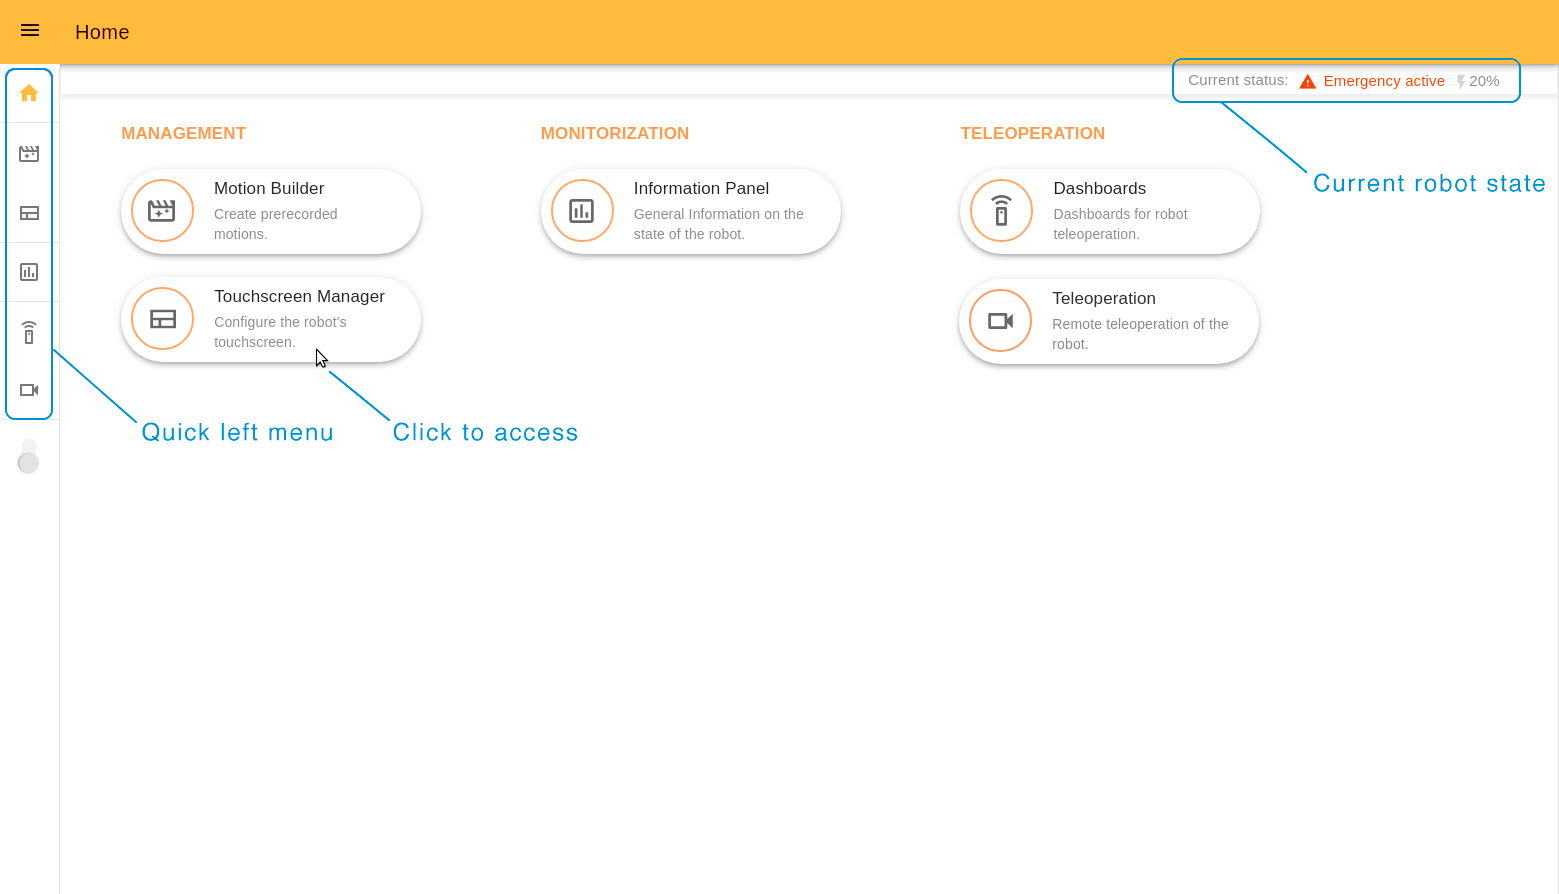
To start, click on the TouchScreen Manager tool:
You’ll see a list of existing pages (if any). For each page, you can see the following information/actions:
Grey/green circle on the left of the page name: the green circle indicates that the page is active , i.e. that it is being publish on the touchscreen now.
Upload icon: to publish the page.
Edit icon: to edit the page.
Trashbin icon: to remove the page.
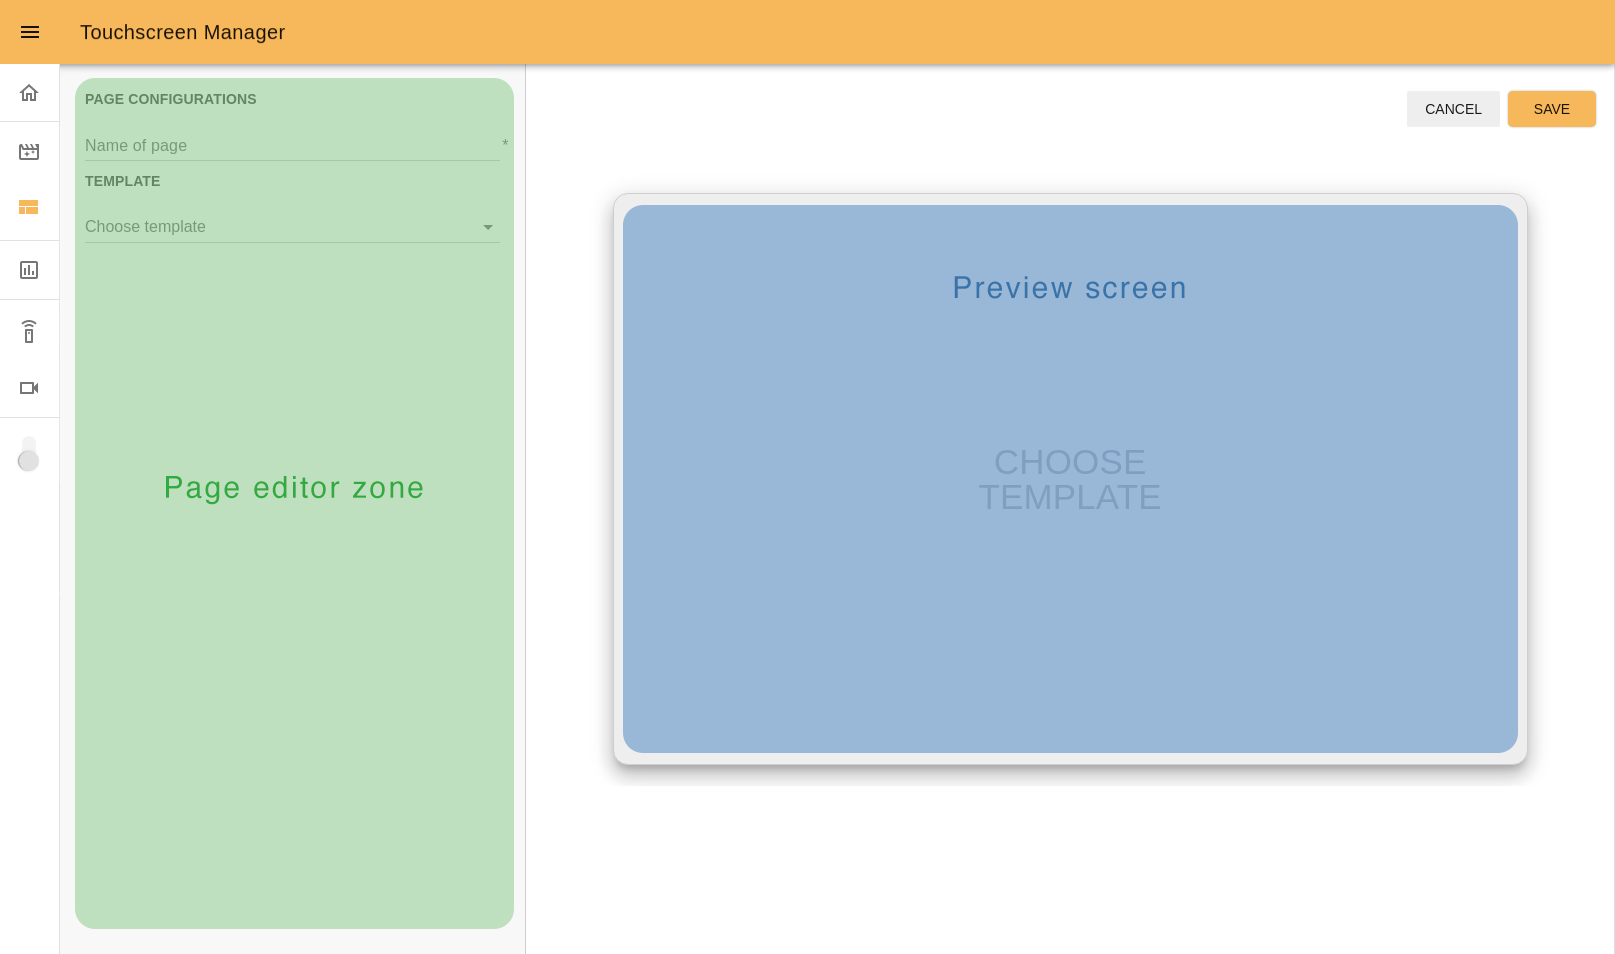
Click on the CREATE NEW PAGE button to start building a new page.

The Touchscreen editor is a tool that allows creating pages by customizing
predefined templates or by importing your own webpage in .zip format. We
will learn how both options work.
Creating a new page using a template#
Note
While you edit the page, a preview is displayed on the preview screen on the right.
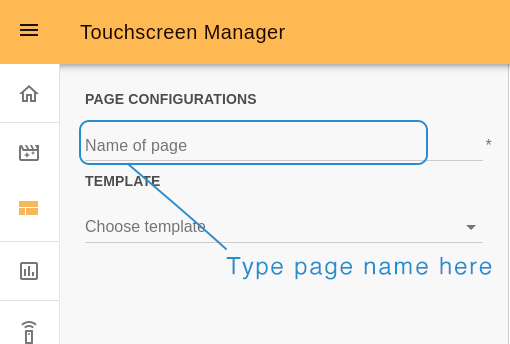
Step 1. Choose the page name. Remember it will be permanent and it is not possible to change it later.
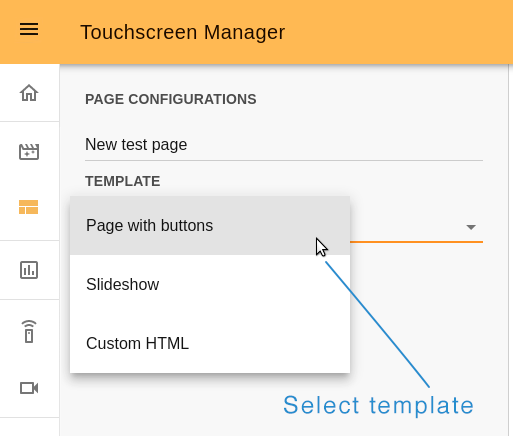
Step 2. Choose the template. You have five options:
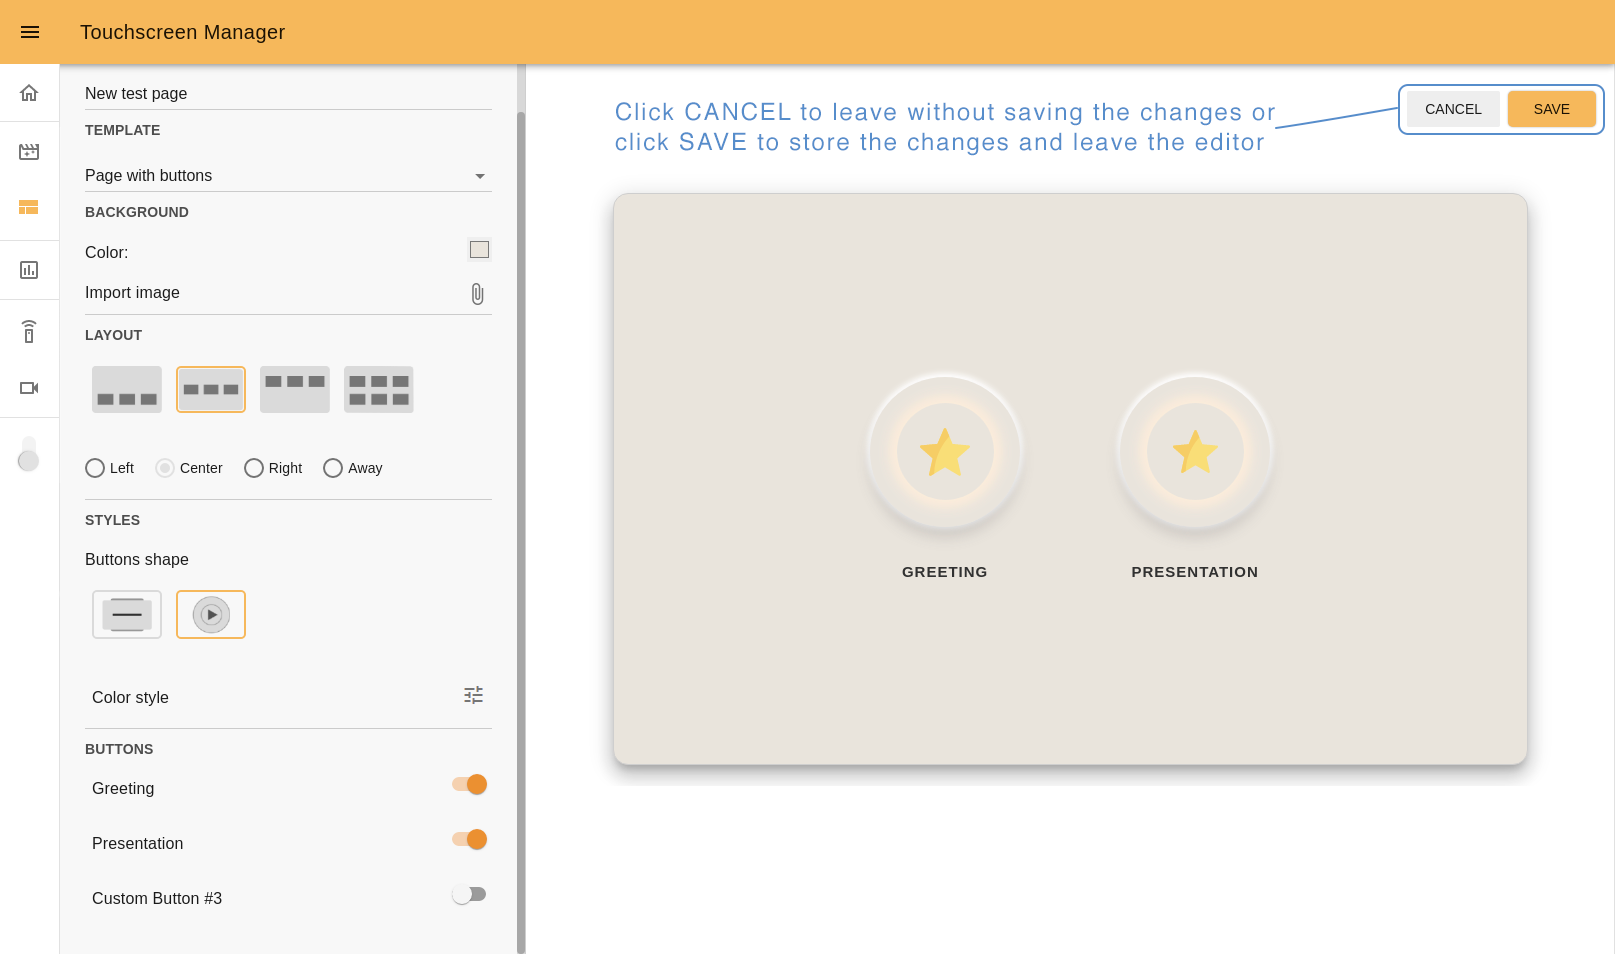
Page with buttons template#
The Page with buttons template gives you the option of adding background images as well as custom buttons in different types of layouts.
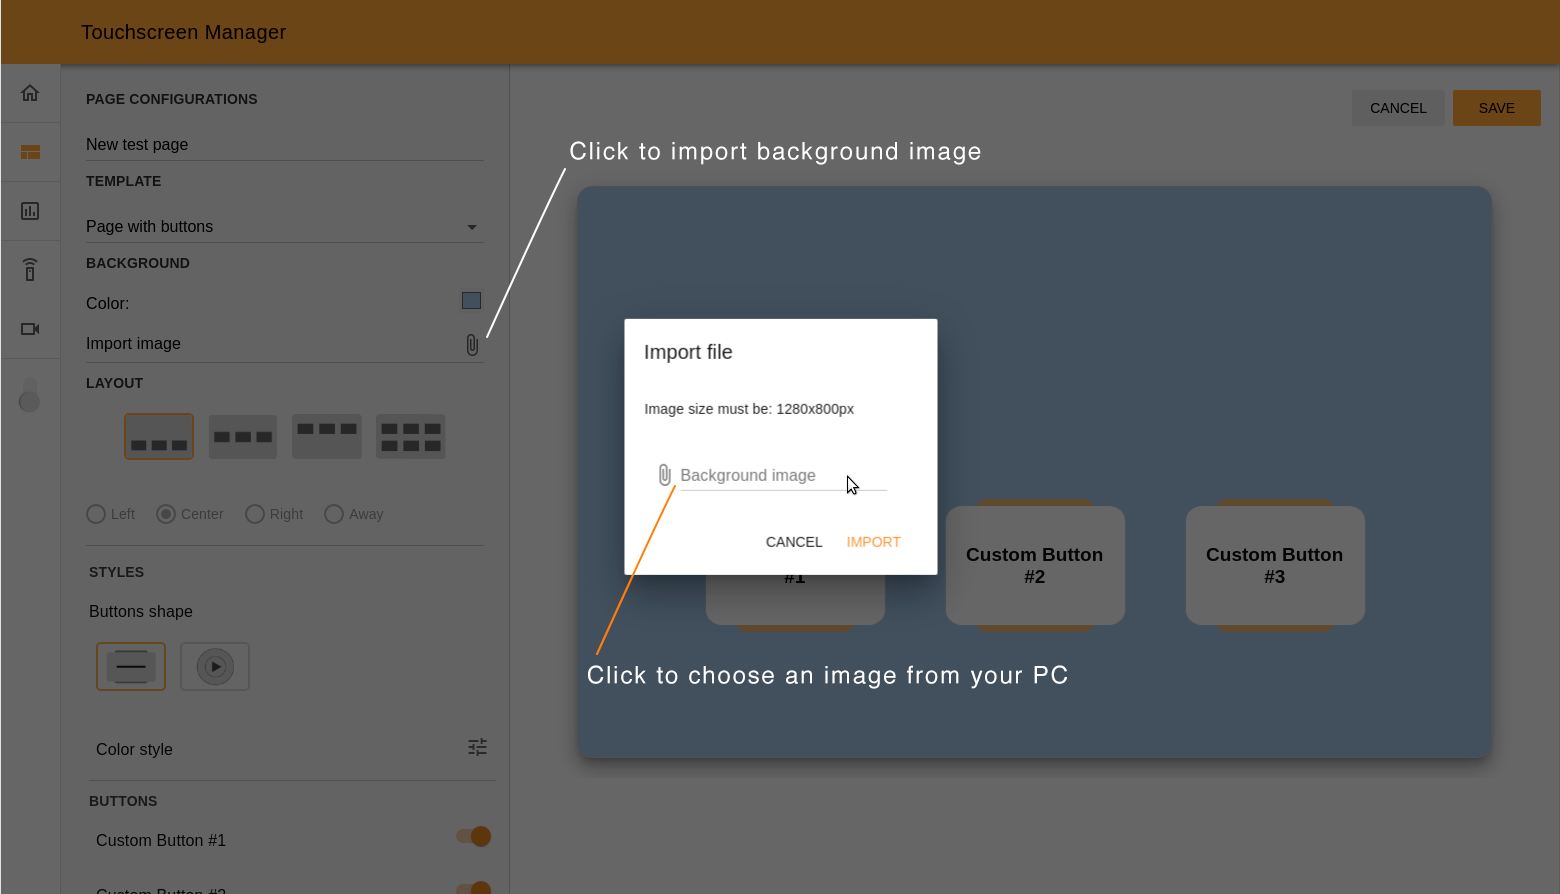
Step 3. Set background. As a background you can choose any color or import your own image. The recommended image size is 1280x800px.
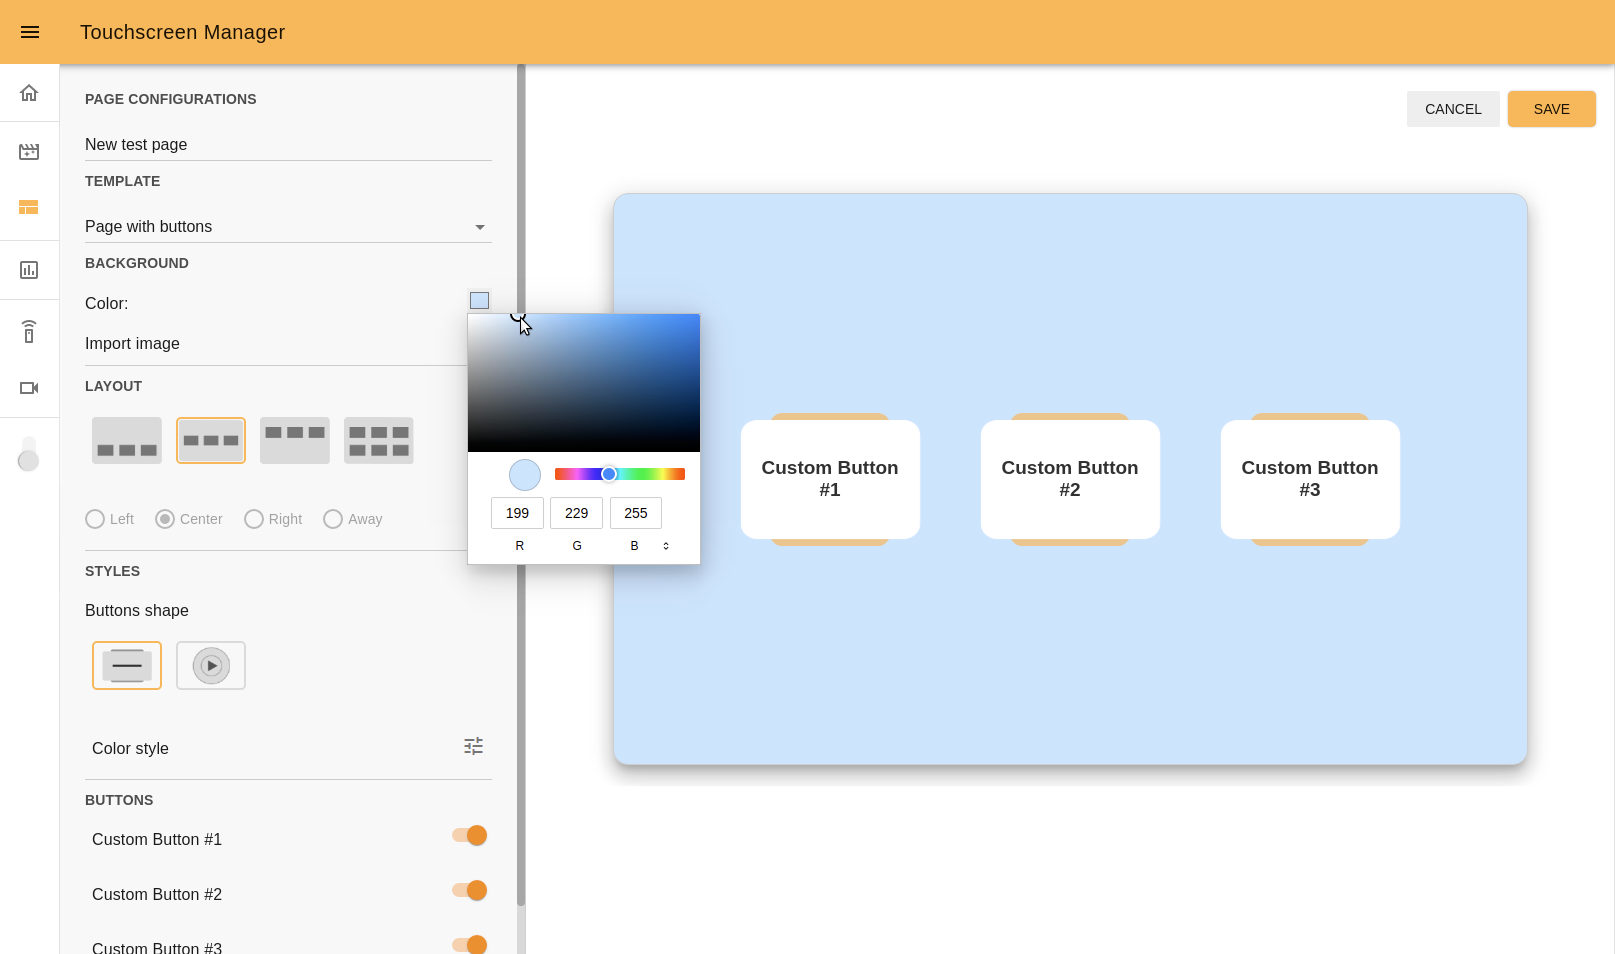
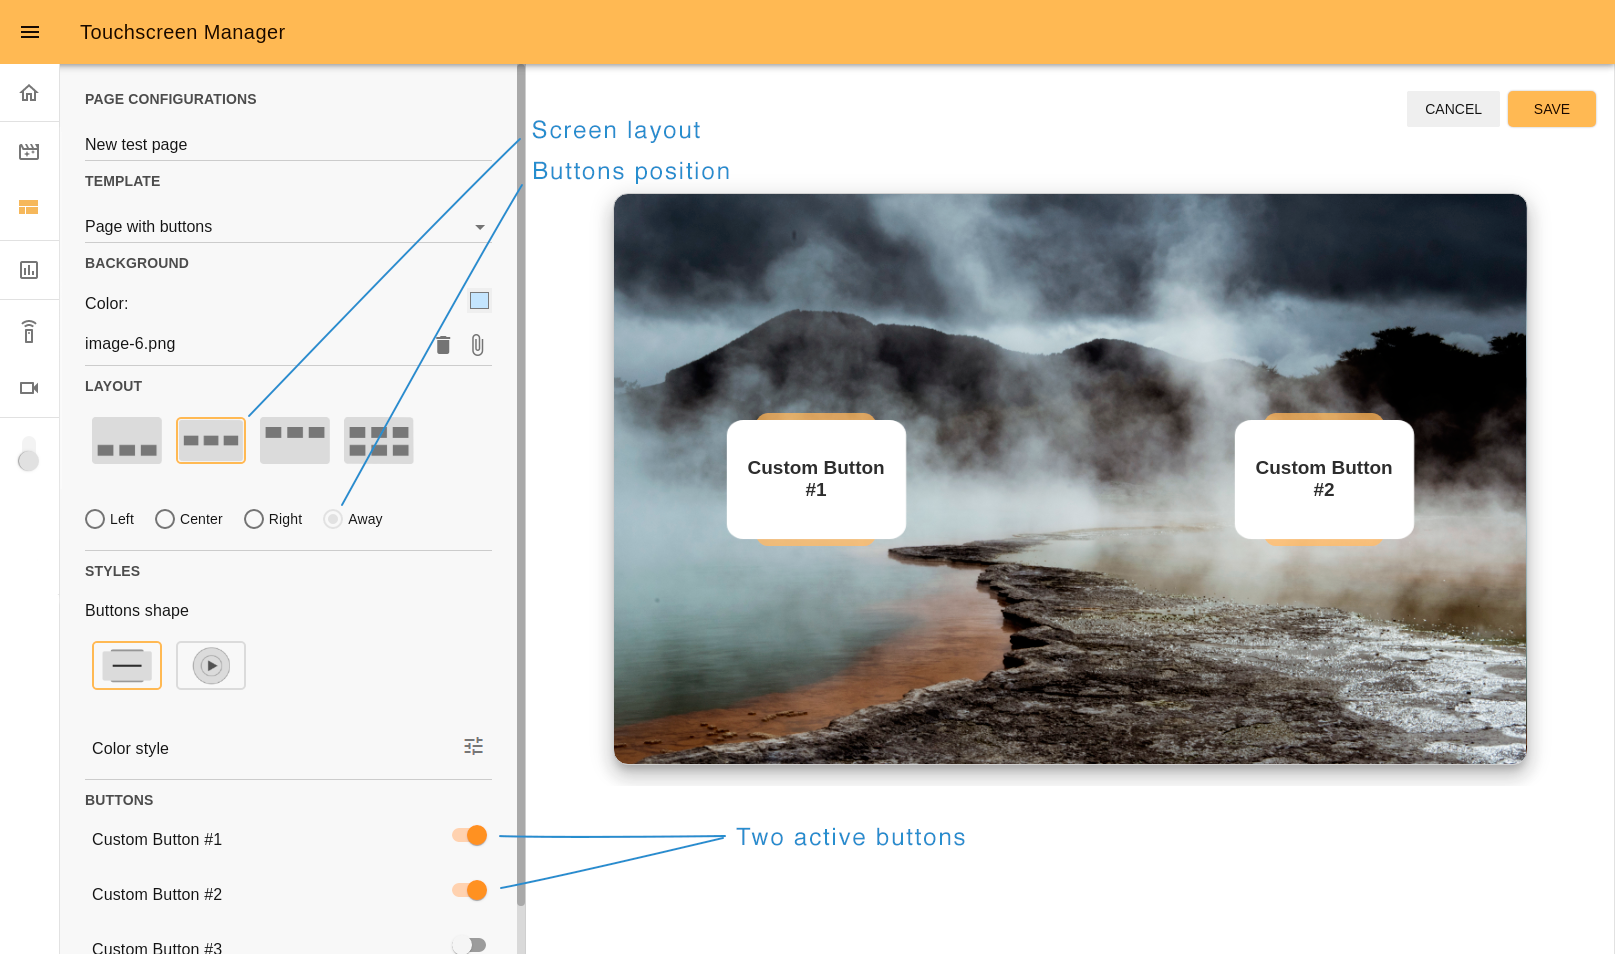
Step 4. Choose layout. In this section you can choose three possible positions for the buttons, add a second row of buttons, and align it (on the left hand side, center, right or away from each other if there are only two buttons in the row).
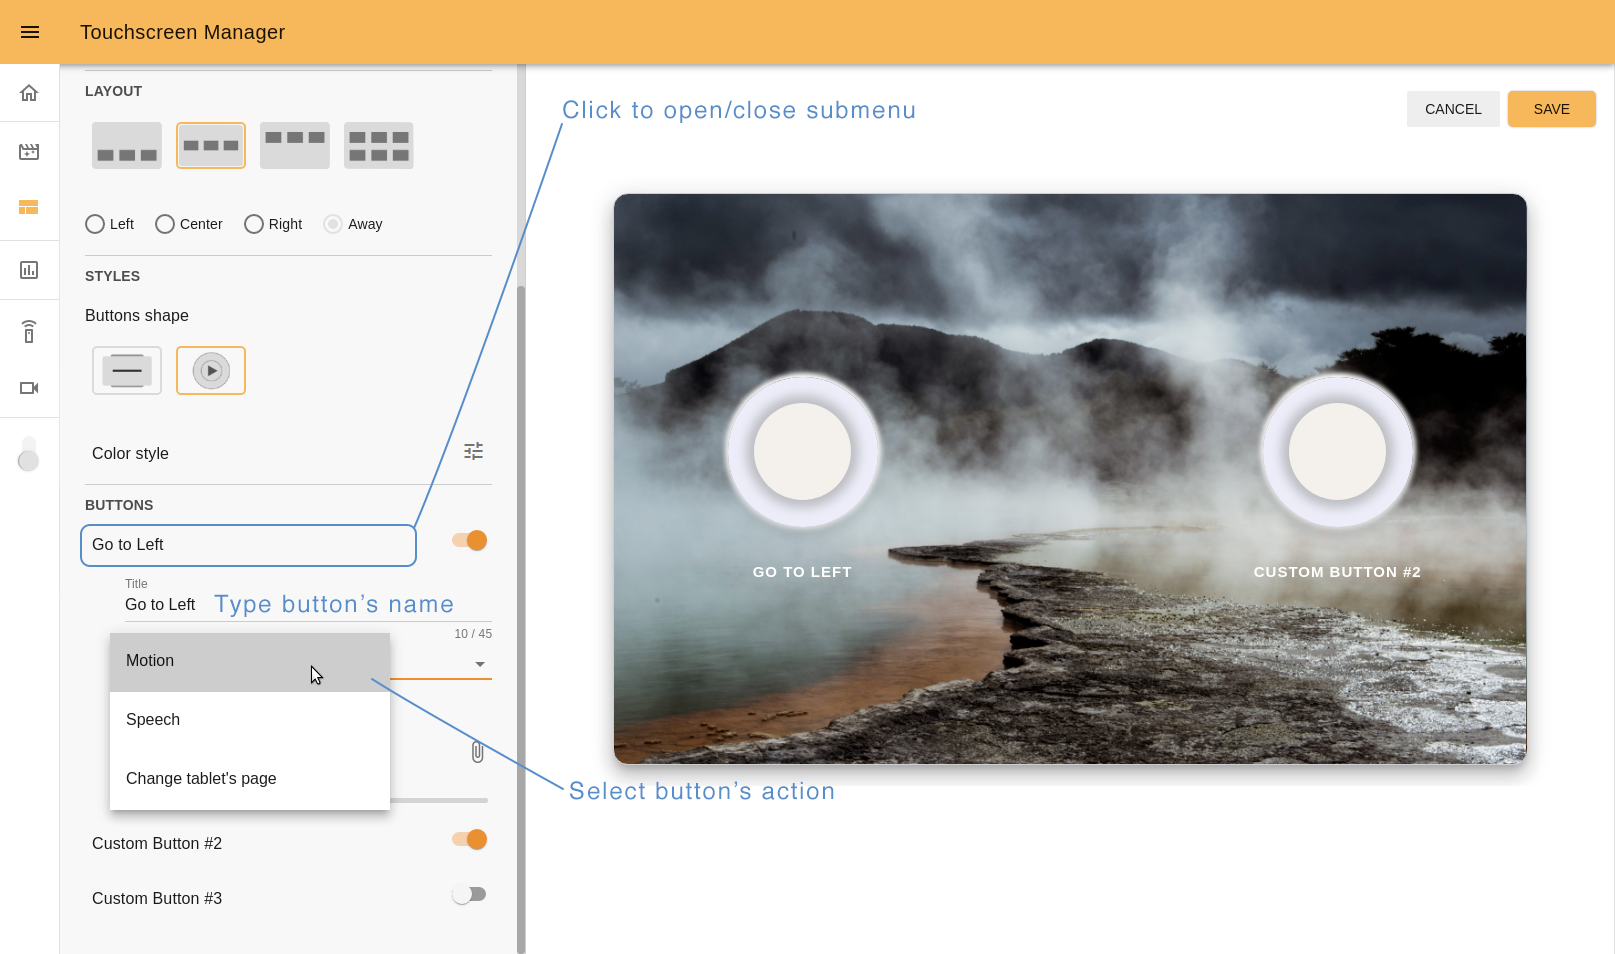
Step 5. Customize buttons. The Touchscreen manager has two predefined designs of buttons: square and round. Each button style allows you different customizations.


The Buttons section shows the list of buttons you can display on the screen. The toggle next to each button name serves to show or hide each button on the screen.
Note
The max number of buttons that can be shown on the screen is 6.
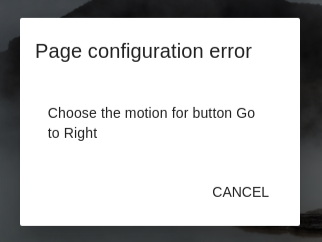
By clicking on the button name you will open an additional panel where you can change the button’s name and choose an action for ARI to perform when the button is clicked. There are three options:
Motion - choose a motion for ARI from the list.
Speech - type text for ARI to say.
Change tablet’s page - in case you want to be redirected to another page you created before.
Note
It is not allowed to save a page if there are any buttons on the screen without an action assigned to them. Choose an action for each button you want to display on the touchscreen.
If you selected the Round button style in the previous step you will see the option to import an icon for each button. Make sure that the image has a transparent background and a small size. Suitable formats are PNG and SVG.
After importing the icon, you can change its size.
Jump to Canceling or saving to continue.
Slideshow template#
With this template you can create a presentation of a series of images. After choosing a page name and the Slideshow template (Steps 1 and 2), continue with the following steps.
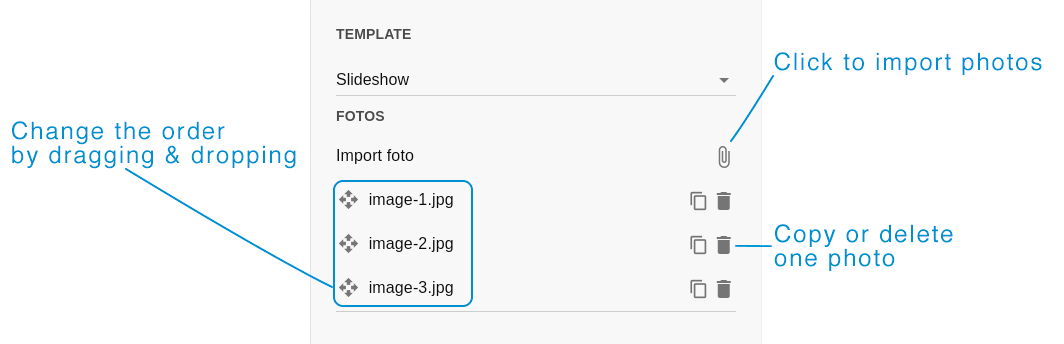
Step 3. Import photo. Click on the attach icon and import the images to your presentation one by one. You will immediately see the list of imported images. You can set the order in which the images will appear by dragging and dropping them.
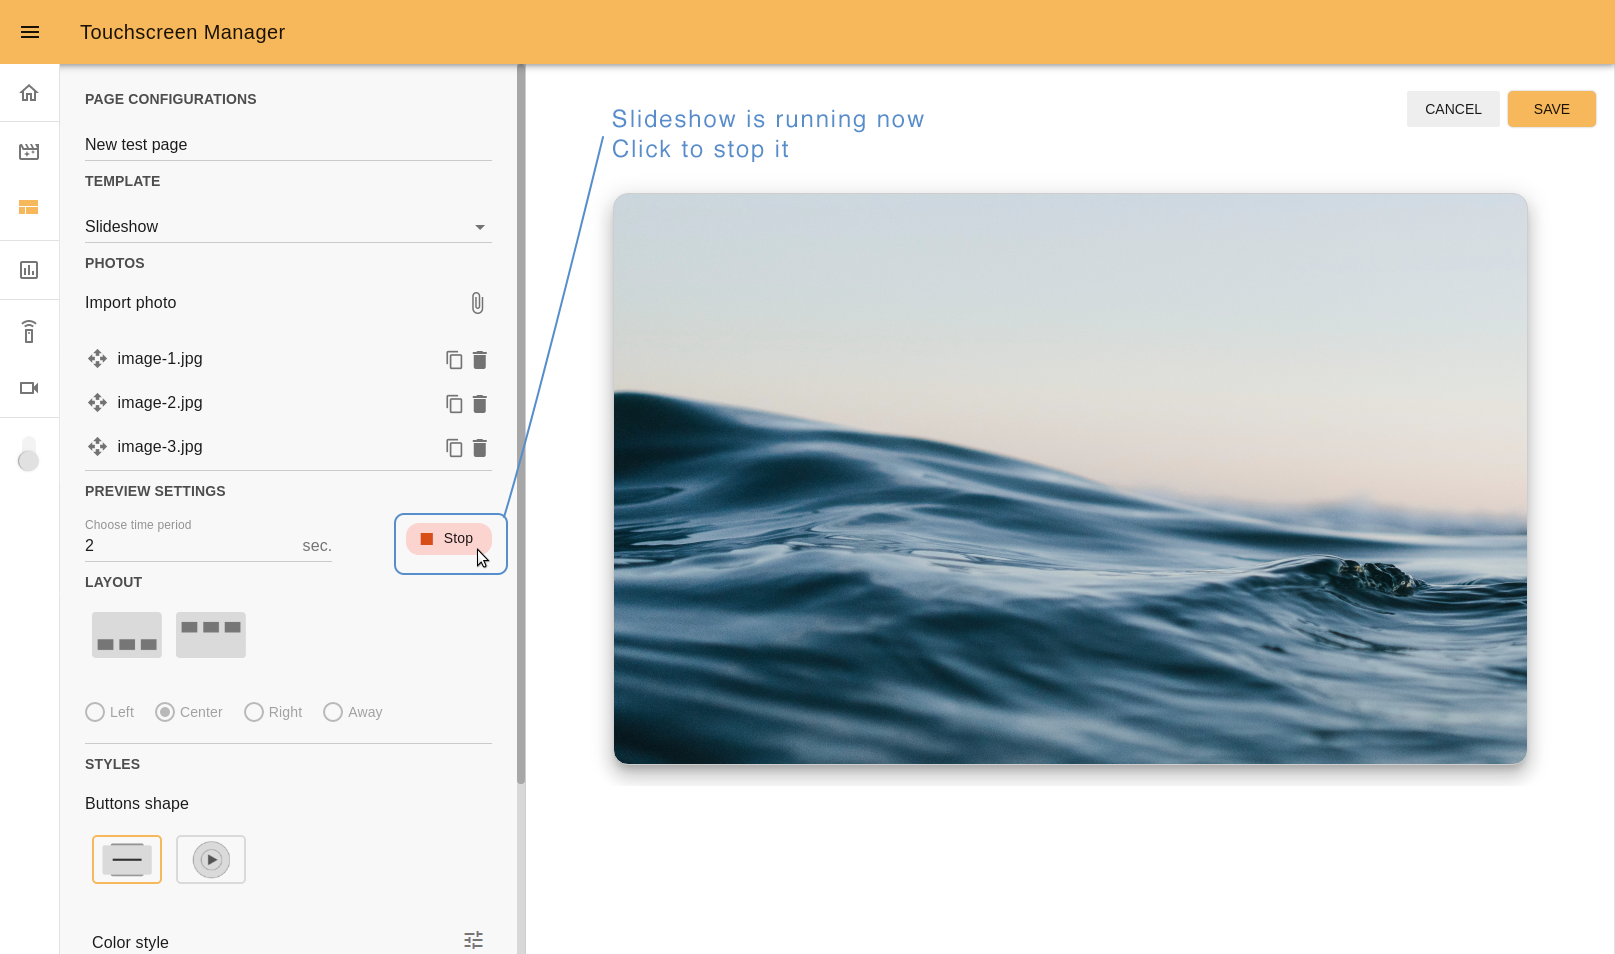
Step 4. Set preview settings. Choose the time delay to switch from one image to the next one. You can check the outcome by pressing the Play/Stop button. You will see the slideshow in the preview screen.
Note
Importing at least one photo and setting a time period are mandatory steps before you can use the Play button.

You can press the Stop button to pause a reproduction of the slideshow preview.
Step 5. Choose layout. It is possible to choose up to three static custom buttons to be shown during the slideshow. The buttons can be displayed either on the top area or at the bottom area. If you set less than three butons, these can also be aligned (left, center, right or away).
Step 6. Customize buttons. To customize your buttons, follow the same process as in the Page with buttons template (step 5).
Jump to Canceling or saving to continue.
Image template#
The image template is used to build web pages to show an image. After choosing a page name and the Image template (Steps 1 and 2), continue with the following steps.
Step 3. Upload image file. Press the attach button to upload your image.
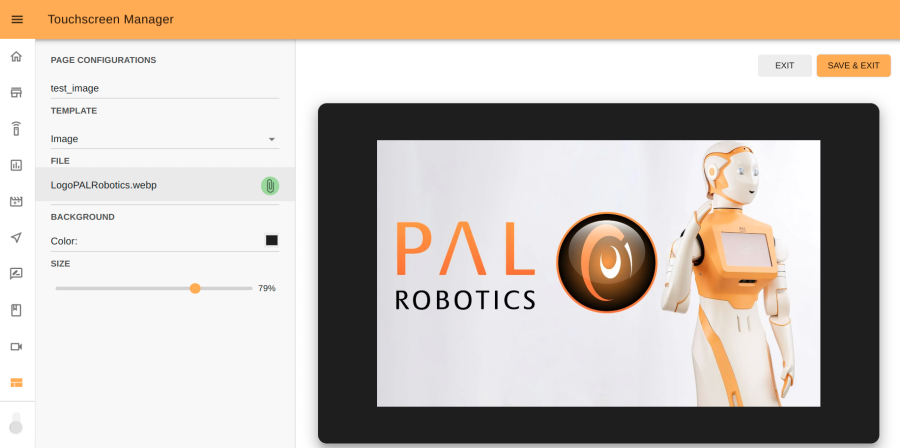
Step 4. Set background color. Pick the background color.
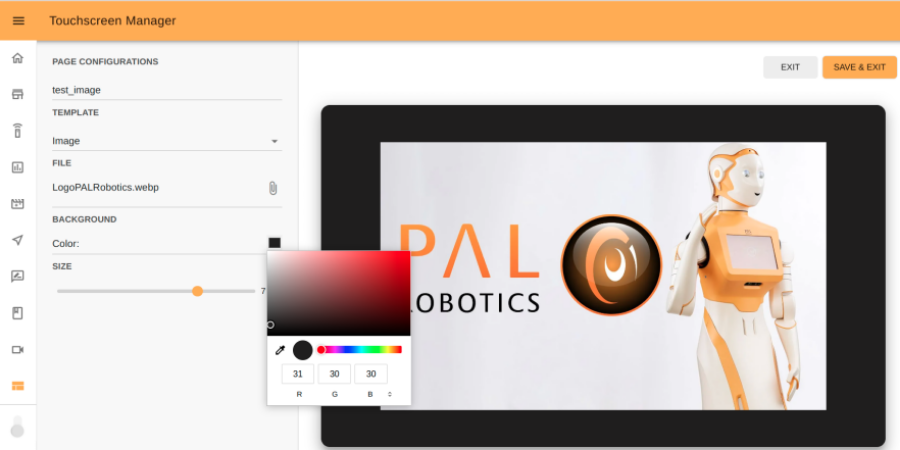
Step 5. Set image size. Move the slider to change the size of the image.
Jump to Canceling or saving to continue.
Video template#
The video template is used to build web pages to show a video. After choosing a page name and the Video template (Steps 1 and 2), continue with the following steps.
Step 3. Upload video file. Press the attach button to upload your image.
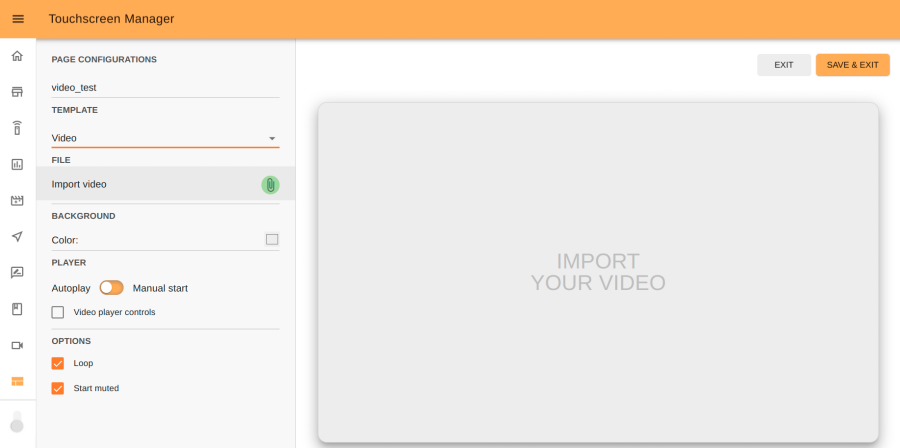
Step 4. Set background color. Pick the background color.
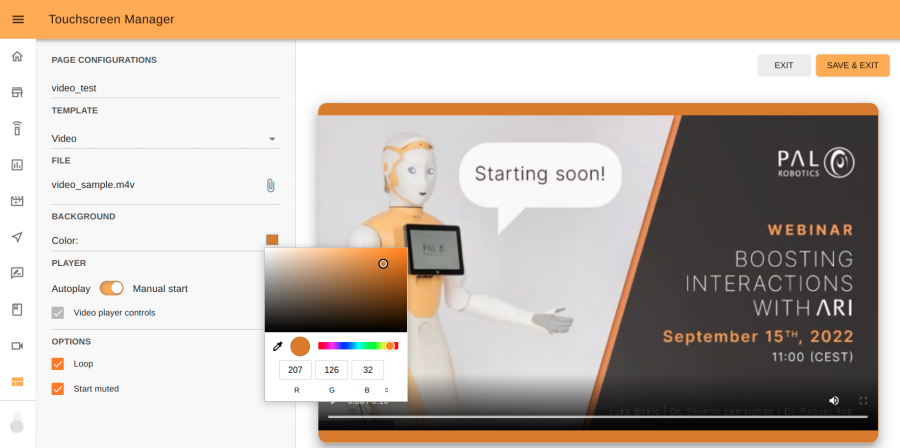
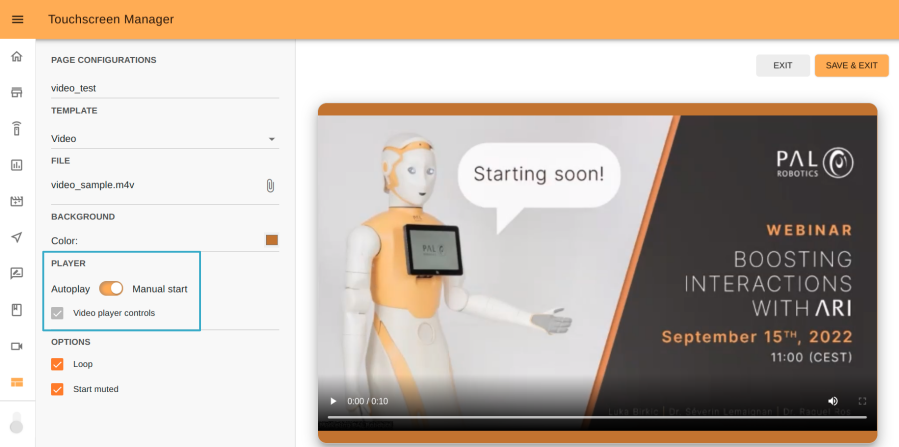
Step 5. Set player control. You can opt for autoplay or manual start. In the former case, the video will automatically start as soon as you publish the page. In the latter case, player controls will appear below the video so you can manually control the video player. In automatic mode you can also have player controls by selecting the Video player controls option.
Step 6. Additional options. With these additional options you can choose to play the video in loop mode and whether you want to start the video in muted mode.

Jump to Canceling or saving to continue.
Custom HTML#
This template can be used if you want to display your own webpage. Follow steps 1 and 2. Next, Press the attach icon in the File section and import your file.
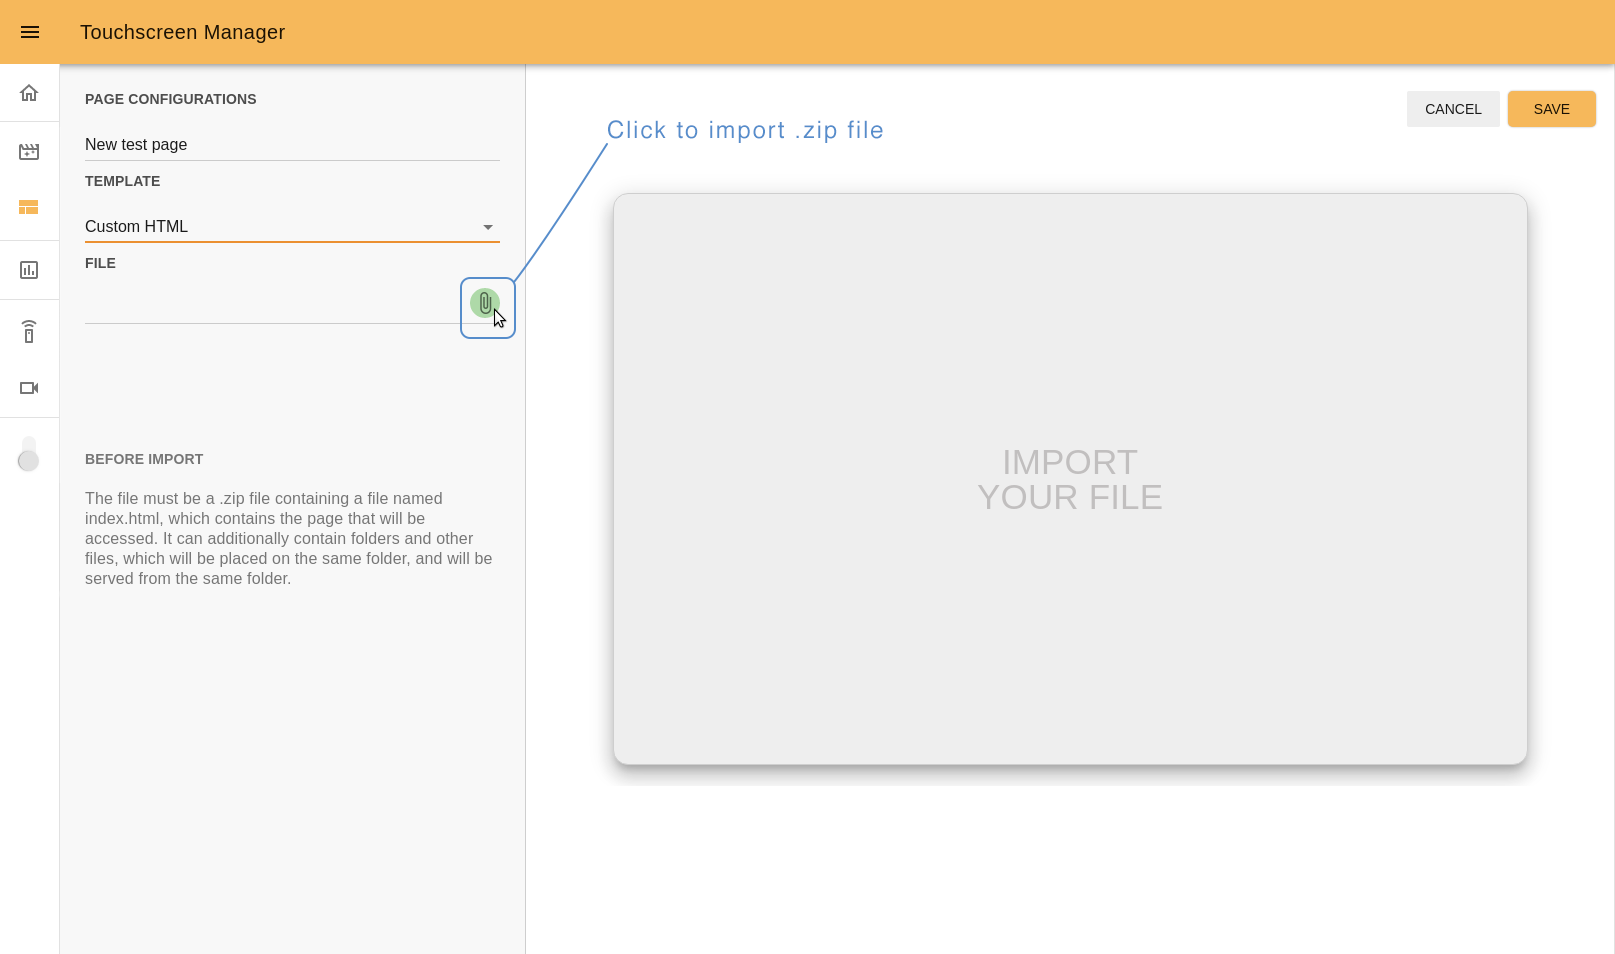
To display your webpage correctly, you must follow the next guidelines:
Allow at least 15px on the boundaries to avoid accessibility problems with the touchscreen frame.
It is advisable to use touch events (https://developer.mozilla.org/en-US/docs/Web/API/Touch_events) to manage the interaction in js.
the file must be a
.zipformat;the Zip file must contain a file named
index.html, which contains the page that will be accessed;A simple example of how files can be organized before the zip compression follows:
game_example.zip
   - index.html
   - js
       - main.js
       - utils.js
   - styles
       - game.css
You can use
jslibraries such asVueandReact. The only requirement is that everything is contained in the Zip file.
Note
While editing the Custom HTML template you cannot visulize the output. You will have to publish the page to view the results.
If you want to learn how to get the input from interactions with the touchscreen through ROS, check the Tutorial: Building a first touchscreen interaction how-to.
Canceling or saving#
You can cancel the process or save it after you are done by pressing the CANCEL or SAVE buttons, respectively:
CANCEL: if you want to stop editing and don’t want to save your progress.
SAVE: to save your work and go back to the pages list
Publishing a page#
Now that you have finished editing your page, you can publish it to show it on ARI’s screen. To do so, press the upload button on the far right side of the name page. Once it has been published, a green circle will indicate that the page has been successfully loaded.
You should see your new page on the touchscreen!