Power management#
Switching on/off ARI#
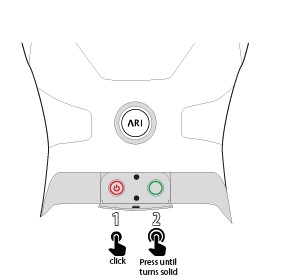
On/off buttons
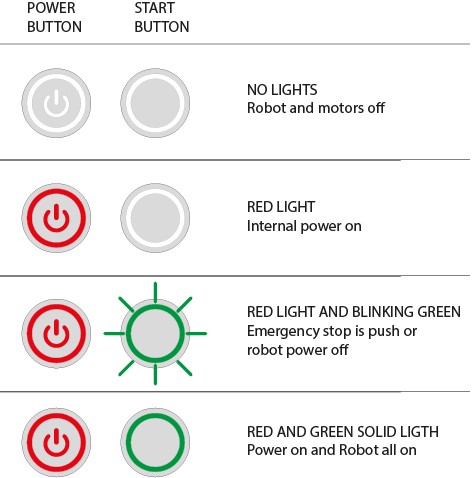
ARI has two buttons for turning it on and off: the Power Button switching the robot main power and the Start Button turning on/off the onboard computer. Before starting ARI with the start button, make sure first that the power button is ON, i.e. its red light indicator is ON. On the other hand, this switch should be turned OFF only while the onboard computer of the robot is OFF, i.e. its green light indicator is OFF.
When ARI is not going to be used for a long period, please make sure to turn OFF the main power so that its red light indicator turns OFF. Note that turning OFF this switch will cut instantaneously the power supply to all the robot components, including the onboard computer. Do not use this switch as an emergency stop. For the emergency stop please refer to the next section.
Turning ON sequence
Before switching ARI on: release the emergency button and open the lid to access the power buttons at the back of the robot.
Emergency stop#
When the emergency button is pushed, motors are stopped and disconnected. The green indicator of the start button will blink fast in order to notify the user of the emergency state.
To start normal behaviour again, a two step validation process must be executed: the emergency button must be released by rotating clockwise, and then the start button must be pressed for one second. The green light indicator of the start button will change to a fixed state.
Charging the robot’s battery#
Overview#
Depending on the version acquired, your ARI may include a docking station that allows the robot to recharge itself automatically. This section will describe the components of the docking station and how to integrate it with your algorithms.
Charging ARI with cable charger#
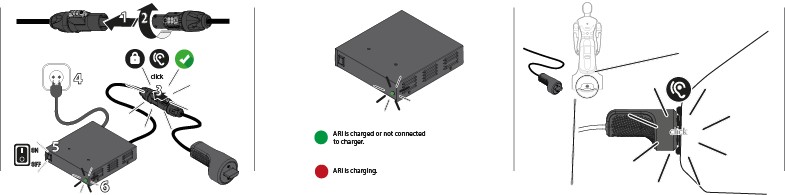
ARI must only be charged with the provided charger and adapter.
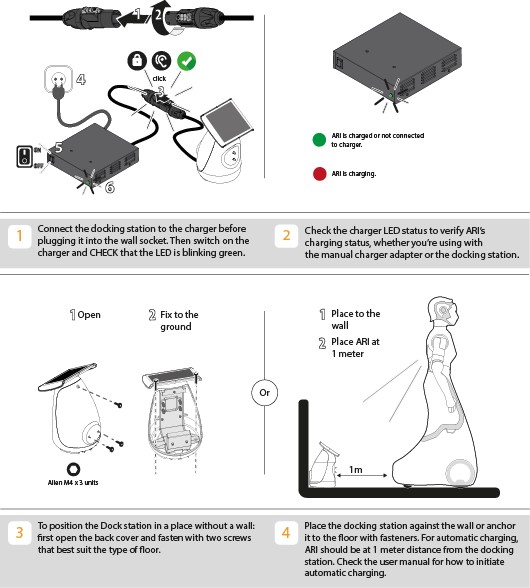
First you need to connect the manual adapter to the charger. Then it should be plugged into the wall socket. To charge the robot, plug the manual charger adapter to the connector on the lower rear part of ARI’s base. Then switch ON the charger and CHECK that the LED indicator is blinking GREEN if the robot is fully charged or NOT connected to the charger. The LED indicator should be RED when ARI is charging.
Charging ARI with dock station#
The docking station hardware and installation
Figure below indicates the components of the docking station.
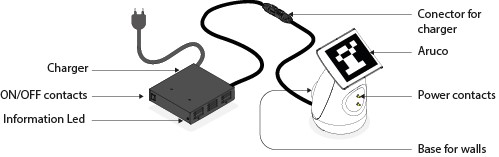
The dock station itself is composed of an adapter, where there are buttons to switch it on and off, charger and a LED indicating whether the robot is charging or not. The other end contains a base, that should be supported against a wall, power contacts, to establish contact with the robot, and an ArUco marker, which is what the robot detects in order to dock.
The docking station should be preferably mounted against a hard surface, to avoid the robot displacing it while doing a docking manoeuvre. The power charger must be plugged into the respective plug. The user must also assure that no objects are present in the docking station surroundings, that could interfere with the docking manoeuvre.
Docking algorithm
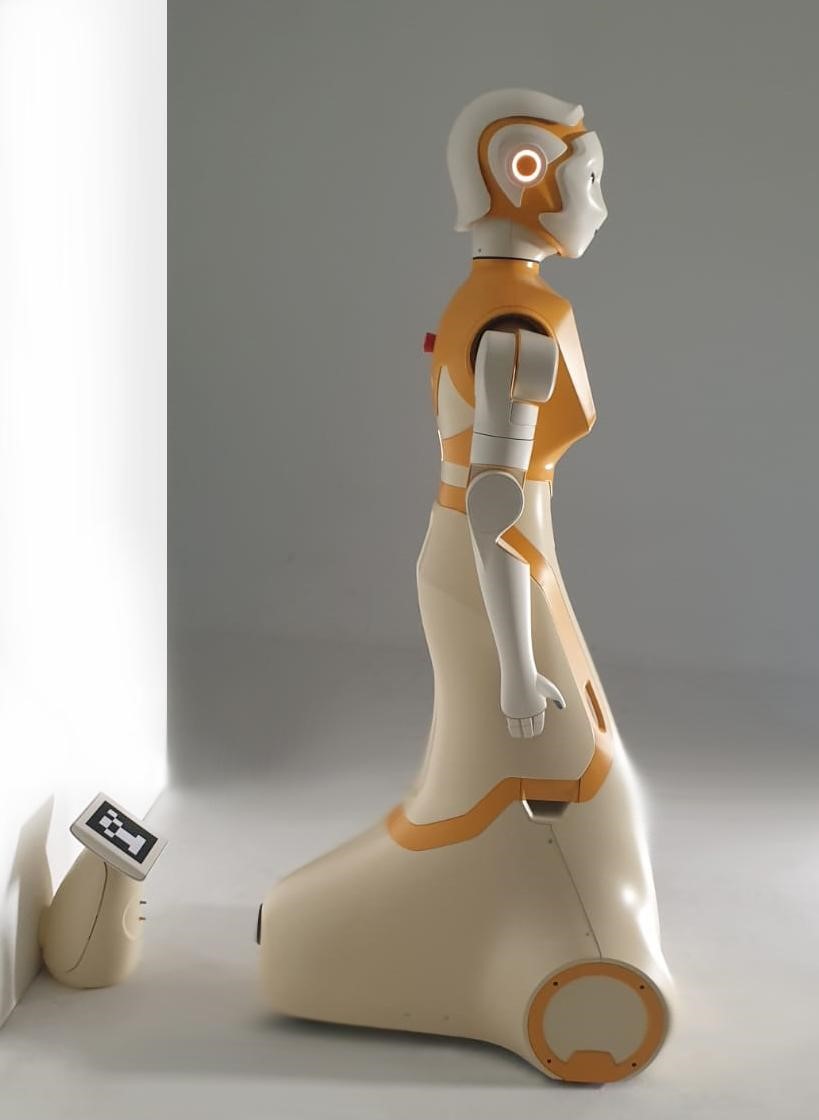
In order to carry out autonomous docking the robot uses its back stereo-fisheye camera, located right below the emergency button, in order to detect the ArUco marker.
When the robot is asked to go to the dock station, it activates two services in parallel. The first is responsible for the pattern detection, while the second performs the serving to reach the power contacts:
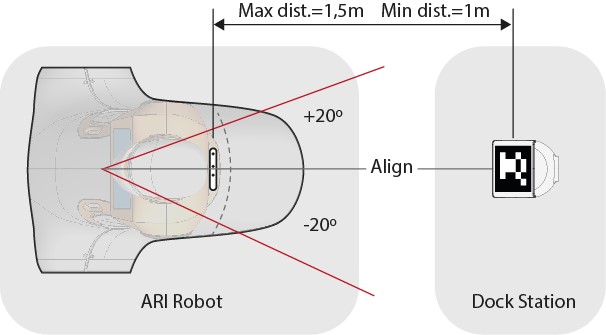
Pattern detector: the robot is capable of detecting the pattern up to 1-1.5 meters from the torso back RGB-D camera and with an orientation angle of 40º
Servoing manoeuvre: it comprises two steps, where first the robot aligns itself with the power contacts and, secondly, moves backwards advances until the contact is made or a timeout occurs (in the case the docking station is not powered, or the contact fails for example).
In order to initiate the docking the robot should be between 1 and 1.5 m away from the dock station. It is also an option to define a point of interest in order to pre-position the robot more easily.
Once the robot is docked, it will block most velocity commands sent to the base, in order to avoid manoeuvres that could possibly damage the robot or the dock station. There are only two ways of moving the robot after it is docked: By doing an undock manoeuvre, or using the graphical joystick, which can override all velocity commands.
Warning
It is the sole responsibility of the user to operate the robot safely with the joystick after the robot has reached the docking station.
Usage
The docking/undocking manoeuvres are available through two different action servers that can be activated by using the provided rviz plugin or directly through the action server interface.
Dock/Undock through WebGUI#
In order to dock/undock using the WebGUI first log in (username and password: pal).


Once logged in navigate to the Teleoperation tool (camera icon).
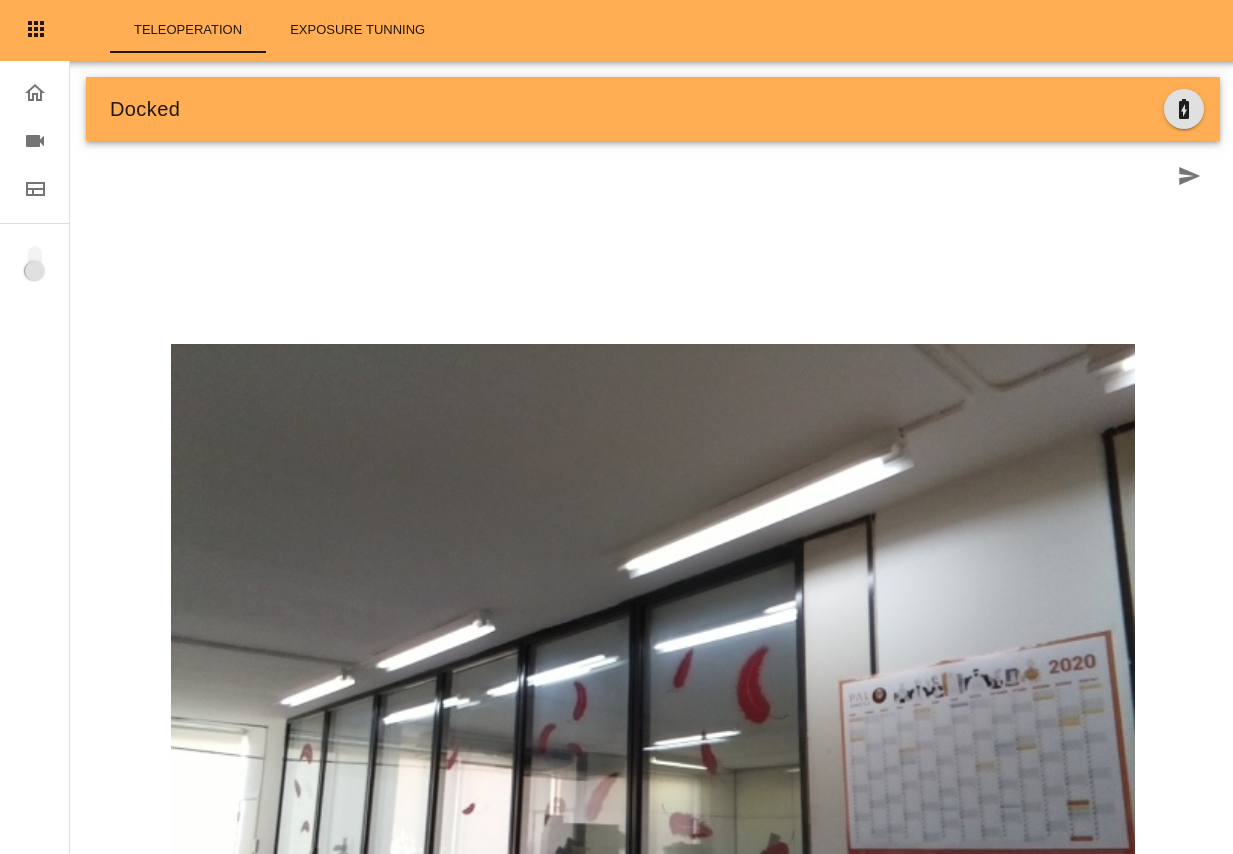
On the Teleoperation plugin the top bar shows the current state of
the robot (Docked or Undocked), the icon on the top right permits
undocking if the robot is docked, or Dock if the robot is undocked and in front
of a docking station.
See Using the WebGUI for further information.
Dock/Undock using RViz plugins#
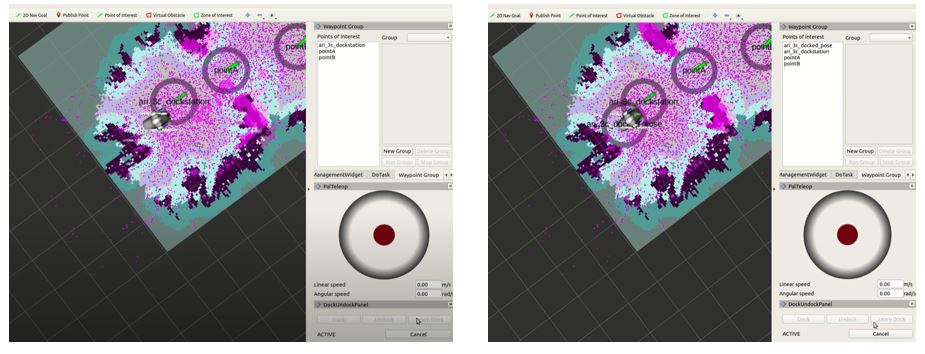
A dock/undock panel is available as an RViz plugin, that can be added to any RViz configuration by going to the Menu Panels -> Add New Panel and then choosing the DockUndock Panel. It is also loaded through the robot’s preconfigured navigation RViz file.
export ROS_MASTER_URI= http://ari-0c:11311
rosrun rviz rviz -d `rospack find ari_2dnav`/config/rviz/navigation.rviz
The panel appears on the right lower side of this interface.
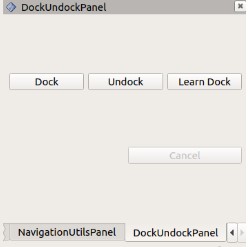
Once the user has positioned the robot within the tolerances specified before, he/she can click the Dock button to perform a docking manoeuvre. At any moment it is possible to cancel the docking manoeuvre by clicking the Cancel button. In a similar way, the robot can be moved out from the dock by clicking the Undock button. A status message will be shown beside the Cancel button, informing the user about the status of the action requested.
Note
the robot will only accept an undock order if it was previously docked, otherwise the action request will be rejected.
It is also possible to use the Learn Dock button to have the robot learn the position of a new dock station and add it as a POIs in the given map. For this it is necessary that a map of the environment be previously built.
Dock/Undock using action client#
ROS provides an action client interface that can be used to communicate with the
action servers responsible for the dock and undock manoeuvres.
The ROS_IP needs to be set properly for this to work -
The IP is the one of the development computer that is visible from the robot.
To run the action client, the following command should be entered for the docking manoeuvre:
export ROS_MASTER_URI=http://ari-0c:11311
export ROS_IP=<your IP>
rosrun actionlib_tools axclient.py /go_and_dock
and for the undocking manoeuvre:
export ROS_MASTER_URI=http://ari-0c:11311
export ROS_IP=<your IP>
rosrun actionlib_tools axclient.py /undocker_server
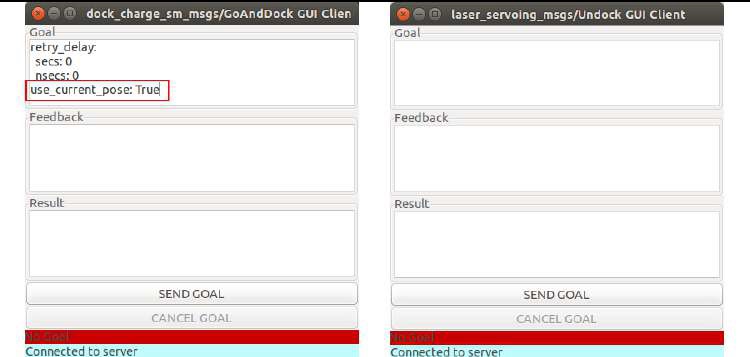
After any of the previous commands is executed, a panel will pop up. The figure
below shows both the /go_and_dock and the /undocker_server panels.
In this interface, the button SEND GOAL would start the docking (or undocking) manoeuvre. As before, the CANCEL GOAL button will abort the action, and the status of the server and of the goal are displayed in the bottom of the panel.
Note
For the docking action client, the field use_current_pose should be set to
True, otherwise the action will fail (this field is not needed for the
/undocker_server).