Operating system configuration and updates#
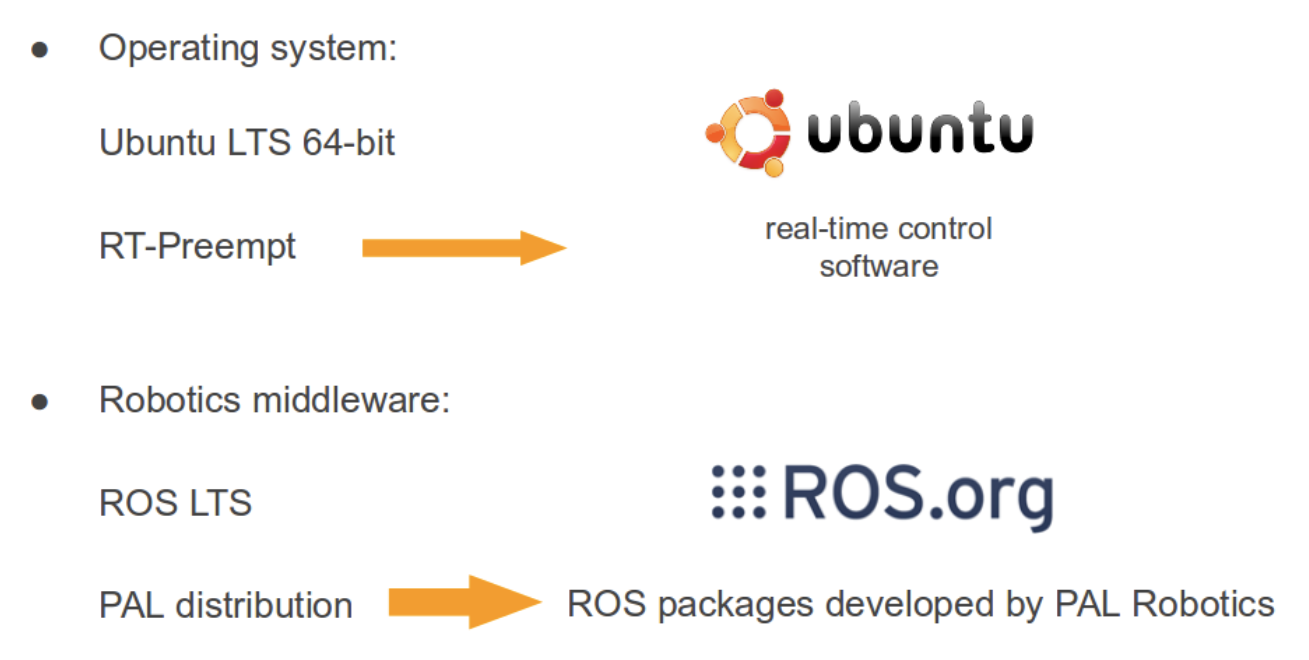
PAL robots run on the Linux Ubuntu operating system, with a patched real-time
kernel. For pal-sdk-23.1, we specifically target Ubuntu 20.04 LTS with RT kernel
5.10.0-rt-amd64.
Hostname#
The name of your robot’s computer is robot-0c, where robot is eg
tiago or ari, and 0 needs to be replaced by the serial number of
your robot. For the sake of clarity, hereafter we will use robot-0c to
refer to your robot computer name.
In order to connect ot the robot, use ssh as follows:
$ ssh pal@robot-0c
The robot’s filesystem#
The system partitions of PAL robots’ computers are mounted as read-only, as a protection against power failures that could corrupt the filesystem.
The following partitions are created:
/: This is an union partition, the disk is mounted in/rodirectory as read-only and all the changes are stored in RAM. As a consequence, by design, none of the changes to the system partition persist across reboot;/home: This partition is read-write. Changes are persistent across reboots./var/log: This partition is read-write. Changes are persistent across reboots.
In order to perform persistent change to the system partition (for instance, install new Debian packages), follow these steps:
pal@robot-0c:~# su # the default root password is 'palroot'
root@robot-0c:~# rw
Remounting as rw...
Mounting /ro as read-write
Binding system files...
root@robot-0c:~# chroot /ro
rw command remounts all the partitions as read-write. Then with a chroot
to /ro we have the same system than the default but all writable. All the
changes performed will be persistent.
In order to return to the previous state do the following:
root@robot-0c:~# exit
root@robot-0c:~# ro
Remount /ro as read only
Unbinding system files
root@robot-0c:~# exit
First exit command returns from the chroot. Then the ro script
remounts the partitions in the default way.
ROS and ROS packages#
ROS is the standard robotics middleware used on all PAL robotic platforms.
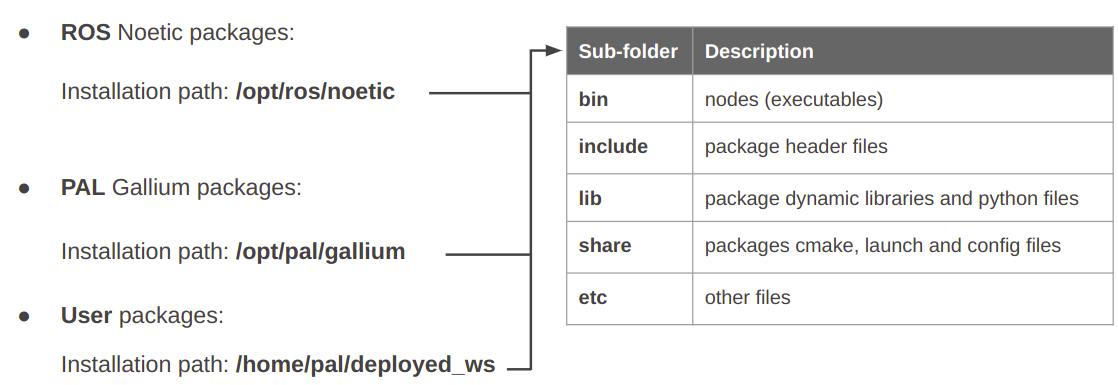
ROS packages on the robots can be categorised into three groups:
packages belonging to the official ROS distribution (ROS
noeticforpal-sdk-23.1);packages specifically developed by PAL Robotics, which are included in the company’s own distribution (
galliumversion forpal-sdk-23.1);optionally, your own ROS packages.
The three categories of packages are installed in different locations of the
SSD, as shown in figure below. The ROS noetic packages and PAL gallium
packages are installed in a read-only partition as explained above.
Note that even if these software packages can be modified or
removed (at the customer’s own risks), a better strategy is to overlay them
using the deployment tool presented in Tutorial: Deploying ROS packages on the robot. The same deployment
tool can be used to install ROS packages in the user space. With this method,
user packages are installed in the /home/pal/deployed_ws/ directory.
System upgrade#
For performing system upgrades, connect to the robot, make sure you have
Internet access and run sudo pal_upgrade.
This will upgrade your robot’s packages to the latest available versions on the PAL repositories.
Do not forget to reboot the robot once the upgrade is complete.
Note
pal_upgrade will only upgrade the package for the current SDK
distribution. To upgrade your robot to a different SDK version, please
contact PAL support.
Firmware update#
Important
You should not perform a firmware update without being instructed by the PAL support to do so. Firmware updates can easily brick your robot, requiring it to be shipped back to PAL for reflashing.
To update firmware, use the application described in section
System upgrade. Check for updates for the pal-gallium-firmware-*
packages and install them.
Before running the script, place the arm in a safe position with a support underneath it, as during the installation of the script, the arm can tumble.
Run the update_firmware.sh script, as shown below. The update will take a few
minutes.
pal@robot-0c:~# rosrun firmware_update_robot update_firmware.sh
Finally, shut it down completely, power off with the electric switch and then power up the robot.
Mitigation of Meltdown and Spectre vulnerabilities#
Meltdown and Spectre are security vulnerabilities that exploit critical weaknesses in modern processors.
Fortunately the linux Kernel has been patched to mitigate these vulnerabilities, this mitigation comes at a slight performance cost.
PAL Robotics configuration does not interfere with mitigation, whenever the installed kernel provides mitigation, it is not disable by our software configuration.
Below we provide some guidelines to disable the mitigation in order to recover the lost performance, this is not recommended by PAL Robotics and it is done on the customer’s own risk.
On this website the different tunables for disabling mitigation controls are displayed.
These kernel flags must be applied to the GRUB_CMDLINE_LINUX in
/etc/default/grub. After changing them, update-grub must be executed,
and the computer must be rebooted.
These changes need to be made in the persistent partition, as indicated in the The robot’s filesystem section.
Be extremely careful when performing these changes, since eg typos can easily prevent the system from booting properly.
Internal DNS#
The main computer of the robot runs a DNS server that is used for the internal LAN of the
robot, with the domain name <robot>-lan. This DNS server is used by all
the computers connected to the LAN.
When a computer is added to the internal LAN (using the Ethernet connector, for
example) it can be added to the internal DNS with the command addLocalDns:
root@robot-0c:~# addLocalDns -h
   -h        shows this help
   -u DNSNAME  dns name to remove
   Example: addLocalDns -u terminal
The same command can be used to modify the IP of a name: if the dnsname exists
in the local DNS, the IP address is updated.
To remove names in the local DNS, exit the command delLocalDns:
root@robot-0c:~# delLocalDns -h
  -h          shows this help
  -u DNSNAME  dns name to remove

  Example: addLocalDns -u terminal
These additions and removals in the local DNS are not persistent between reboots.
NTP#
Since big jumps in the local time can have undesired effects on the robot applications, NTP is setup when the robot starts and before the ROS master is initiated. If no synchronization was possible, for example if the NTP servers are offline, the NTP daemon is stopped after a timeout.
To setup ntp as client, edit the /etc/ntp/.conf file and add your desired ntp
servers. You can use your own local time servers or external ones, such as
ntp.ubuntu.com. You can also try uncommenting the default servers already
present. For example, if the local time server is in 192.168.1.6, add the
following to the configuration file.
server 192.168.1.6 iburst
Restart the ntp daemon to test your servers.
systemctl restart ntp.service
Run the ntpq -p command and check that at least one of the configured
servers has a nonzero reach value and a nonzero offset value. The corrected
date can be consulted with the date command. Once the desired configuration
is working make sure to make the changes in /etc/ntp.conf persistent and reboot the robot.
If, on the contrary, you want the robot to act as the NTP server of your
network, no changes are needed. The current ntp daemon already acts as server.
You will only need to configure NTP for the clients.
To configure NTP on the rest of the clients, like the development PCs, run:
systemctl status ntp.service
If the service is active, follow the previous steps to configure the ntp
daemon. Once again a private or public NTP server can be used. If, instead the
robot is desired as server add this line to /etc/ntp.conf.
server robot-0c iburst
If the service is not found then that means ntp is not installed. Either
install it with apt-get install ntp or make use of Ubuntu’s default ntp
client called timesyncd.
To configure timesyncd simply edit the /etc/systemd/timesyncd.conf file
and set the proper NTP server.
Restart the timesyncd daemon.
systemctl restart systemd-timesyncd.service
Check the corrected date with the date command. The time update can take a
few seconds.