Using the WebGUI#
Overview#
This section explains the use ARI’s Web User Interface and its different plugins. The Web User Interface is a tool designed to simplify the configuration of the robot as well as the user experience. The Web User Interface can be accessed via browser, at the address http://ari-Xc , where X is the serial number of the robot.
Technical considerations#
At the moment the Web User Interface supports only the Chrome browser on a laptop or computer. Accessing the Web User Interface from a mobile phone or tablet, or from a different browser, will result in some of the functions not working properly or at all.
Login screen#
When accessing the Web User Interface a user and password will be requested. The default user and password is pal / pal . Once the correct user and password are introduced the user will automatically be redirected to the page he was accessing.
Sessions are not time-constrained, which means that once a user has logged in he won’t be logged out until either he closes the browser or the robot is rebooted.
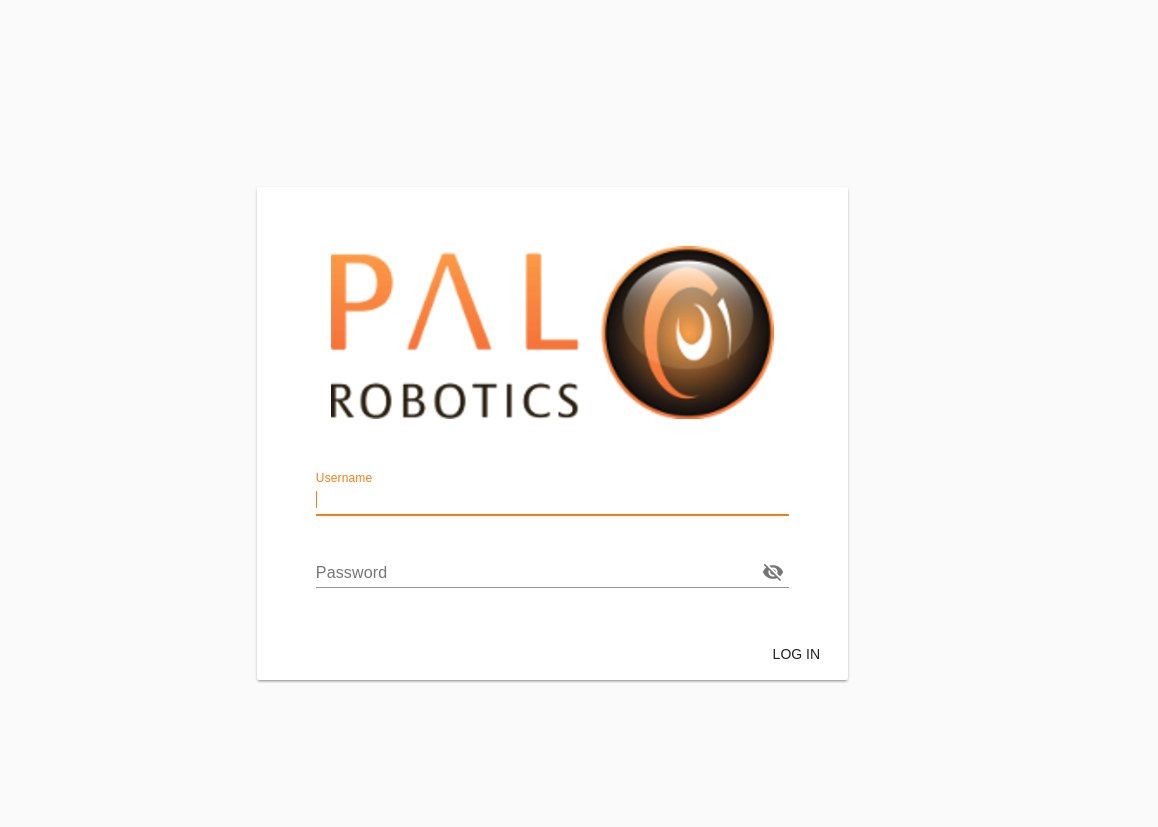
Figure: Login screen of the WebGUI.#
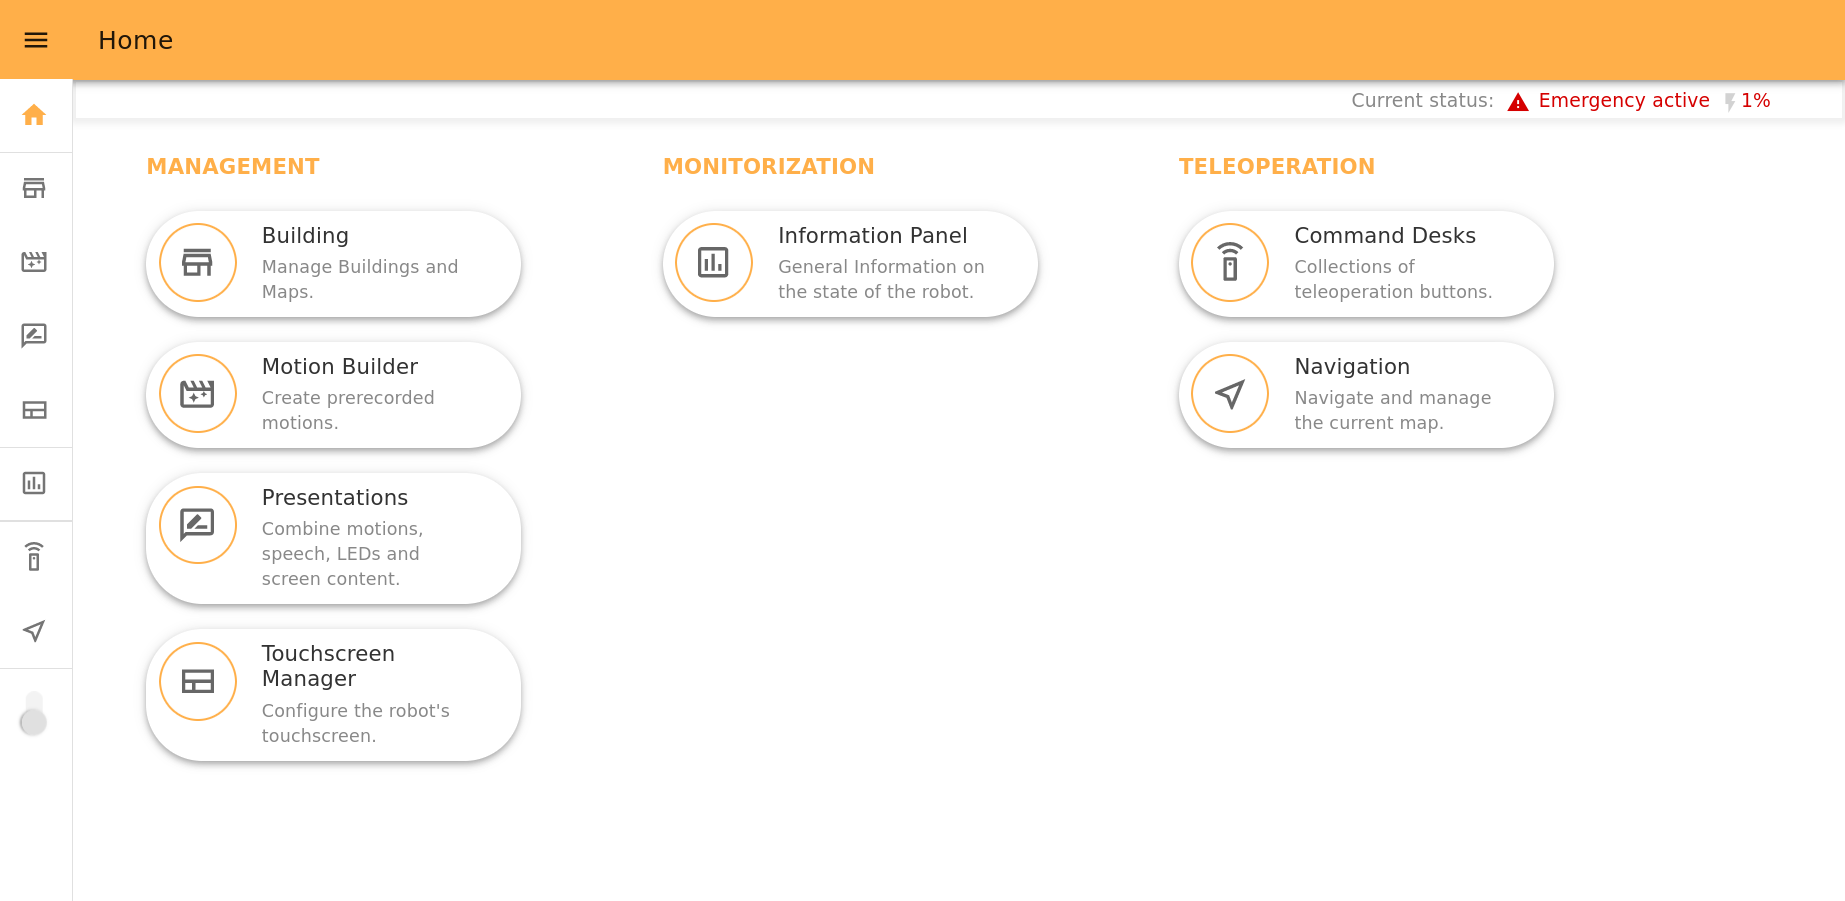
ARI Homepage#
In this page there is a grouped list of webapps with short descriptions of each of them. Clicking on any icon will redirect you to the corresponding app:
Management - to configure the robot aspects (includes Motion Builder, Touchscreen Manager, Presentations).
Monitorization - to access the robot status information (includes Information Panel).
Teleoperation - to operate the robot remotely (includes Command desks, Teleoperation).
Note
Depending on the hardware that comes with your robot, you will also have
additional apps. Mainly, if your robot comes with a lidar, then you will also
have the Navigation and Building apps for navigating purposes.
On top of the page there is a summary of the robot’s status in real-time. It indicates if the emergency button is pressed, if the robot is docked (if it’s charging now) and the level of the robot’s battery.
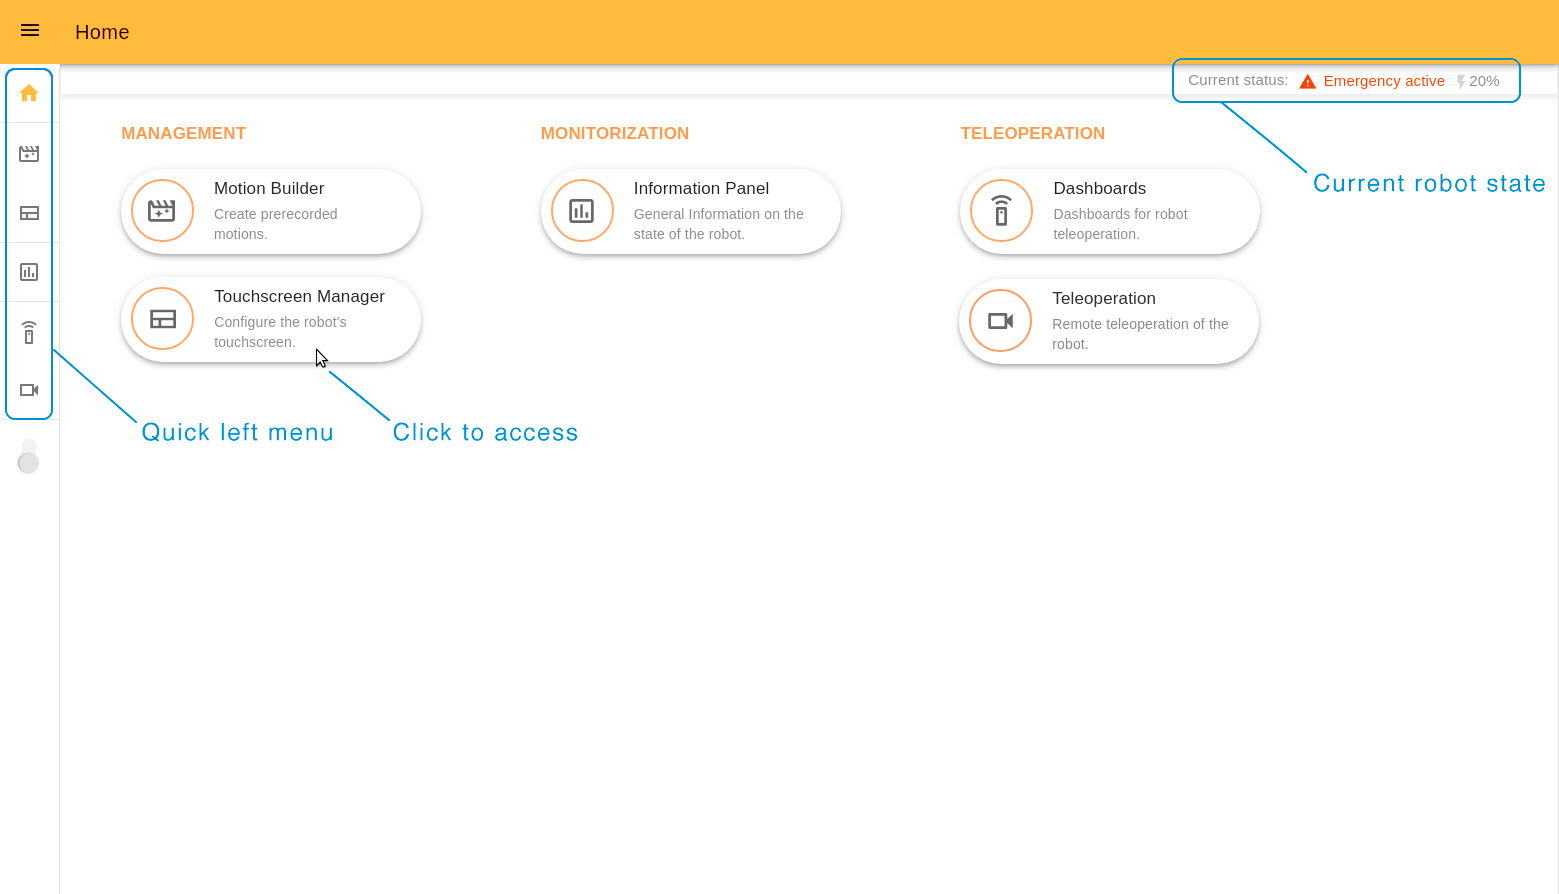
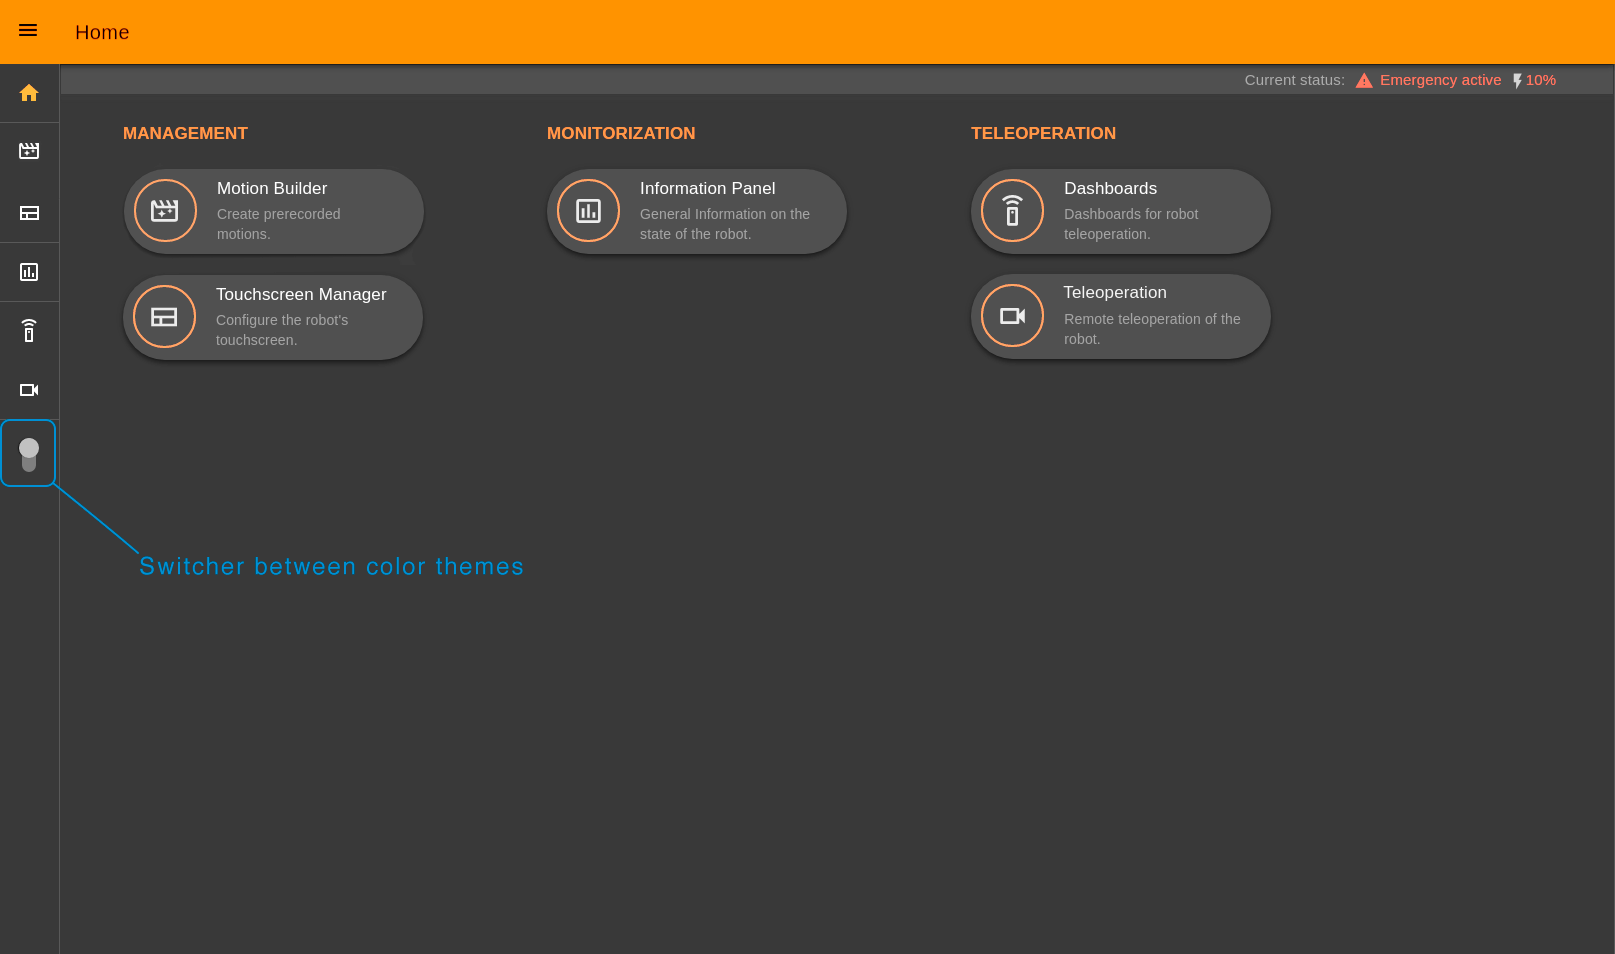
To quickly access any webapp use the menu on the left hand side. Under the menu icons there is a switcher between Light and Dark colour themes.
Information Panel#
The Information Panel serves to provide visual information on the robot’s current state.
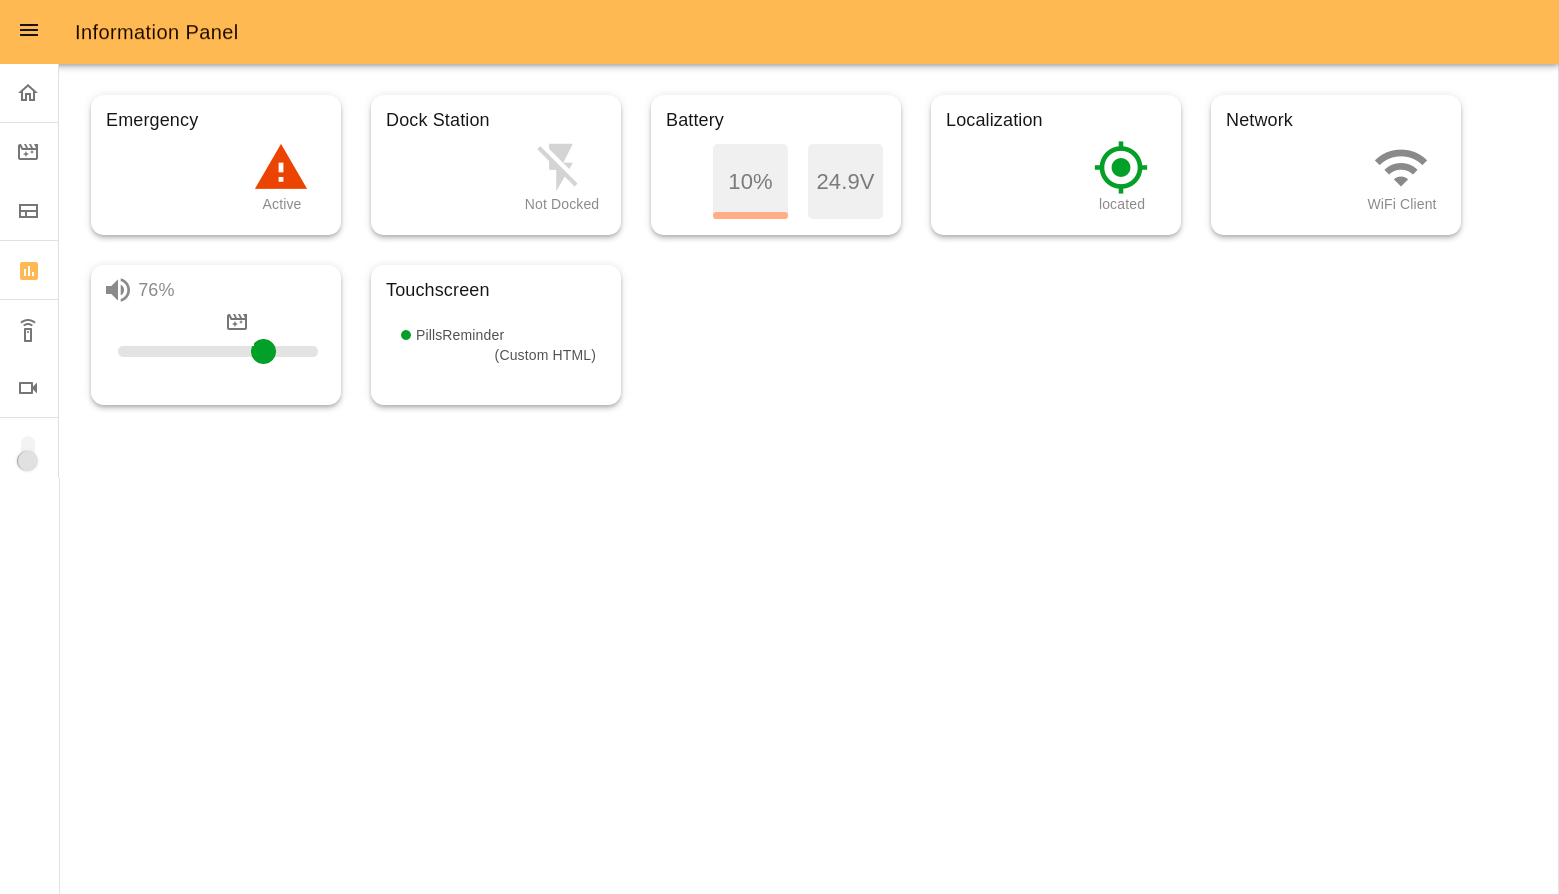
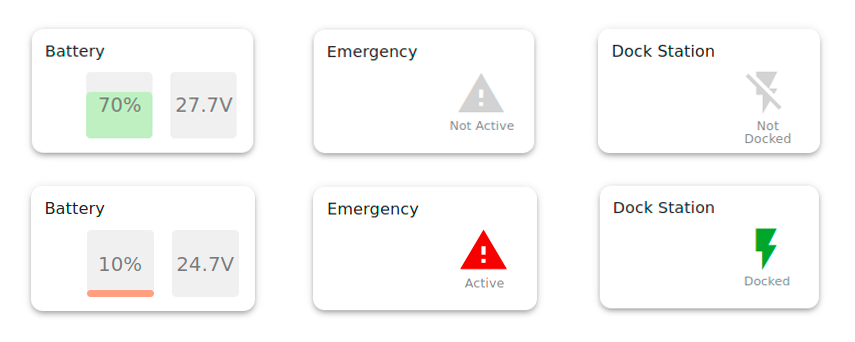
Emergency indicates the emergency button status (pressed or not). In the case of it being pressed, the icon will be red.
Dock Station indicates if the robot is connected to the dock or not.
Battery shows the current battery percentage and voltage. Yellow and red colours indicate middle and low battery levels.
Localization shows if the robot is located correctly in the navigation map.
Network indicates the currently active connection mode of the robot. Can be: Wi-fi Client or Access point.
Volume allows management of the robot’s volume and shows the current volume percentage.
Touchscreen is connected with the Touchscreen Manager webapp. Here there is the information on the page that is displayed on the touchscreen and its template.
Some examples that may be displayed:
Motion Builder#
The Motion Builder is a webapp that allows you to create prerecorded motions and execute them.
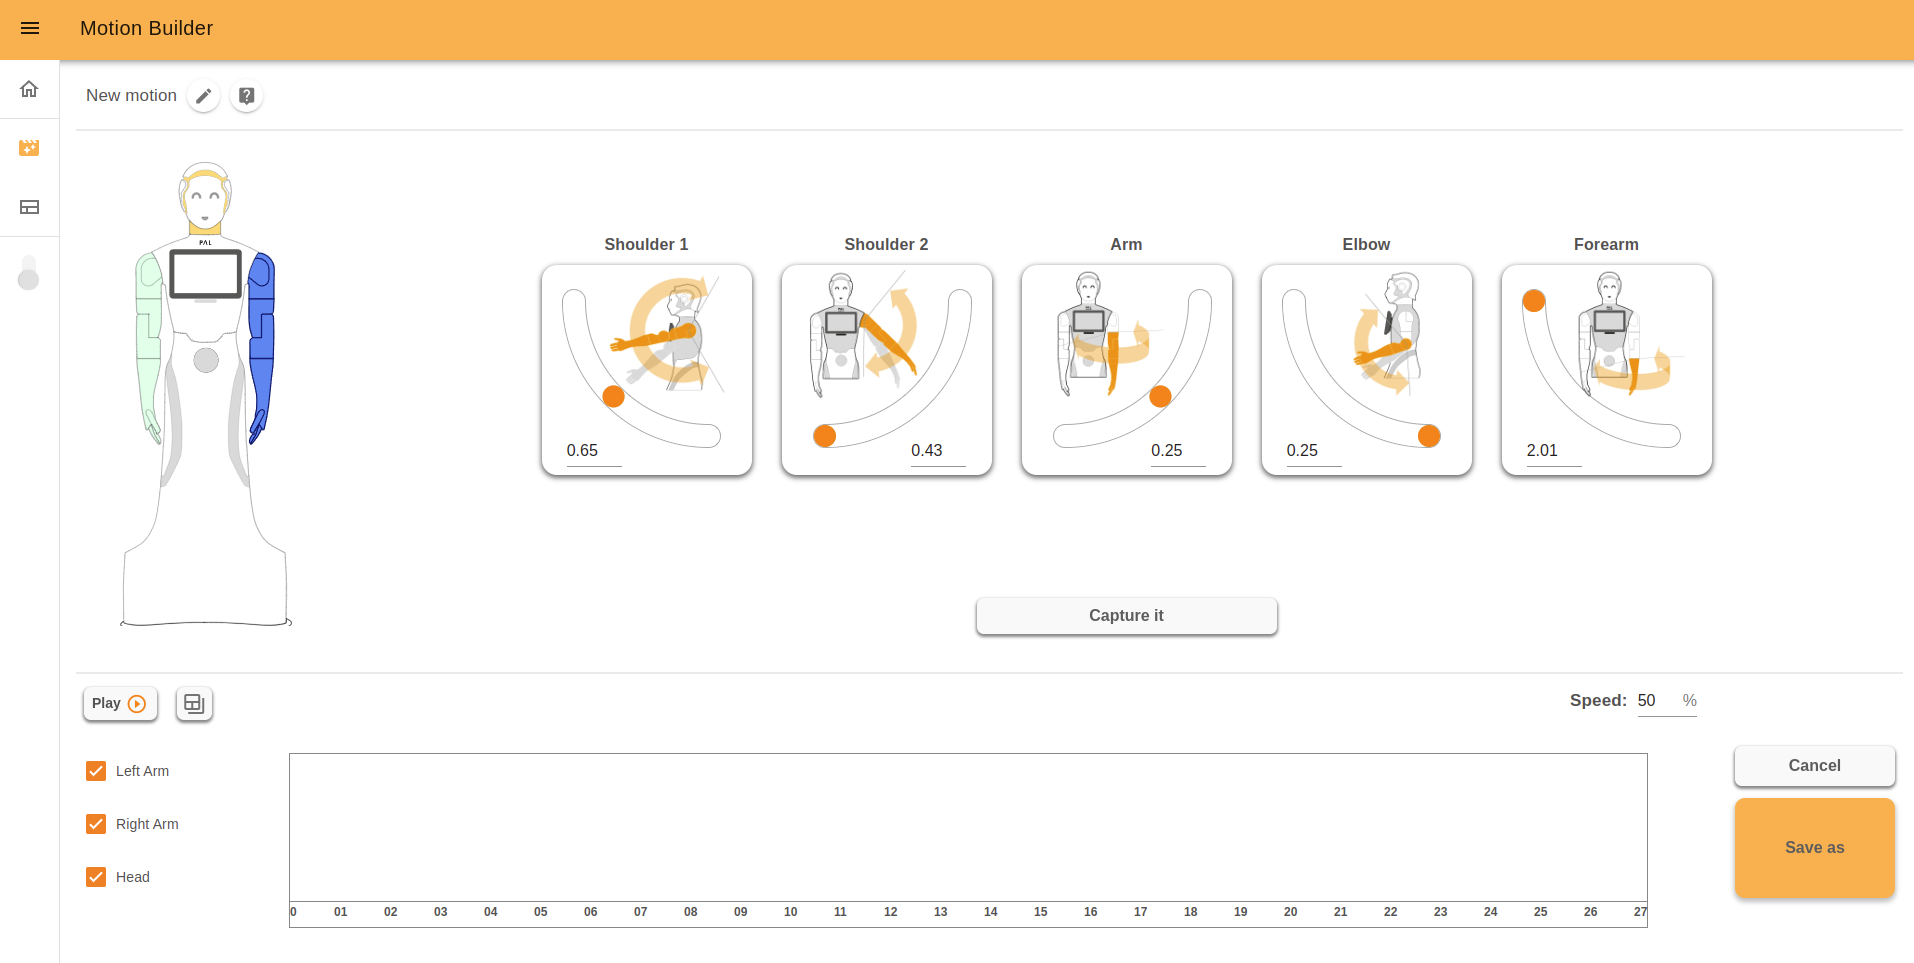
This app is documented in its own page.
Touchscreen Manager#
The Touchscreen Manager is a webapp that allows you to create web pages and publish them on the ARI’s touchscreen.
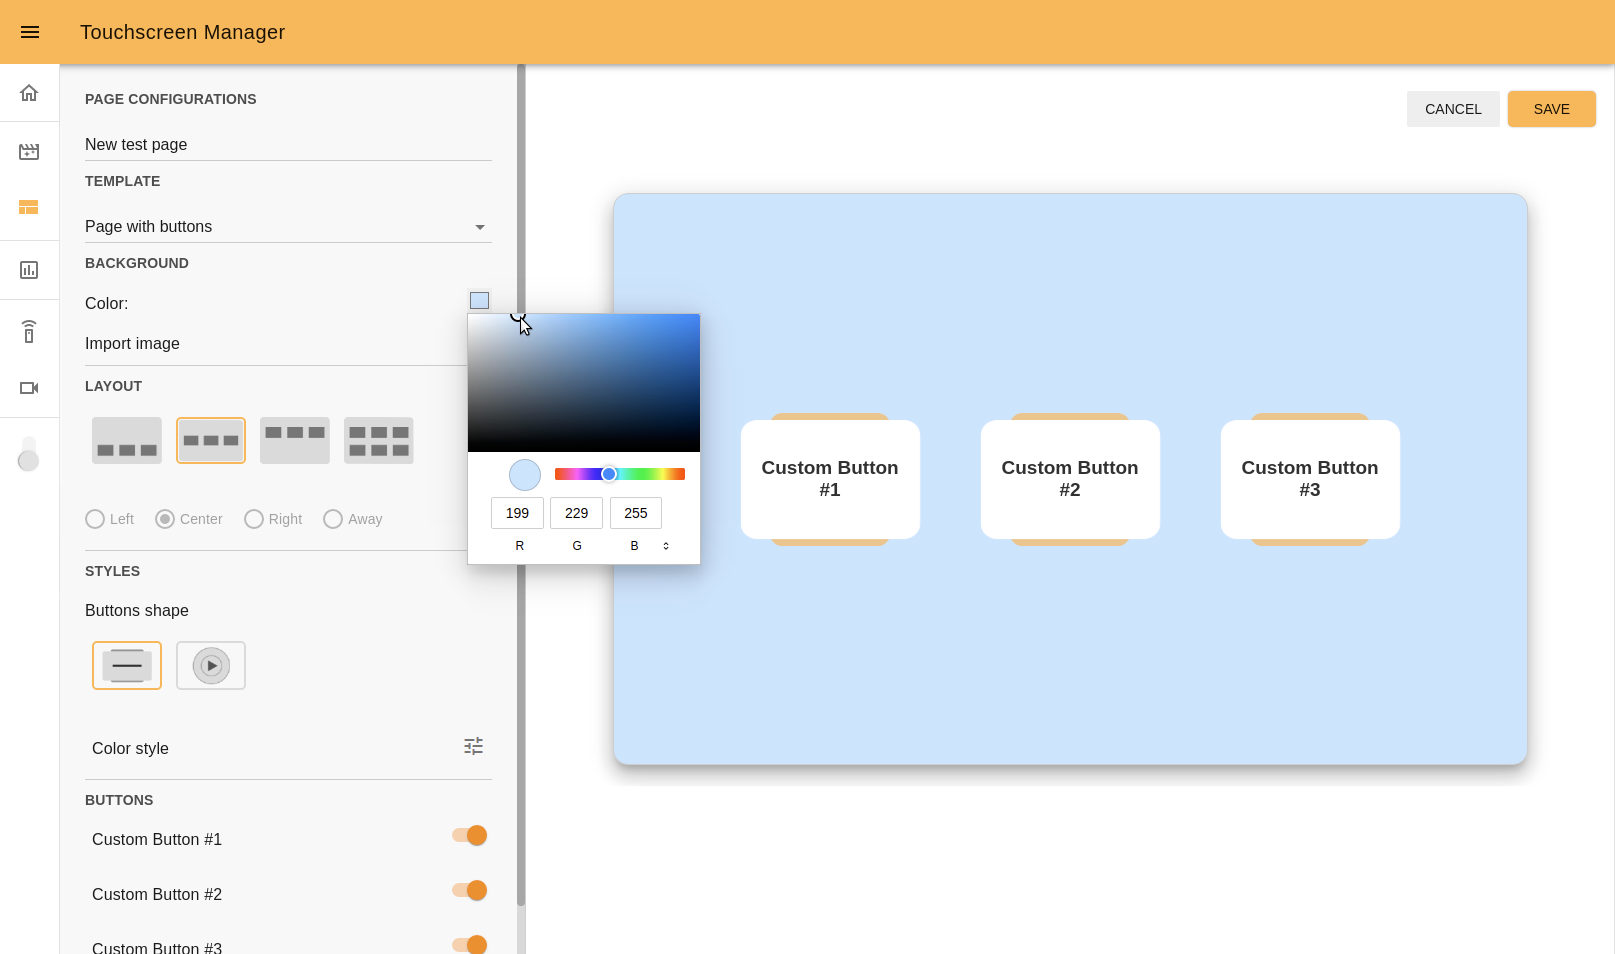
This app is documented in its own page
Presentations#
Presentations is a webapp that allows you to create pre-recorded presentations (a combination of Speech, Motions, Touchscreen content and LEDs effects) and execute them.
The features of the Presentations tool include:
Creating, Editing, Deleting presentations and presentation slides
Adding the custom text to speech in a chosen language
Adding motions (previously created in Motion Builder)
Managing the content on the touchscreen and it’s duration
Choosing and tuning the LED effects
Managing all possible combinations of presentation elements on a graphical timeline
Storing and executing the presentation
The interface of Presentations consists of a list of the presentations and a user-friendly editor, where you can create, edit and test presentations from your PC or mobile devices.
This app is documented in its own page
Command Desks#
With this app, you can teleoperate the robot, and prepare it for events or other needs, by creating Command desks with groups of buttons inside them. Then you assign actions that the robot will perform when you click any button.
To create a new command desk click on the “NEW COMMAND DESK” button at the top of the page. Near it, at the left top corner menu, you can choose a Command desk created earlier.

Create a new desk#
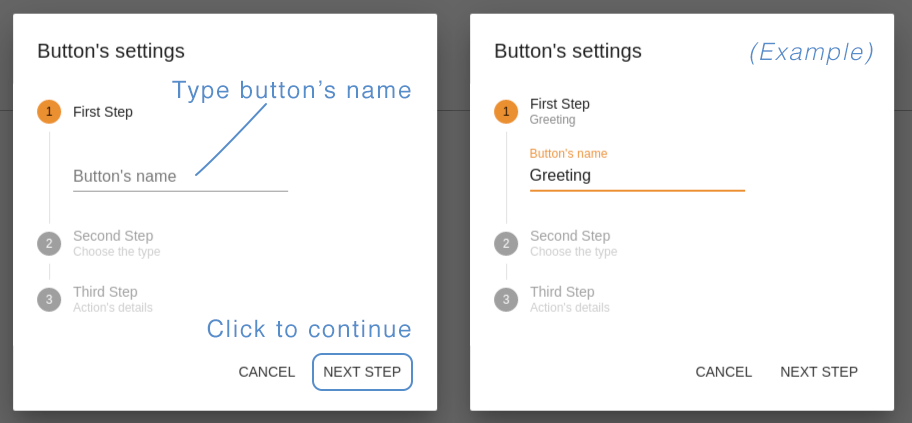
Type the name of your desk and create a first group (you must have at least one) by clicking on the “plus” icon near the “New group” title. To create a new button, click “ADD NEW”.
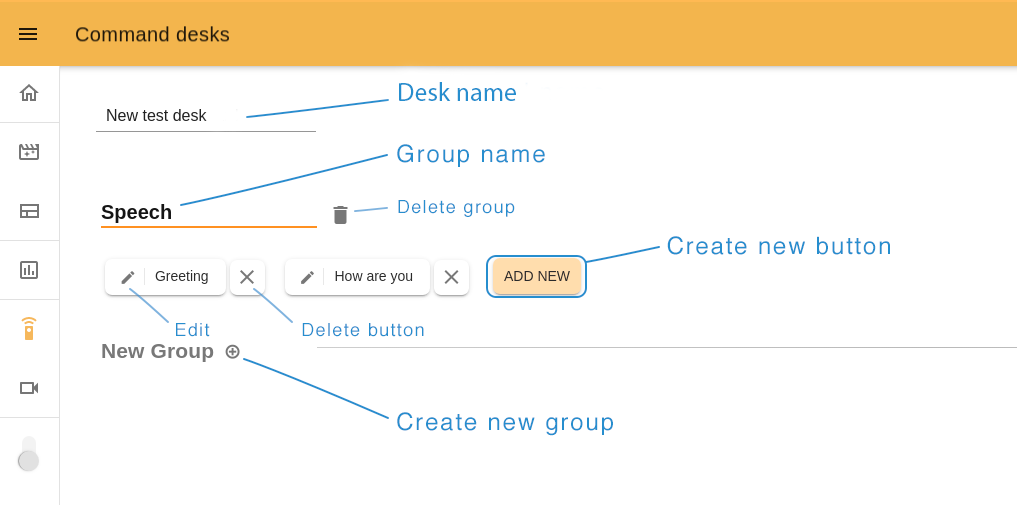
Step 1. Button’s name. Choose a name related to the action this button will perform.
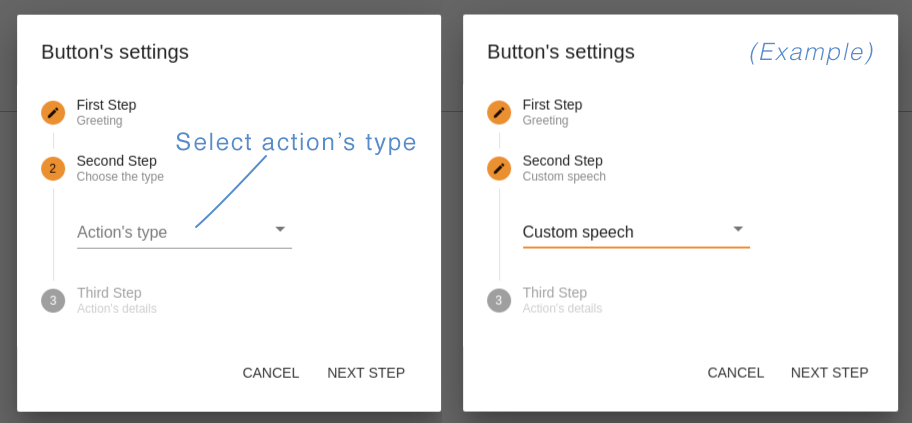
Step 2. Action’s type. You can create buttons with “Motion” type, corresponding to the blue circles, so that the robot makes a movement; or “Custom Speech type”, which is represented by an orange circle, so that the robot says the written text. In this example we chose “Custom speech”.
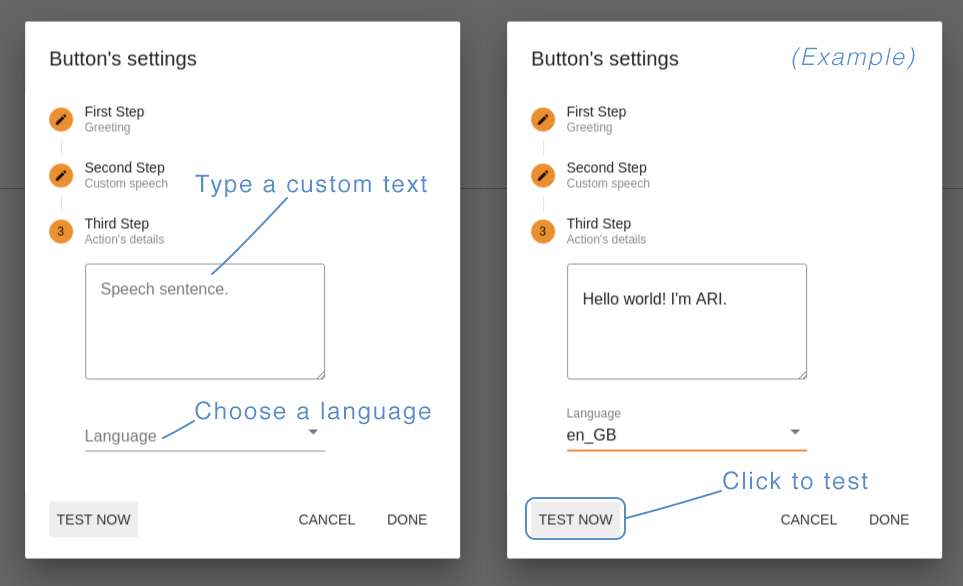
Step 3. Action’s details. Here you should define what ARI will do after clicking on this button. For “Motions” choose an option from the list, for “Custom speech” type a custom text for ARI to say, and choose the corresponding language.
The button “TEST NOW” allows you to try your button in action before saving it. If all is ok, click “DONE” to save and close the button editor.
After creating all the buttons you need, click “SAVE” at the right top of the page to exit the Edit mode and return to the Command desk page.
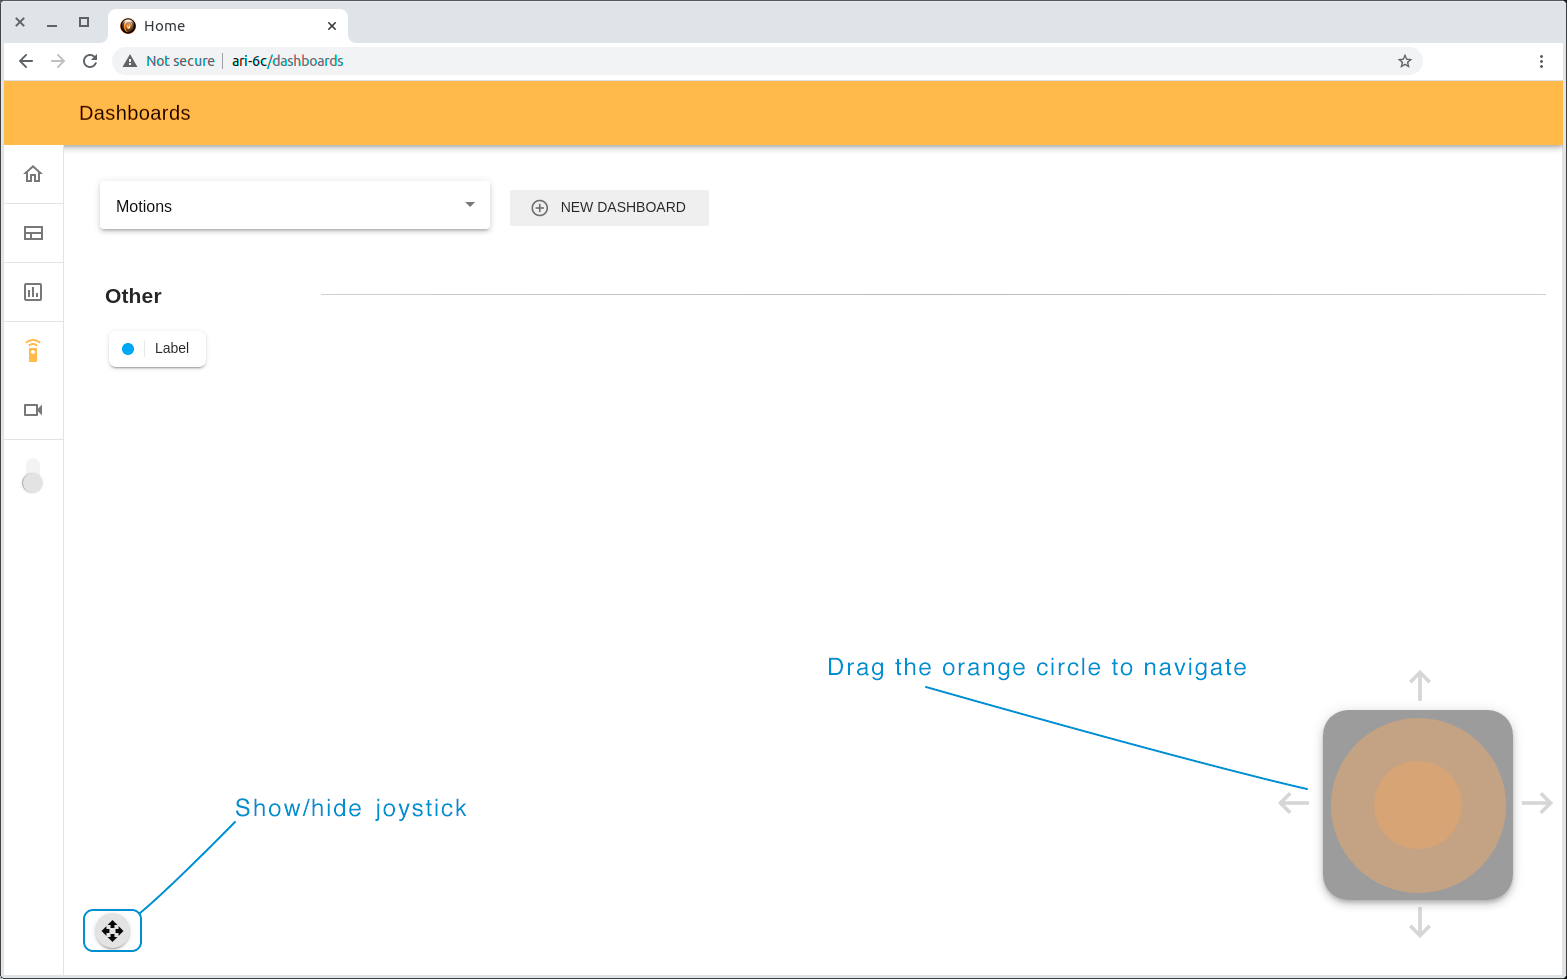
Joystick#
With this webapp you can also navigate the robot. The small joystick button at the bottom of the page opens a virtual joystick. Drag the orange circle towards the direction you wish to move the robot.
Teleoperation#
The Teleoperation webapp serves to navigate a robot remotely by using its cameras. The webapp has 2 tabs: teleoperation and exposure tuning.
The Teleoperation tab allows you to see from the head camera’s point of view. With this display you can click anywhere on the image to have ARI look at that point, or, by clicking the navigate icon at the top right and then clicking on an empty spot on the floor, have ARI navigate to this position. The two arrow buttons allow for simple rotation of the base. In this tab you also can Dock/Undock the robot (see Dock/Undock through WebGUI for further information).
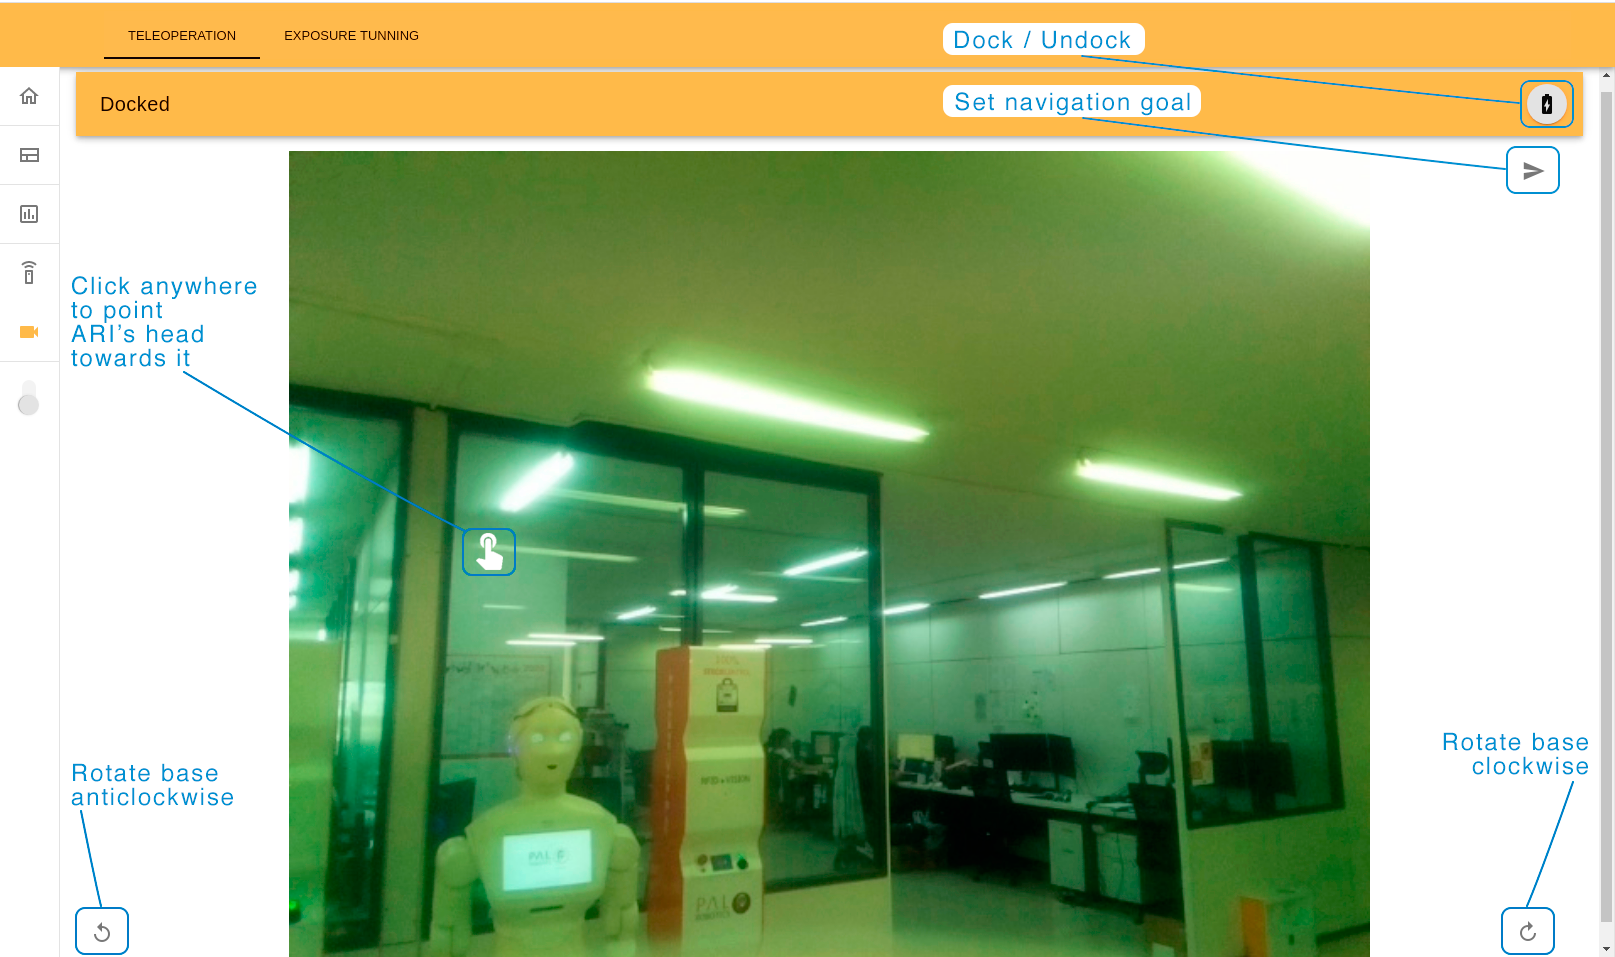
In order to be able to navigate the robot must be in an Undocked state,
displayed by this text on the top menu, which will also change colour to grey.
On the Exposure Tuning tab you can change the exposure settings on the torso front camera, which will affect obstacle avoidance. It is a good practice to do it each time the robot changes its environment. Different quantities of light, and the presence of luminescent light affect the camera image and consequently the robot’s ability to distinguish obstacles on the floor.
To calibrate the exposure, type a number or use the arrow buttons on the bottom of the page to change it. The direction of the arrows (right or left) shows if the exposure number will increase or decrease (respectively). The quantity of the arrows (one or two) means a step of the number changing (10 or 100 respectively). Use the camera image as a reference to a current state of the exposure.
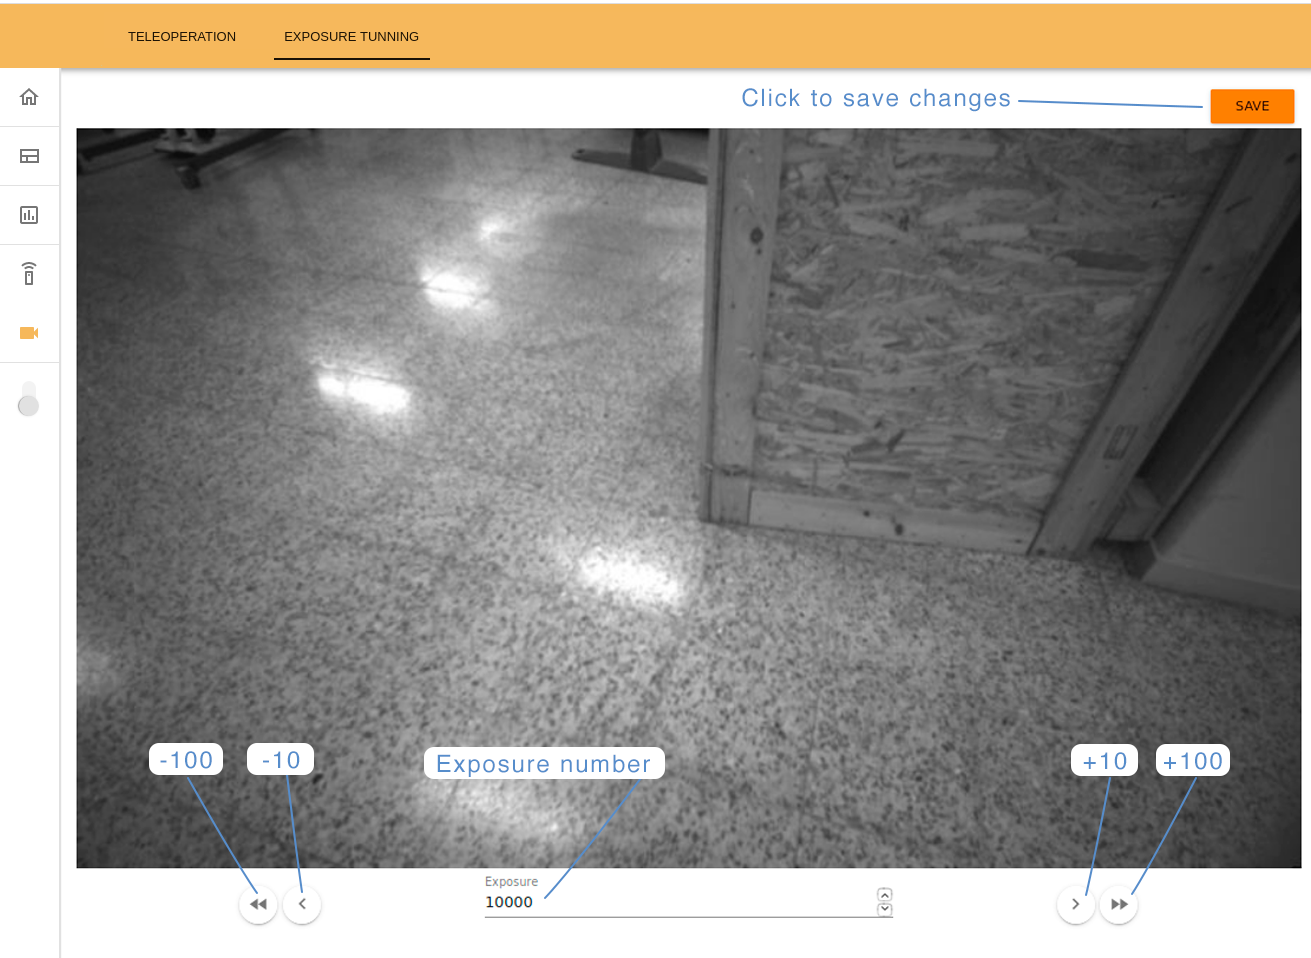
Click on the top-right SAVE button to store the current configuration.
Navigation#
The Navigation Manager is a webapp that facilitates the users setting up the navigation environment of the robot. Moreover, it also provides tools to make the robot navigate in it in a simple way.
Note
This webapp is only available if your robot has the necessary hardware to perform navigation tasks.
This app is documented in its own page.