How to flash an ISO on your robot#
Flash the ISO on an USB stick#
Once you have downloaded the ISO image, to burn it to a bootable pen-drive there are two ways to do so:
Gnome Disk (recommended)
usb-creator-gtk
Note
You will need a USB stick with at least 8GB of space.
Caution
This will erase all data on the USB stick!
Gnome Disk#
Step 1#
Execute the following command in the terminal:
gnome-disks
Step 2#
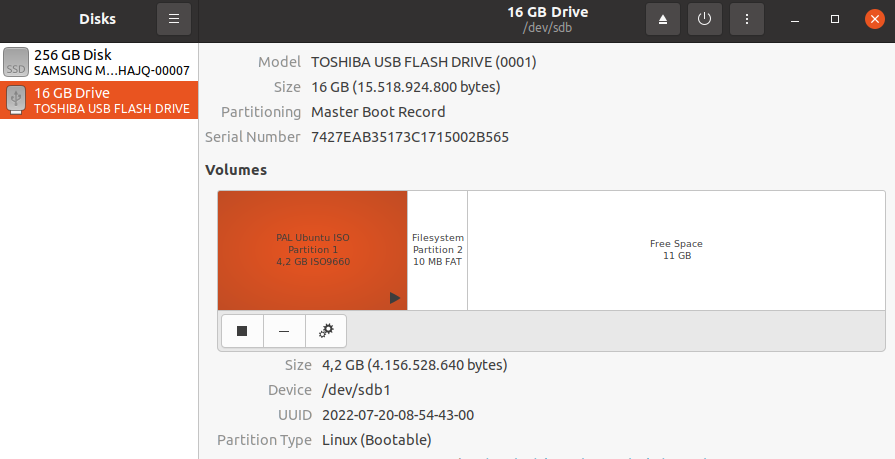
Plug in the USB drive and select the correct option on the left hand column:
Step 3#
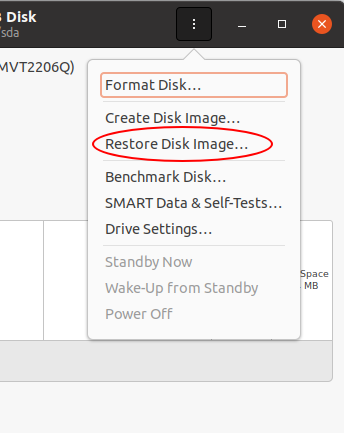
Select the option shown below of the three dots on the upper right corner of the window and click on Restore Disk Image:
Step 4#
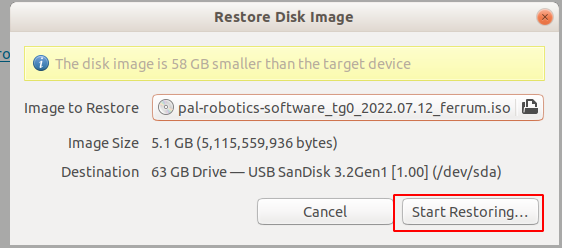
Select the provided PAL ISO as Image to Restore and click on Start Restoring. Once this process has finished, you may unplug the USB from your computer.
usb-creator-gtk#
Step 1#
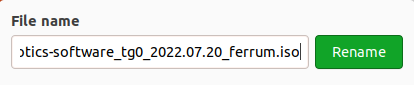
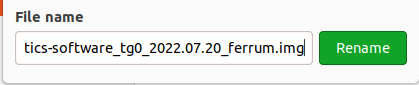
Due to this bug, we must
change the extension of the ISO from .iso to .img by renaming the file:
to:
Step 2#
Execute the following command in the terminal:
usb-creator-gtk
Step 3#
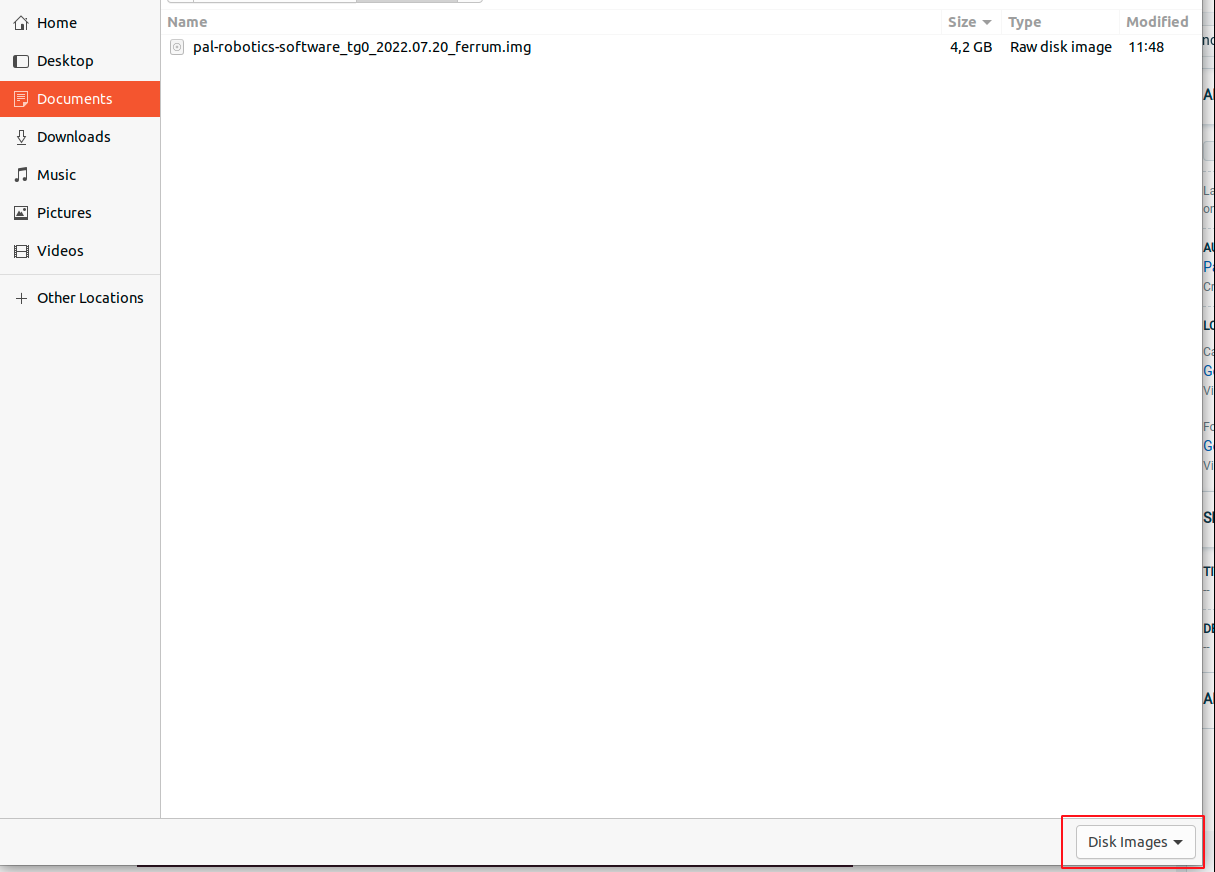
Go to the location where your ISO is saved and change the option on the bottom right corner from CD Images to Disk Images, that way your ISO will appear. Select it.
Step 4#
Select the ISO and the USB device desired and press Erase Disk if the option is available. After that, press Make Startup Disk to start burning the ISO. Once this process has finished, you may unplug the USB from your computer.

Install the ISO on the robot#
Finally, to install the ISO on the robot:
Step 1#
Turn off the robot; open the back panel (on ARI); insert the USB stick in any free USB port, as well as a regular USK keyboard.
Step 2#
Turn on the robot, and press the F11 key to access to the boot menu. Select the USB stick and press Enter to start the installation.
The installer will ask for a language; choose your prefered language for the robot’s Linux system, it will not impact the language supported by the robot when interacting.
Once the installation process is complete, the robot will reboot. You can then remove the USB stick and keyboard.