Presentations#
Homepage Interface#
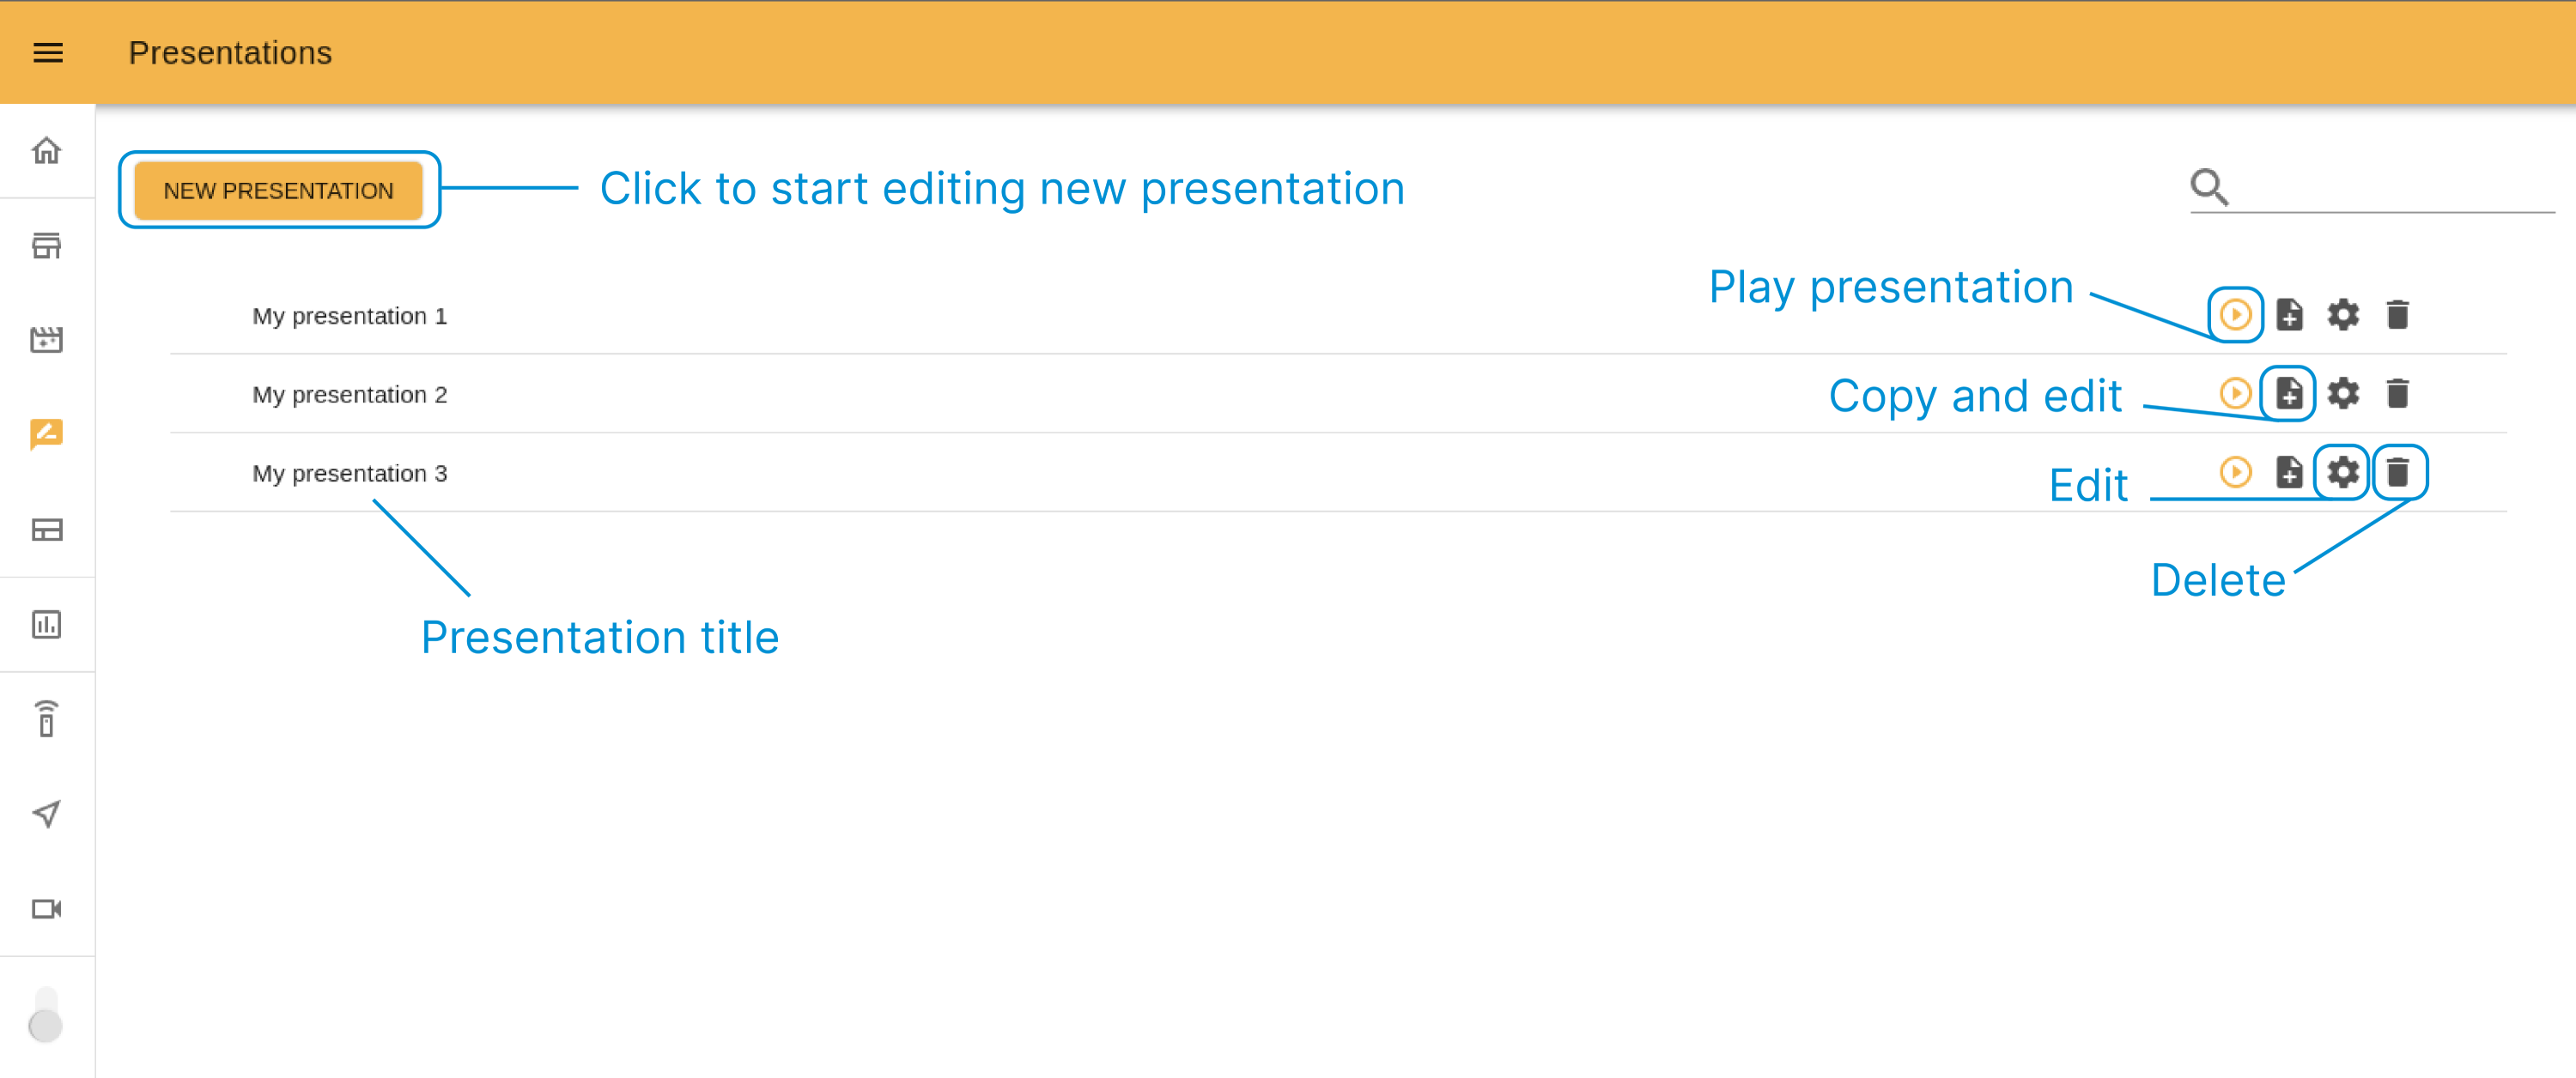
The start page of Presentations serves not only to display the list of stored
presentations but also to manage them. From here you can execute any
presentation, edit or delete it. To quickly search it is useful to use the
search by title bar.
To open the Presentations Editor click on the Create new presentation
button or Edit icon of an existing presentation.
Editor interface#
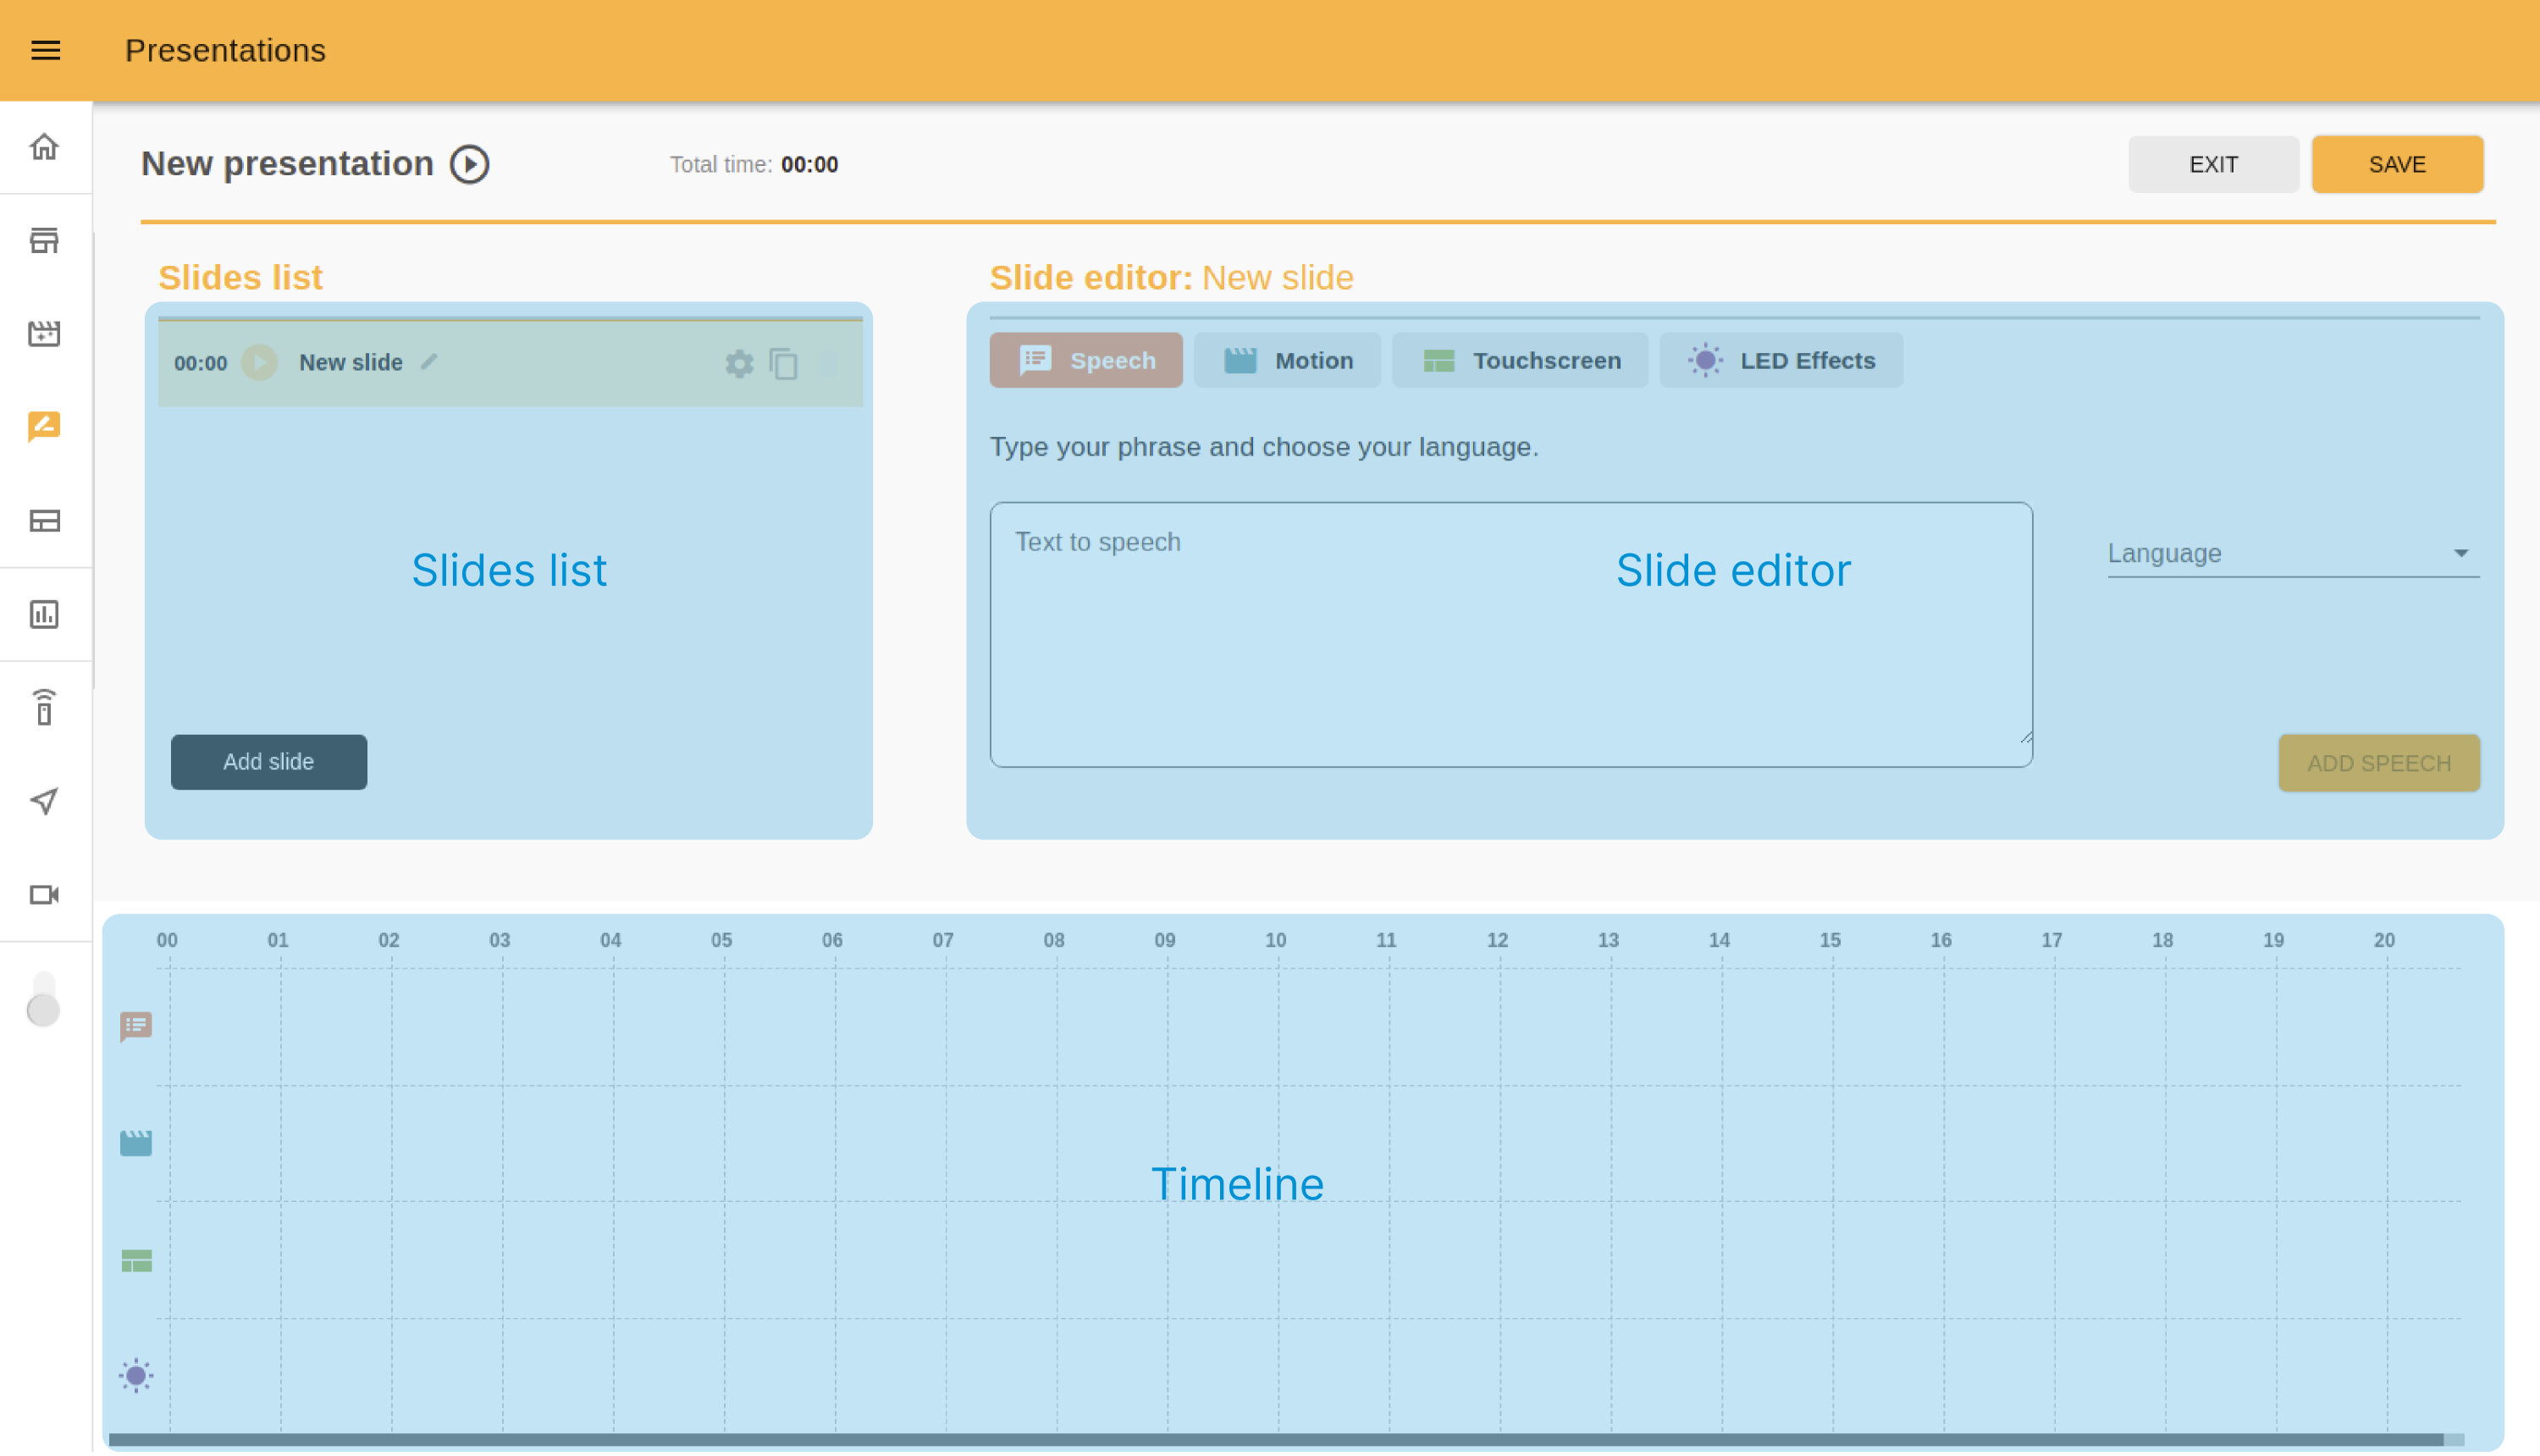
Let’s see what the interface Presentations has and how to interact with it.
In the picture below you can see the main sections of the editor: slides list,
slide editor and timeline.
Presentation name#
On the left top of the page you can see the current presentation name with the Play presentation icon.
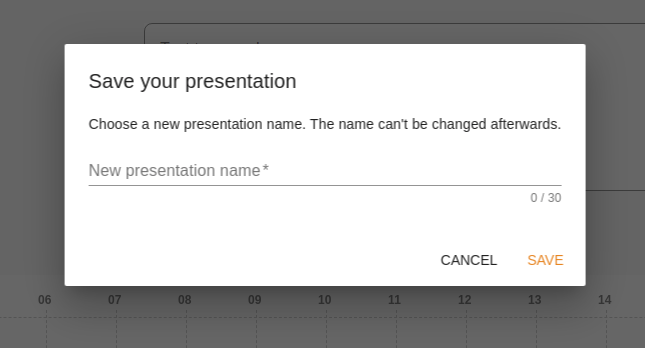
In case you are editing the new presentation after clicking the Save button you will see the popup with text input to set the presentation title. This step must be performed only once.
Caution
The existing presentation cannot be renamed afterwards.
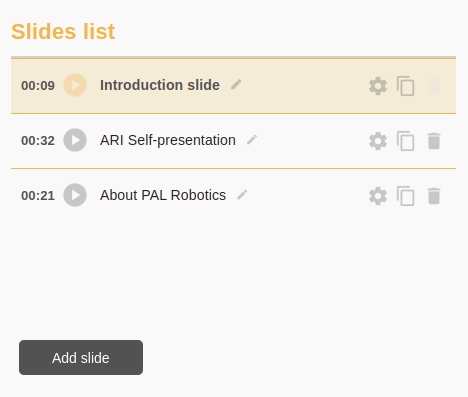
Slides list#
It is good practice to divide your presentation into slides base on the use case logic. In the slide list you can manage slides, add new ones, rename slides, delete, edit or play slides separately.
The slide you are currently editing will have a different color style.
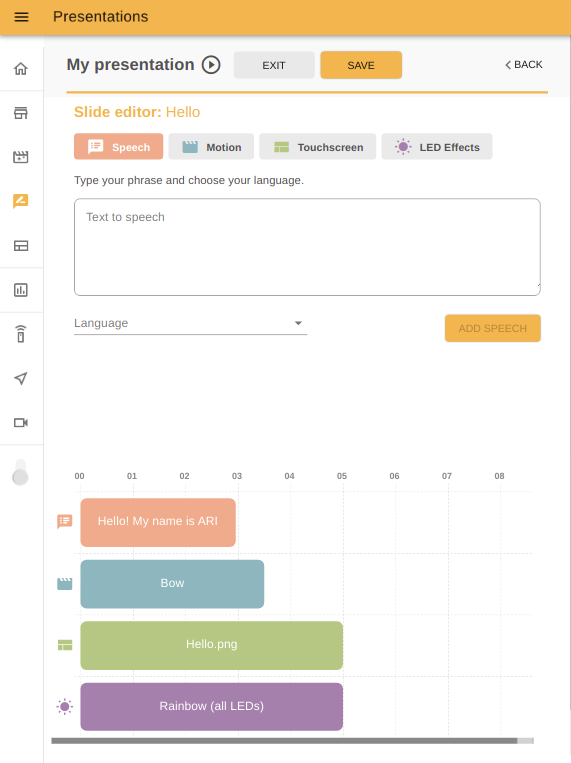
Slide editor#
In this panel you can edit the elements you want to include in your presentation. There are four tabs: speech, motion, touchscreen and LED’s effects. Let’s see how we can use them.
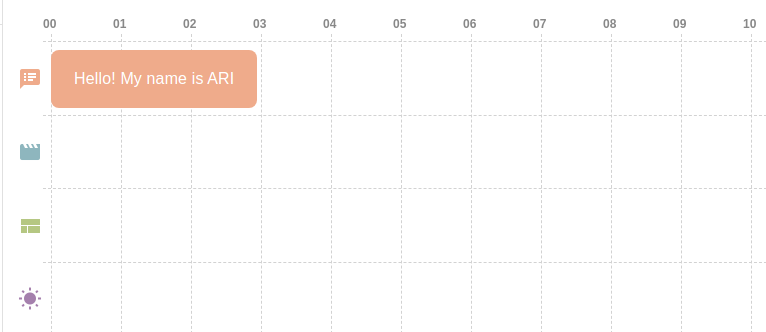
1. Speech: To add text to speech, choose the Speech tab, input the desired phrase on the text input, choose the corresponding language and press on the ADD button.
A new block with the same color as the Speech tab will appear on the timeline. The duration of each text block is computed by the robot so you can not modifythe speed of ARI’s speech. However you can divide your text into short phrases or separated words, if you need, and add them to the presentation one by one.
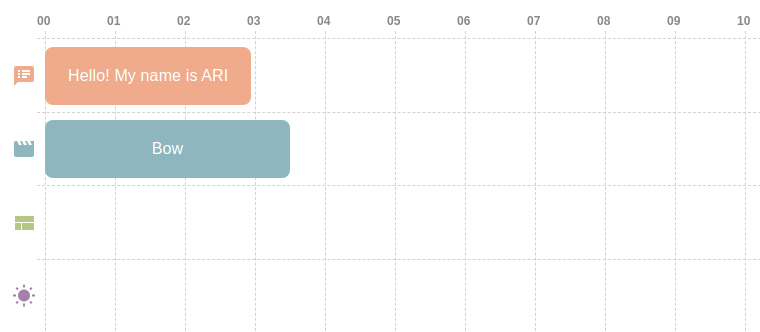
2. Motion: To add a motion to your presentation go to the Motion tab, choose the motion you want to include from the list and press on the ADD button.
A new block with the Motion tab color will appear on the second row of the timeline below. The duration of motions and other settings should be edited in the Motion Builder app.
3. Touchscreen: The Touchscreen tab allows you to manage the content of the touchscreen of your robot. There are two options to set such content:
Uploading an image, or
Displaying a pre-created page from the Touchscreen Manager app.
Once you have loaded the content, you can assign the time (in seconds) you want to display your content on the touchscreen.

After saving changes, the new block will appear on the third row of the timeline.
Note
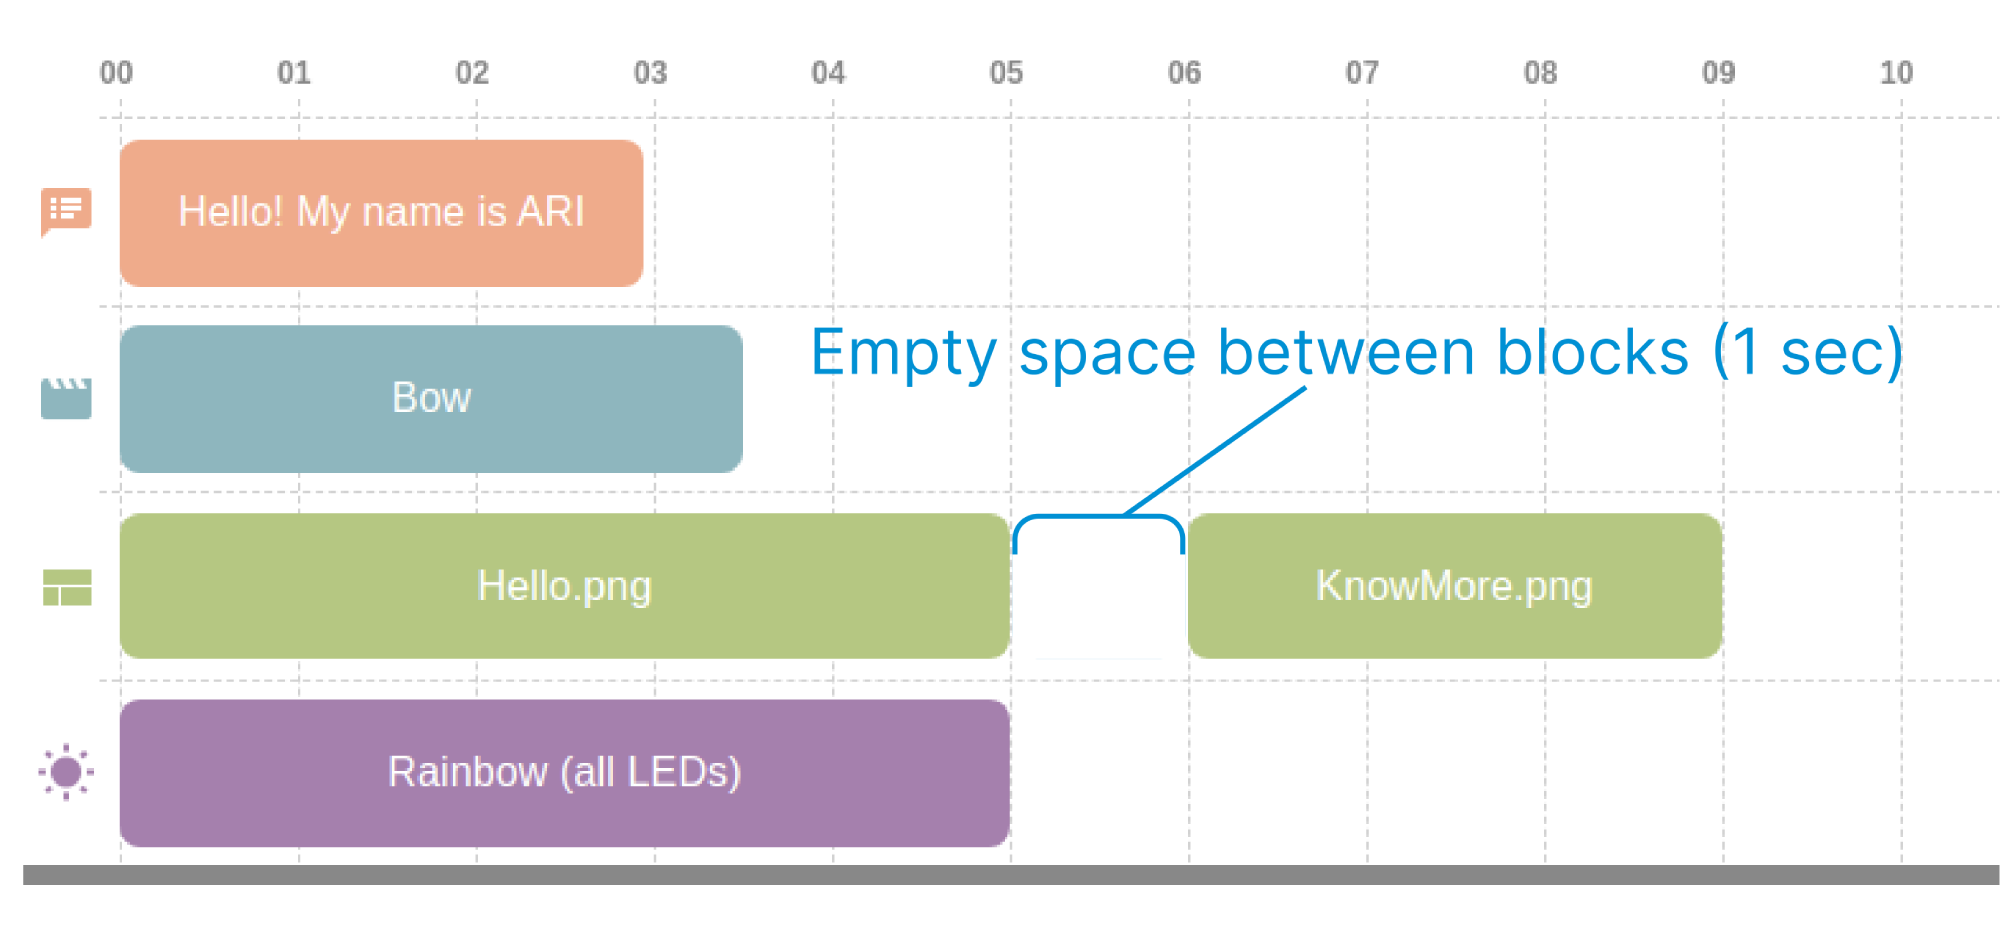
Check the timings between the images or pages you have included in the
timeline. Empty spaces between the blocks means that there will be some
seconds without any touchscreen content assigned. In such cases,
ARI’s screen will display the active page indicated in the
Touchscreen Manager app by default when the presentation is being
played.
4. LEDs: To manage the LED’s effects use the last tab. First choose the robot devices where you want to play the effect. Next, choose the effect you want to display. Different options will be available depending on the chosen effect.
Tune the timing for the effect by setting the duration in seconds. You can use the quick-options buttons to set 3, 5 seconds duration in one click. Finally, save your changes.
You will see the new block in the last row of the general timeline.
Timeline#
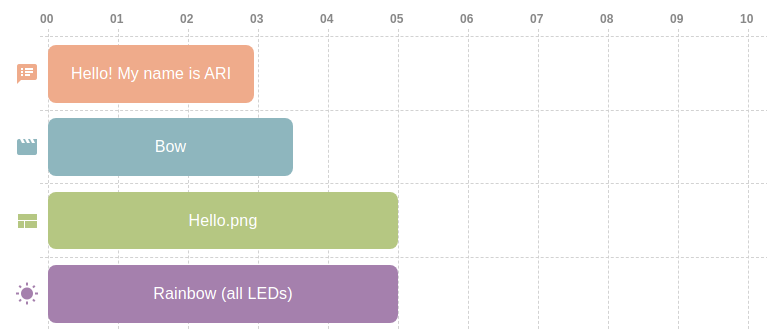
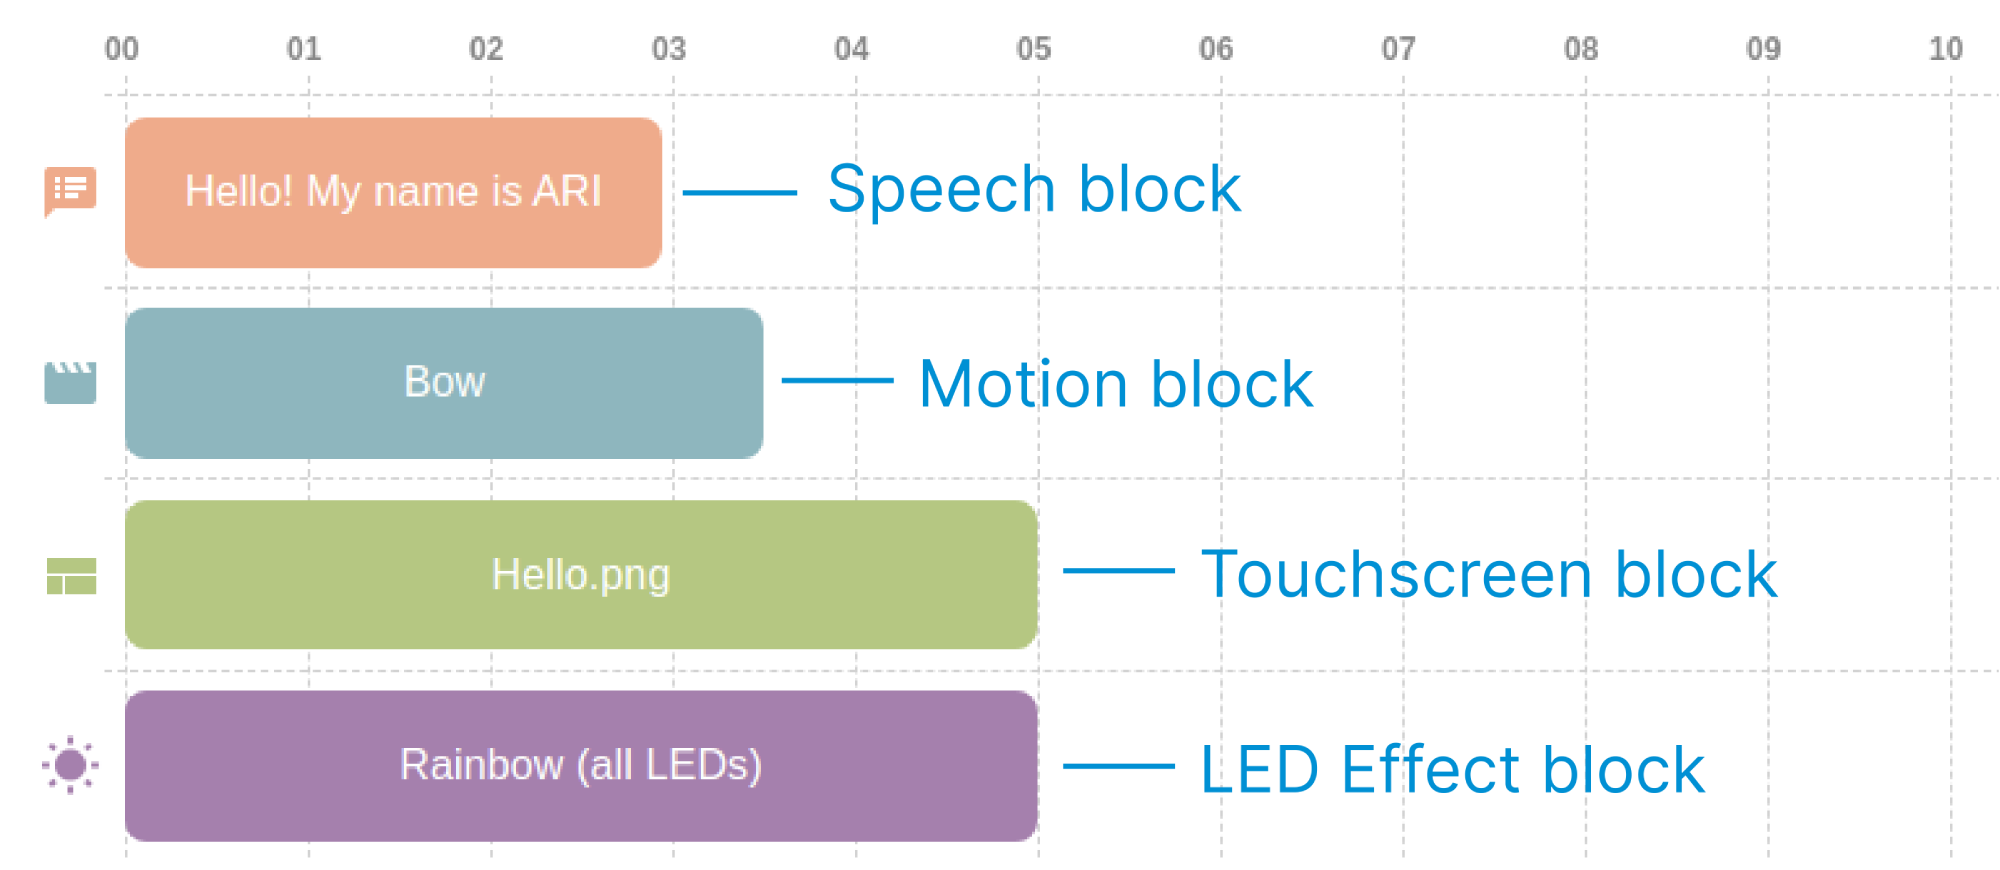
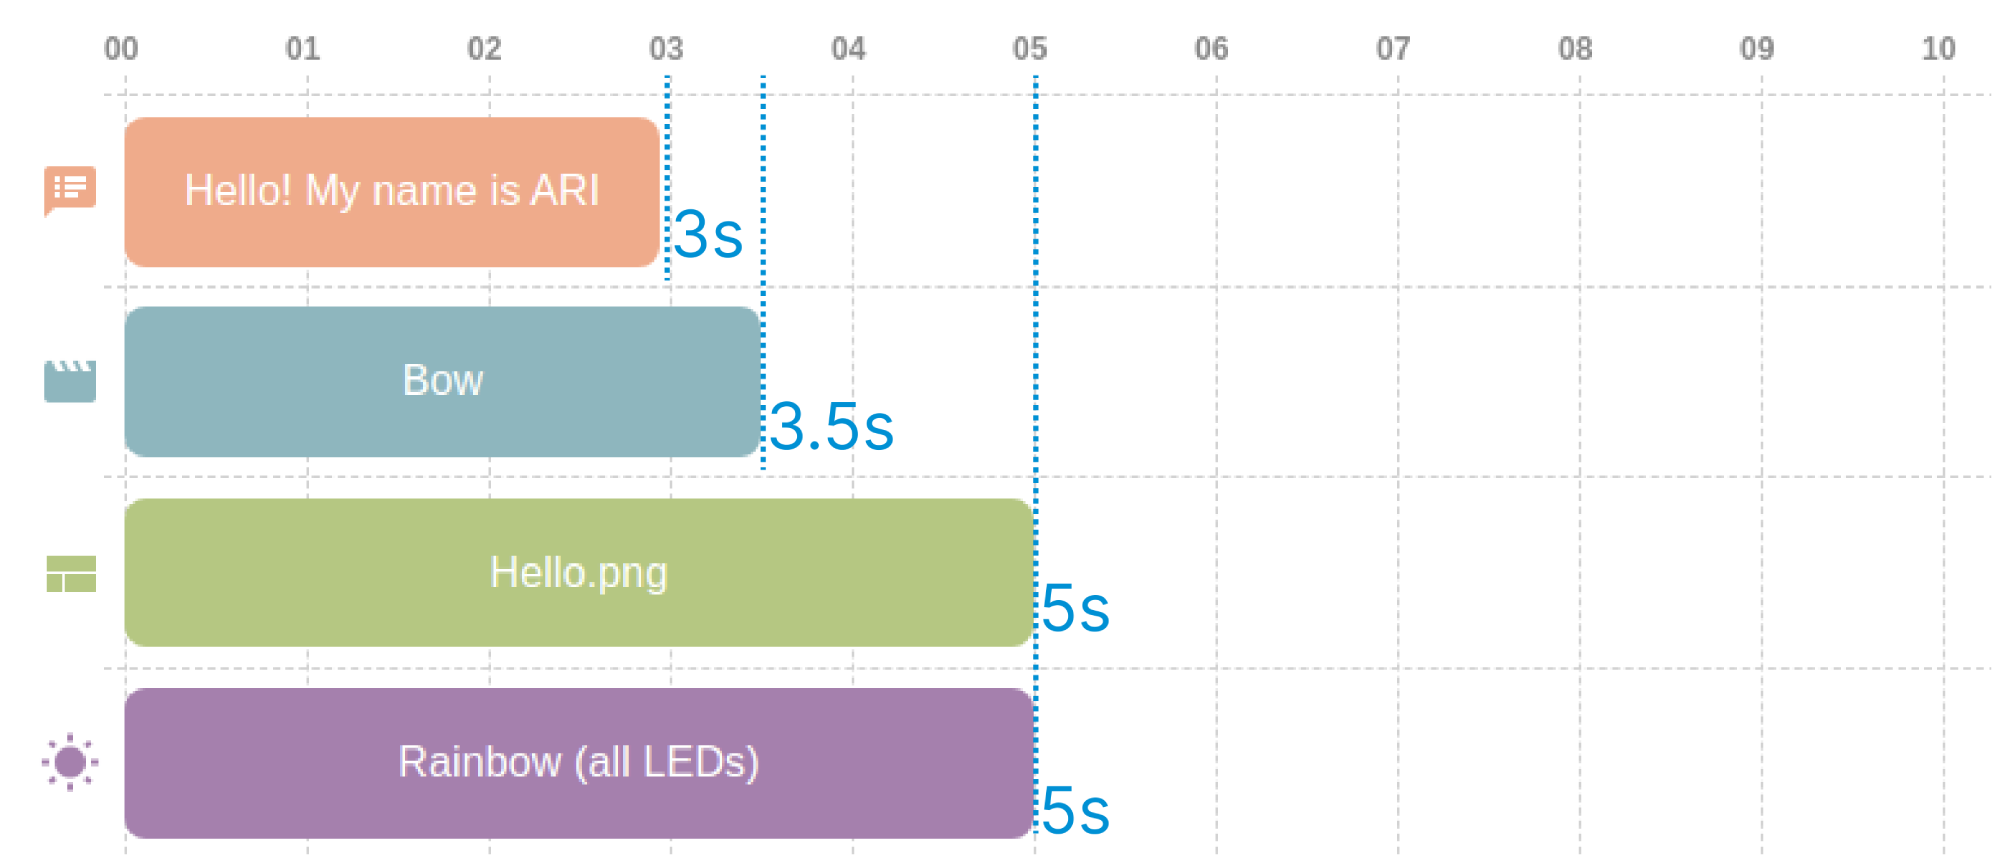
After adding a new element to the presentation, it will graphically appear on the timeline as a colored block. The colors match with the color of the slide editor tabs. For example, pink for the speech blocks, blue for the motions, etc.
Each presentation element has its own row on the timeline, i.e. in the first row only pink speech blocks will appear; in the second row, only motions; in the third row, only touchscreen blocks; and in the forth row, only LED’s effects.
The width of each block corresponds to its duration in seconds. These are shown on the timeline as vertical lines.
You can drag the blocks using the cursor or touching it (if you are using a
tablet device) and decide the position of each one on the timeline. This way you
can make some actions start at the same time (for example, say the Hello
word and make a Waving motion) and create a time pause between blocks.
You can select one block by clicking on it (it will change color to indicate the selected one). You will see the settings of the selected block on the slide editor tab, which will open automatically. You can edit it there and save the changes.
You can also copy the selected block as the next, the last one or delete it by using the small icons that appear on the top of the block when you select them.
To deselect the block, click on it again or click on any empty space close to it.
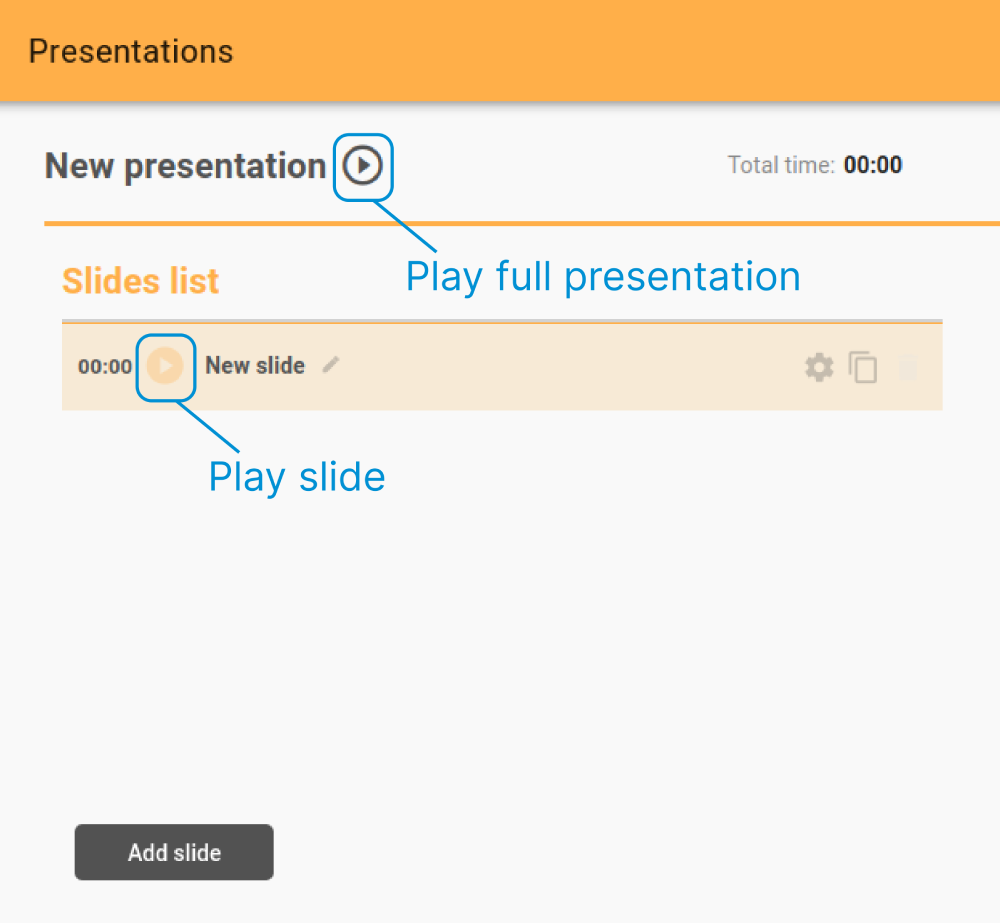
Playing the presentation#
Since the presentation consists of the slides, firstly you have the option to play each slide individually while you edit the presentation. To do so, press on the Play icon close to the chosen slide title.
You can obviously play the whole presentation. To do so from the Editor, press the Play button on the left top of the page, close to the presentation’s name.
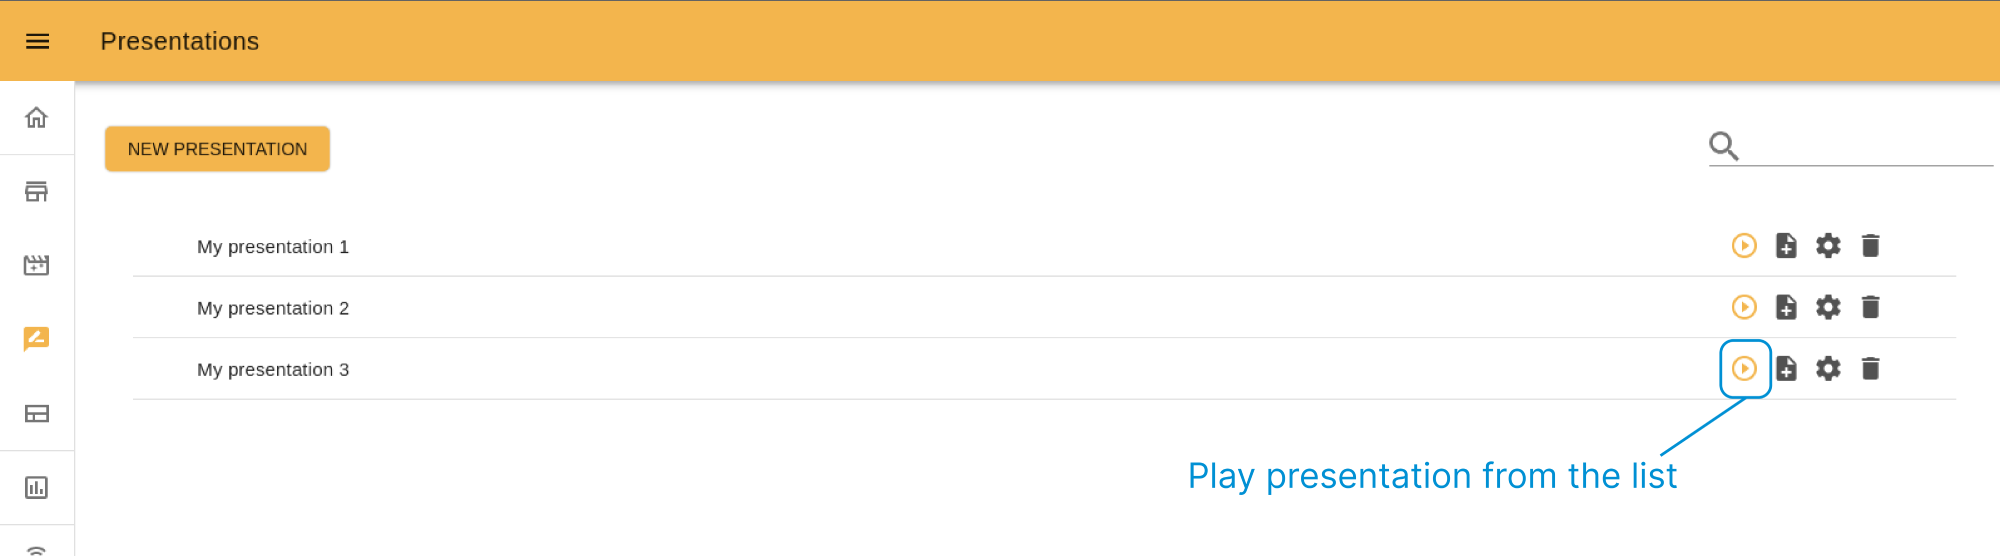
If you want to play the whole presentation from the start page, press the Play icon of the presentation from the list.
You can also play your presentation from the Command Desks
app or, from the Touchscreen Manager app. In the latter
case, you can create a Page with buttons or
Slideshow page and assign a presentation you created
through the Presentations app to a button on the screen. When a user presses
this button, ARI will execute the presentation.
Saving the presentation#
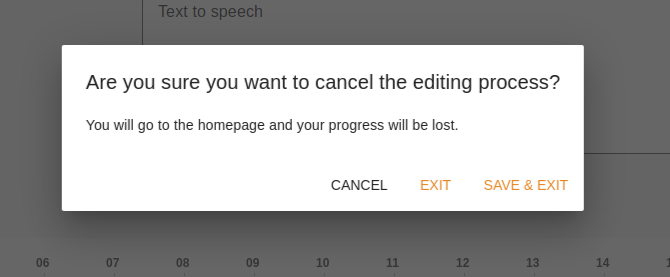
There are two buttons at the top right of the editor: Exit and Save.

If you press on the Exit button you will see the popup with two options:
Exit, exiting without saving changes, and
Exit and Save, to do both actions.
If you press the Save button, you can save the current progress without leaving the editor.
When you save a new presentation for the first time, the editor will ask you to introduce a name for your presentation.
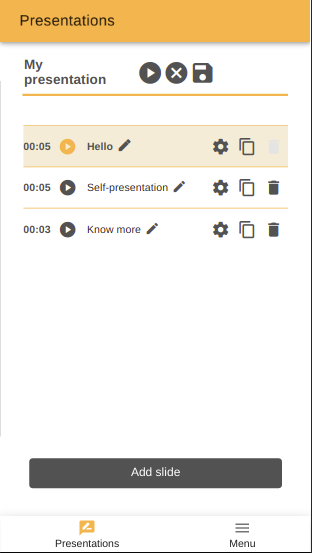
Mobile version#
You can create/edit presentations from your mobile or tablet device. The interface for the different screens might be slightly different depending on the device:
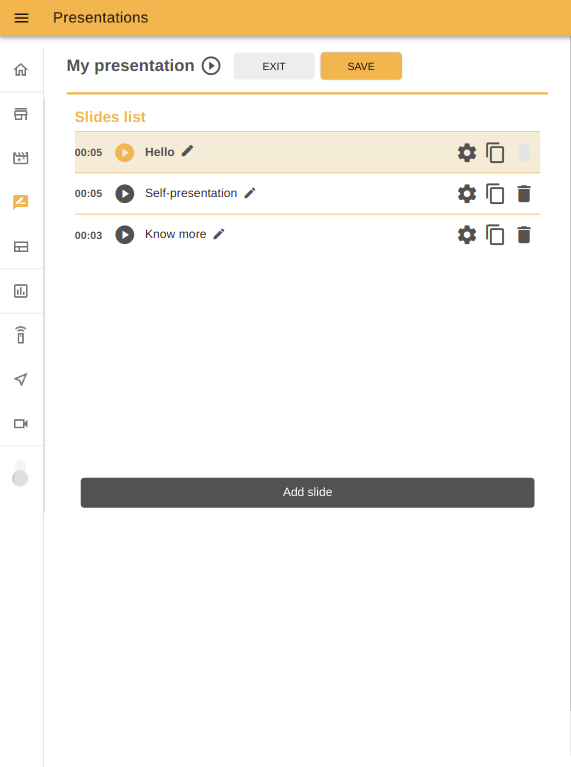
On tablets: when you open the
Presentations Editor, you will first see the list of slides. You can play, edit slide name, copy or delete slides from there. To edit the slide content press on the Settings icon and you will see the slide editor and timeline. To go back to the slides list, press click the Back button on the top right.
|
|
On mobiles: the slides list has the same interface as for the tablets. To access the slide
Editorpress the icon of the element you want to edit at the bottom of the screen. In case you want to edit a block on the timeline, select it first and press on the corresponding slide editor icon.
|
|