WebGUI Navigation Manager#
The Navigation Manager app facilitates the users setting up the navigation
environment of the robot, and provides tools to make the robot navigate in it in
a simple way.
It is composed of two different tabs:
Navigate, which allows interaction with the current navigation stack
Edit map, which allows configuration of the map and its objects.
Throughout this chapter the following terms will be used:
Point of Interest (POI): A pose (position and orientation) in the map, identified by a name.
Point of Direction (POD): An orientation with respect to the map, identified by a name.
POI List: An ordered list of POIs and PODs.
Zone of Interest (ZOI): An area in the map identified by a name.
Ramps (RA): An area on the map which contains a ramp (change in ground level).
Virtual Obstacle (VO): An area in the map marked as an obstacle for the robot, to prevent the robot from navigating in said area.
Draw on map: Online editor that allows updating the map through drawing polygons and polylines directly in the map canvas.
Navigate#
The Navigate tab contains all the required tools to properly navigate the robot in its current environment.
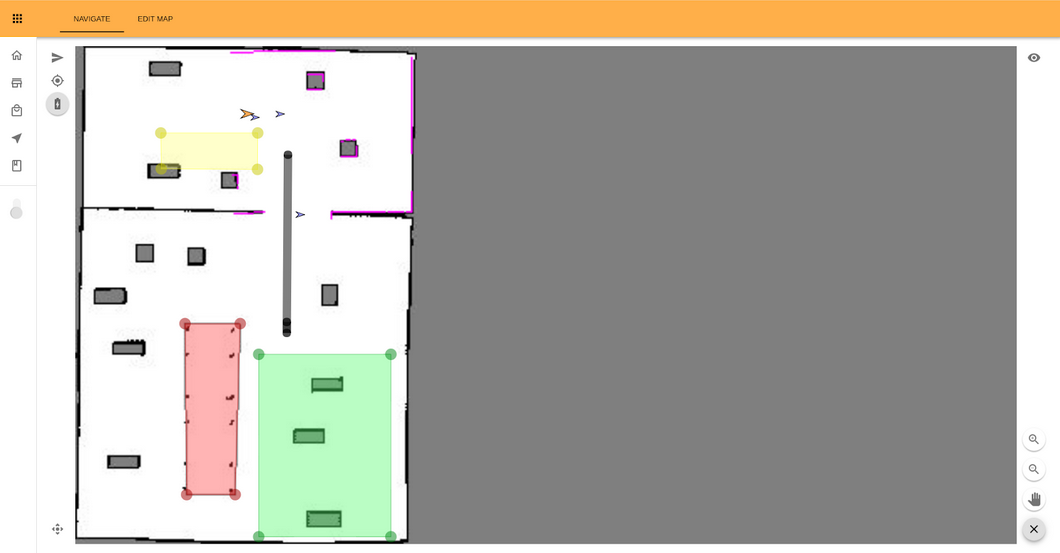
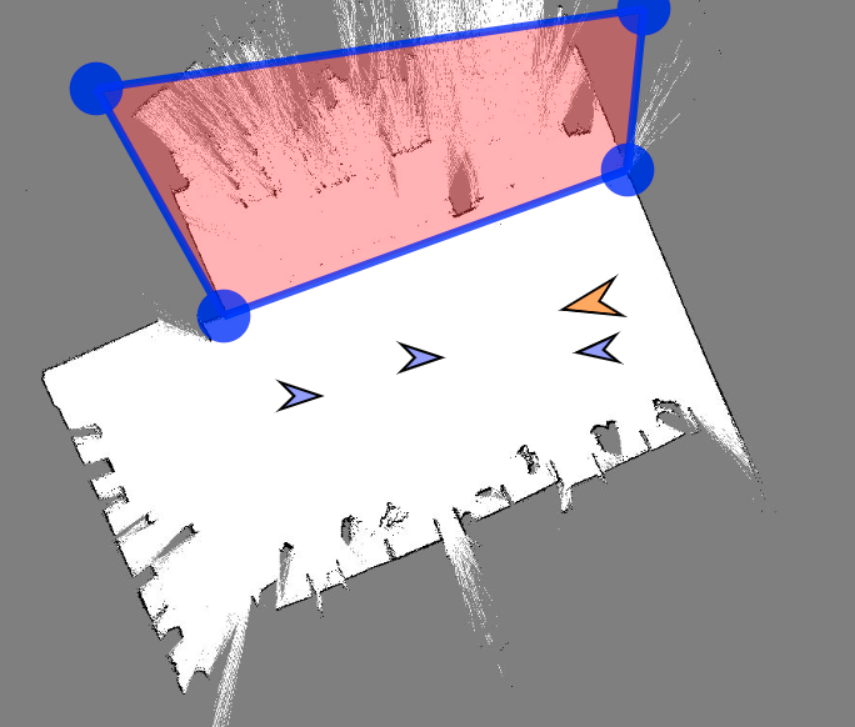
The main component of the Navigate tab is the map in the center. We can see on this map:
the robot as a pulsing orange arrow
the laser scan in pink
POIs represented by blue arrows
PODs represented by yellow arrows
ZOIs represented by green polygons
RAs represtend by yellow polygons
VOs represented by red polygons
The map may be zoomed in and out by using the scroll wheel of the mouse. When the map is zoomed in, it can be moved by dragging it with the mouse wheel.
To display the name of an object (POI, POD, ZOI, RA or VO) hover the mouse above it for the label to appear. If multiple objects are overlaid the name of each object will appear as well as its type.
The buttons#
We next describe the different buttons you can find in the main page.
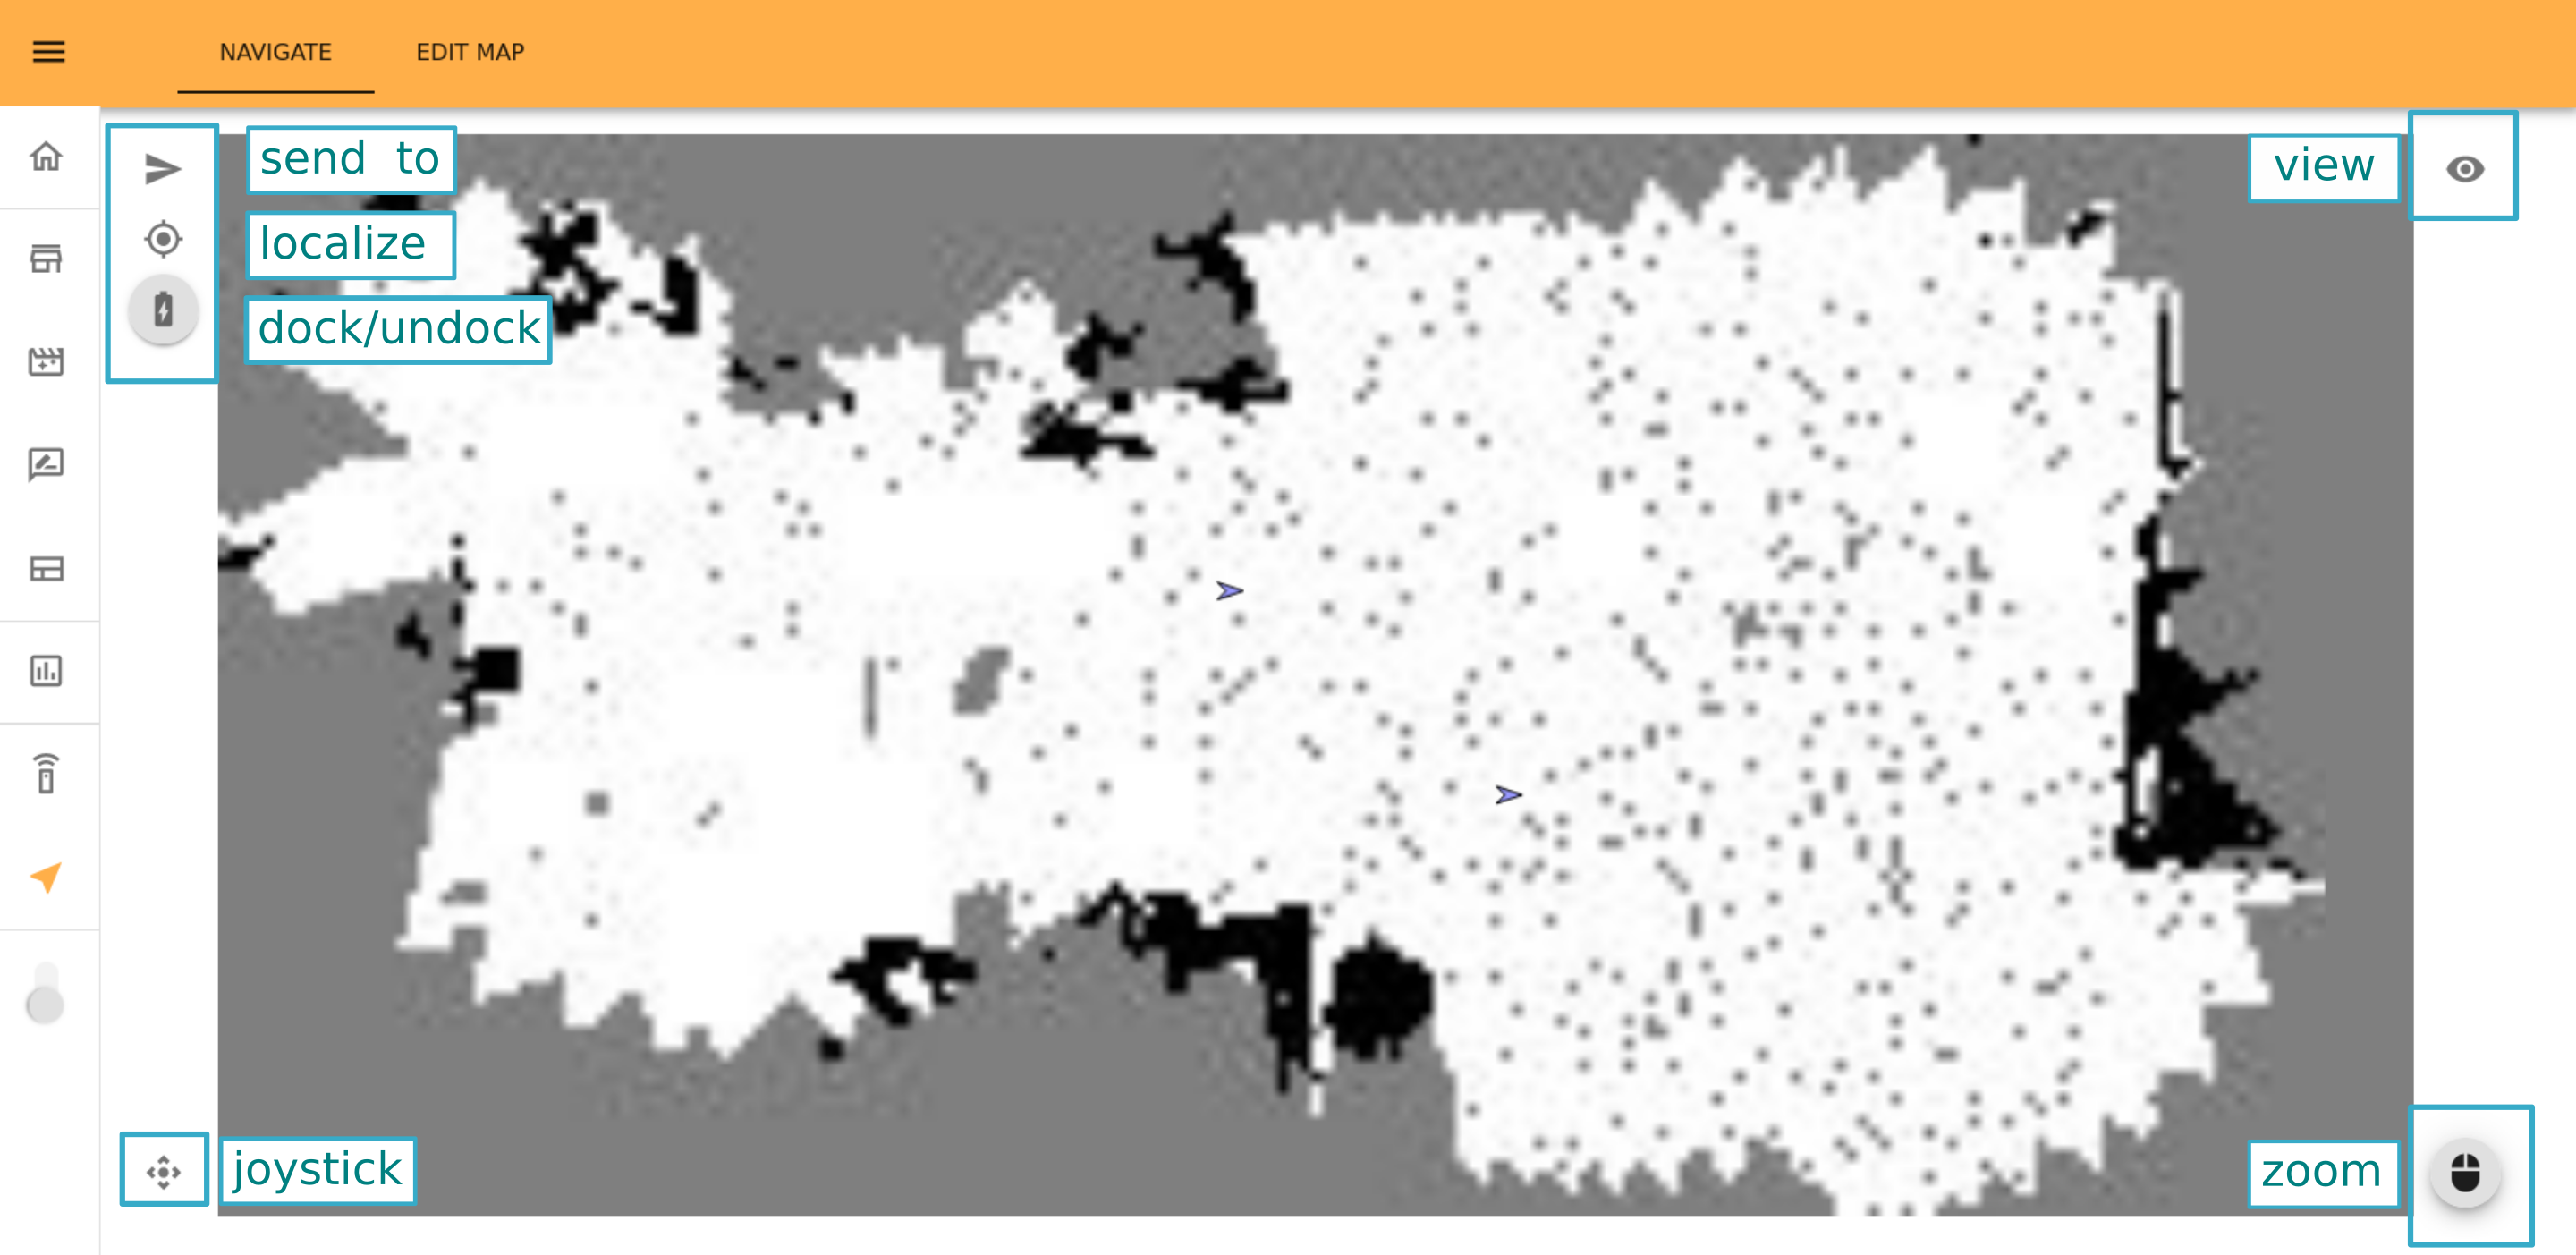
On the top left menu there are three buttons:
Send To, represented with an arrow. It opens a popup to allow the user to choose a POI to send the robot to, or alternatively, to select a point in the map. Selecting a point in the map is done by pressing down the left mouse button on the desired location and then dragging the mouse to select the target orientation.
Dock/Undock, represented with a battery icon. It allows the user to either dock to a dock station or undock from it, depending on the current state of the robot. When the robot is docked the button has a grey background and a lighting bolt drawing on it, otherwise the battery icon is empty and has a white background.
Localize Robot, represented with a target icon. It allows the user to change the current localization of the robot on the map. In order to do so a position must be selected by pressing down the left mouse button on the desired location and then dragging the mouse to define the target orientation. The robot position will then be updated to match the selected configuration.
The View button on the top right opens a menu to change the displayed objects and change their size. Each type of object has a toggle to show or hide them, and their size can be changed between Small, Medium and Big (the default being Big).
On the lower left the Joystick button (represented with a movement icon) allows the user to open and close a small joystick to control the robot.
The Mouse button on the lower right side opens a menu to change the zoom by clicking the zoom-in and zoom-out icons, and to activate drag mode by clicking on the hand icon. In drag mode the map can be panned by clicking and dragging with the left mouse button. The menu can be closed by clicking on the X icon, which automatically disables drag mode if it was enabled.
View options. |
Jostick to control the robot. |
Zoom and drag options. |
Edit map#
Similarly to the Navigate tab the main component of the Edit map tab is the map shown in the center of the page. In this view, the user can edit the different features of the map. Thus, the same items are displayed, except for the laser. You can also zoom in and out, as well as move around in the same way. The view of features can also be set to visible or hidden or change their size as explained in the Navigate tab. The mouse controls menu is also accessible and used in the same way.
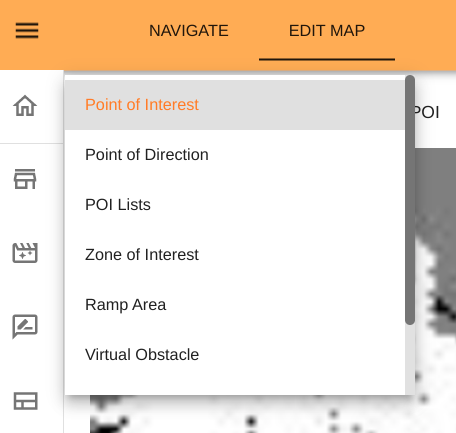
On the top left menu a dropdown list is displayed, with options to edit the different features. By selecting each feature, the user can add, edit and remove the respective type of feature.
Point of Interest#
When selecting the Point of Interest feature in the dropdown, five buttons are displayed:
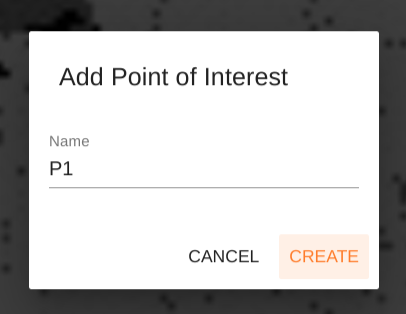
The Add POI button allows the user to select a point in the map to create a new POI.

To do so, press down the left mouse button on the desired location and then drag the mouse to select the orientation of the POI. Once this is done a popup will open to allow the user to set the name of the new POI. Pressing the Create button saves the POI, while pressing Cancel discards the changes made.
The POIs will be shown in the map as blue arrows.
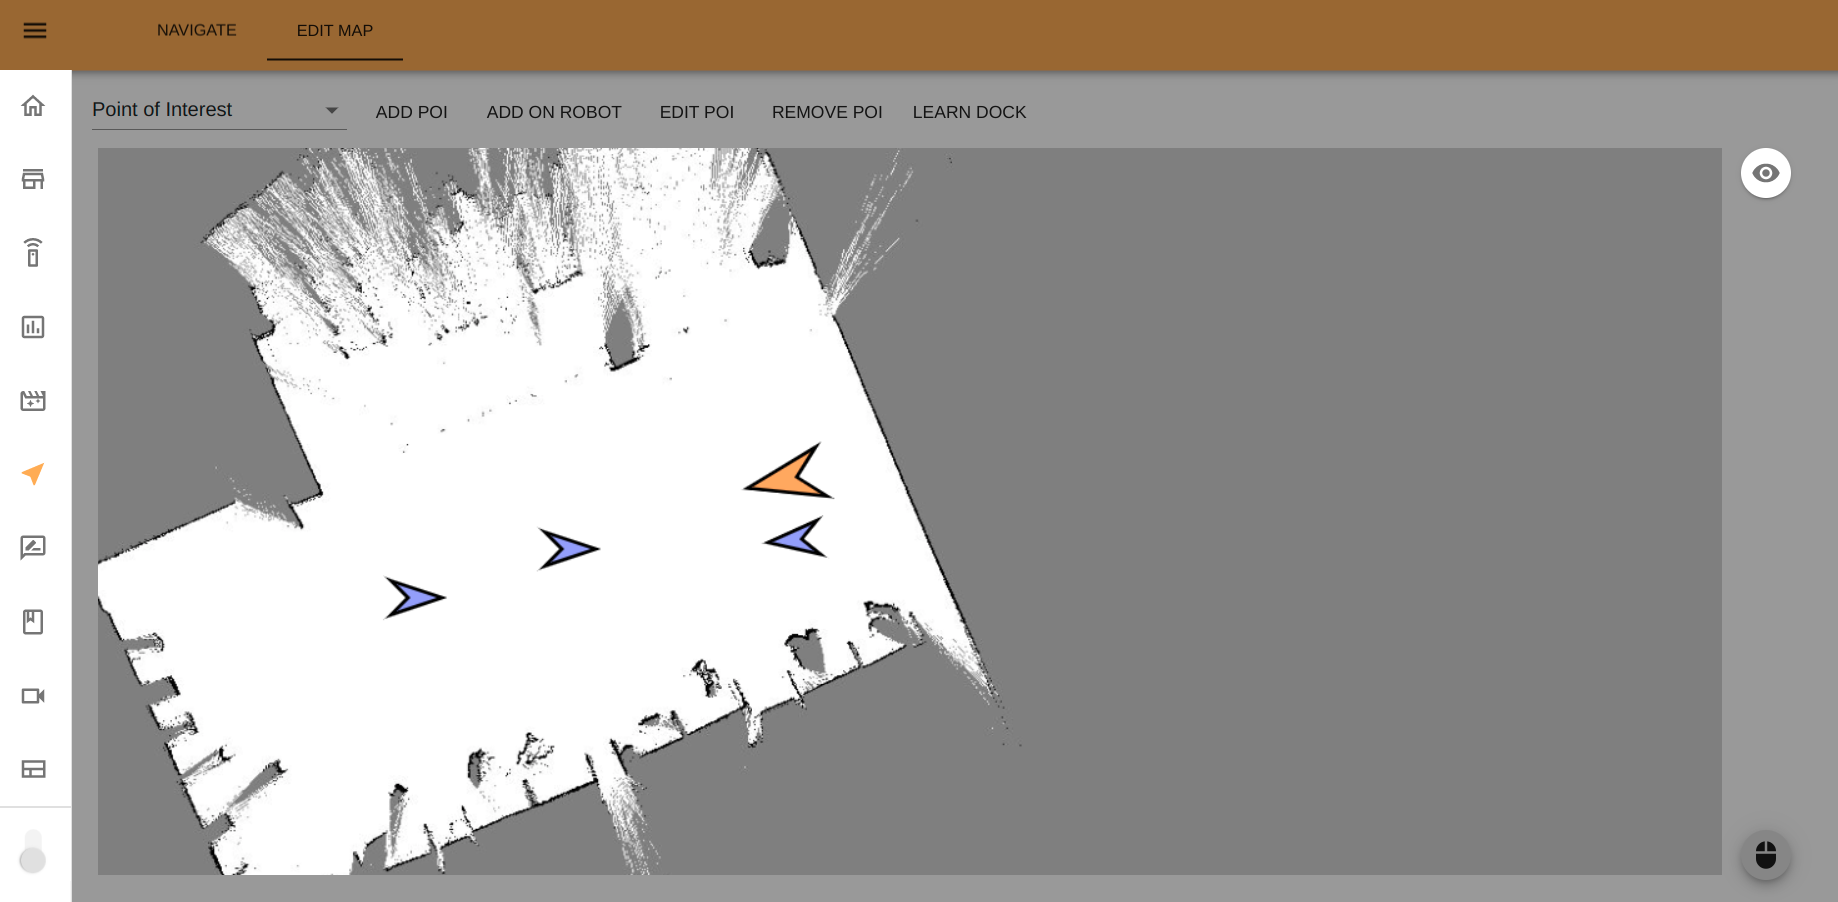
The Add On Robot button creates a POI at the current robot’s location and orientation. When clicked, a popup will appear to allow the user to set the name of the new POI. Pressing the Create button saves the POI, while pressing Cancel discards the changes made.
The Edit POI button allows the user to modify an existing POI. First the user should double click on an existing POI to indicate which POI will be modified. A popup will open that allows the user to change its name, move or rotate the POI.
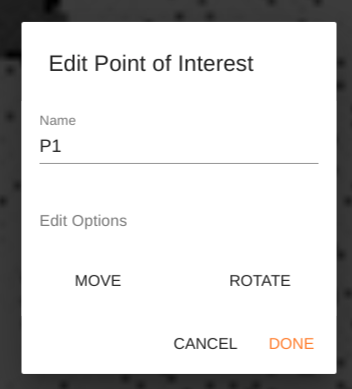
Clicking the Move button allows the user to drag and drop the POI on the map. Clicking the Rotate button allows the user to rotate it, by pressing down the left mouse button and dragging it on the map. Finally, pressing on the Done button stores the changes made on the POI, while pressing the Cancel button discards those changes.
In order to exit the editing mode, press on the Stop Editing button on the top menu.
The Remove POI button allows the user to completely remove an existing POI. The user should double click the POI to be removed, which will prompt a popup asking the user for confirmation. This action cannot be undone.
The Learn Dock button triggers a learn dock behavior on the robot. The robot will attempt to dock on a dock station in front of it. If successful, it will create the
dock stationanddocked_posePOIs used in the docking system.
Point of Direction#
When selecting Point of Direction in the dropdown, three buttons are displayed:
Add POD
Edit POD
Remove POD
The three buttons work exactly the same way as their POI counterparts.
POI Lists#
When selecting POI Lists in the dropdown four buttons are displayed:
The Add POI List button allows the creation of a new POI List. First the name must be introduced in the new popup.
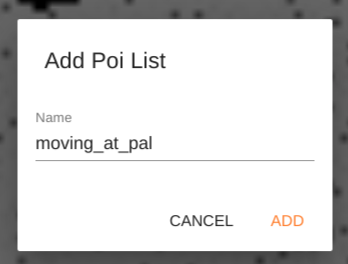
Then the Edit POI List popup will be opened with the newly created list. Press the ADD to add any previously created POI you wish to include in the list. You will see the list of available POIs. Double click on the ones you want to include. They will be added to the current list.
The Visualize POI List button opens a popup to visualize an existing POI list. Once a list has been selected on the popup all other POIs and PODs will be hidden and the POIs in the POI list will turn red following the sequence marked by the POI List. To exit this visualization, click on the Stop Visualization button.
To edit the visualization speed, use the View icon on the top right corner of the screen. You will see the available speed options: Low, Medium and High. After choosing the desired speed, the visualization of POIs will start from the beginning.
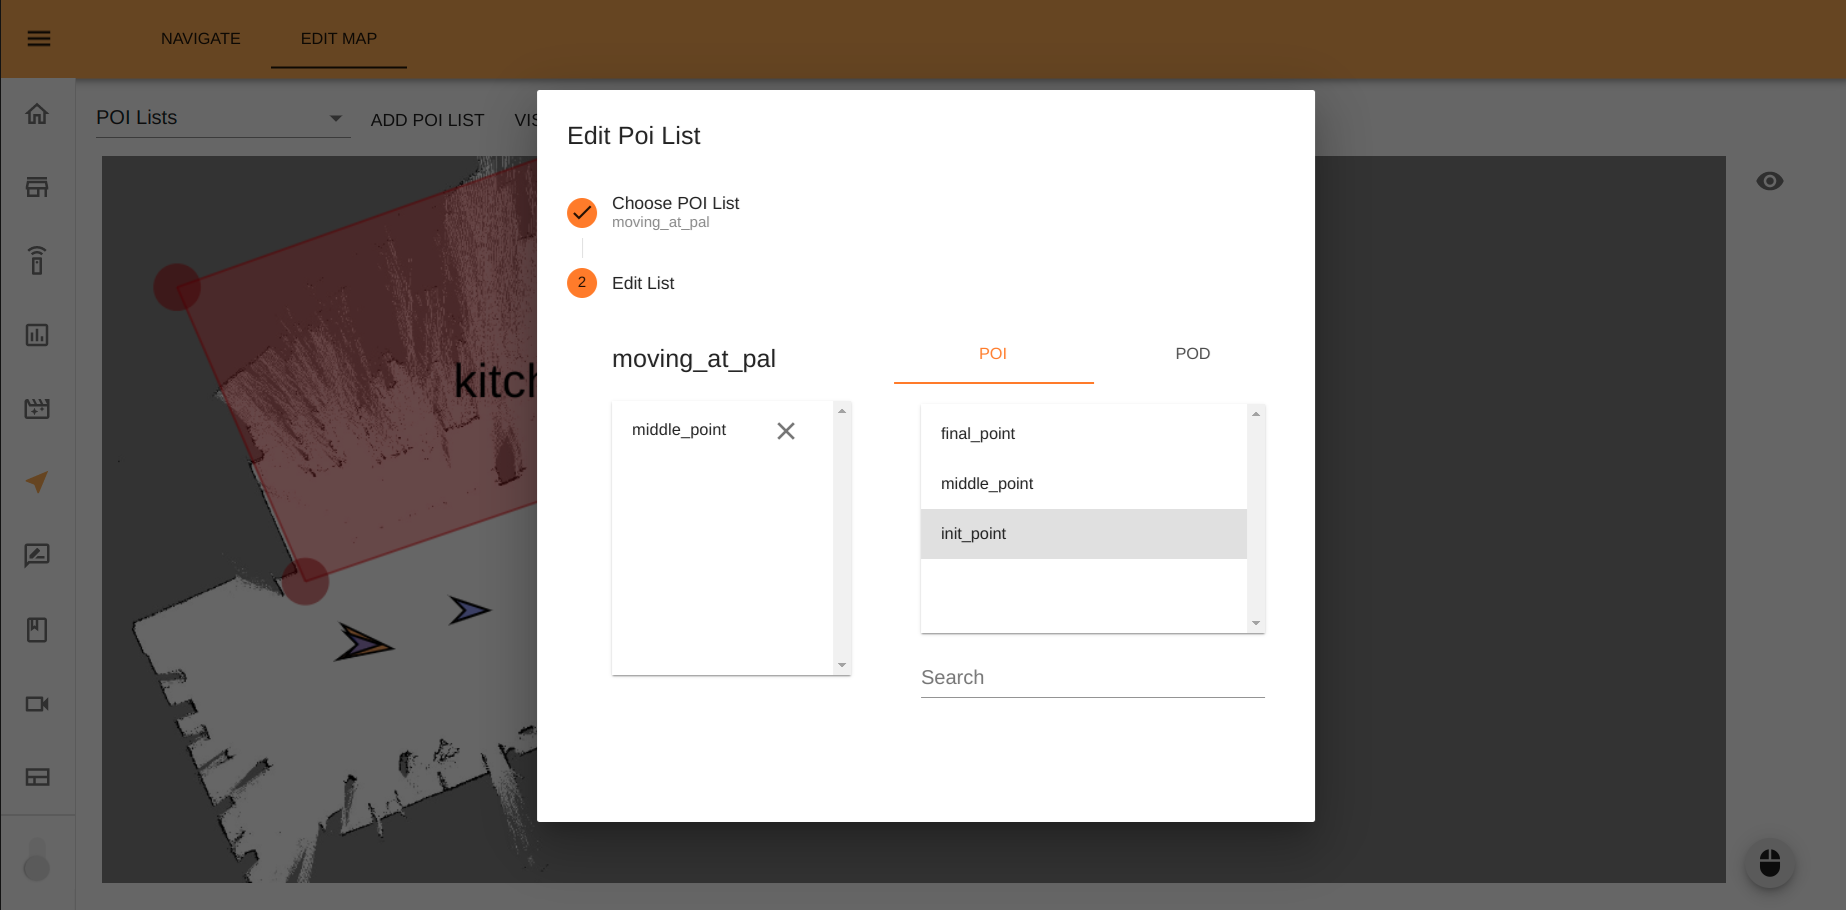
The Edit POI List button opens a popup to edit an existing list. First, an existing list must be chosen on the dropdown menu. Next, a popup will show: the list of POIs in the POI list on the right side, and a menu to select POIs and PODs on the right hand side.

To add a new POI or POD to the list, either drag and drop it on the list or double-click it to be appended at the end of the list.
To change the order of the points in the sequence, drag and drop them to their new positions. To remove a POI from the list, drag it outside of the list.
Points can also be removed from the list by clicking on the X icon next to them.
The Remove POI List button allows the user to completely remove an existing POI List. The user should select the POI List to be removed on the dropdown menu of the popup that will be shown. You will be prompted with a popup asking for confirmation. This action cannot be undone.
Zone of Interest#
When selecting Zone of Interest in the dropdown three buttons are displayed:
The Add ZOI button allows the user to draw a new zone. The zone is drawn by clicking with the left mouse button and then dragging the blue vertexes to create the desired shape.
The vertexes can be dragged and dropped into new positions and new vertexes can be added by clicking anywhere along the edges. When done, double-click inside the created area to set the name of the ZOI. Clicking on the Create button adds the new zone, while clicking on the Cancel button discards the changes.
The Edit ZOI button allows the user to modify an existing zone. First the user should double click on the desired zone to be edited. A popup will open allowing the user to change the name of the zone.
The Change Shape button allows the user to modify the shape of the selected zone. The vertexes can be dragged and dropped to new positions. New vertexes can be added by clicking anywhere along the edges.
Double clicking inside the zone brings the editing popup back. Clicking on the Done button stores the changes made, while clicking on the Cancel button discards the changes.
The Remove ZOI button allows the user to completely remove an existing ZOI. The user should double click the ZOI to be removed, which will prompt a popup asking the user for confirmation. This action cannot be undone.
Ramp Area#
Warning
While the robot can navigate on ramps with an inclination smaller than 12%, the robot has been designed for, and should be used in flat surfaces.
When selecting Ramp Area on the dropdown, three buttons are displayed:
The Add Ramp Area button allows the user to draw a new ramp. The ramp is drawn by clicking with the left mouse button on the map and then dragging it to create a basic rectangle shape of the desired dimensions. Once this is done, the vertexes can be dragged and dropped into position, and new vertexes can be added by clicking anywhere along the edges.
When finished, double-click inside the defined area to set the name of the Ramp Area. Clicking on the Create button adds the new ramp, while clicking on the Cancel button discards the changes.
The Edit Ramp Area button allows the user to modify an existing ramp. First the user should double click on the desired ramp to be edited. A popup allows the user to change the name of the ramp. Clicking on the Change Shape button allows the user to modify the shape of the selected ramp. The vertexes can be dragged and dropped into new positions. New v ertexes can be added by clicking anywhere along the edges.
Double clicking inside the yellow area brings the editing popup back. Clicking on the Done button stores the changes made, while clicking on the Cancel button discards the changes.
The Remove Ramp Area button allows the user to completely remove an existing Ramp Area. The user should double click the Ramp Area to be removed, which will prompt a popup asking the user for confirmation. This action cannot be undone.
Virtual Obstacle#
When selecting Virtual Obstacle in the dropdown three buttons are displayed: Add VO, Edit VO, and Remove VO.
The three buttons work exactly the same way as their ZOI counterparts. While correctly localized, the robot will never create a path that goes through a VO. Moreover, it cannot be localized inside of a VO.
See also#
Now that you have edited your map, you might want to check Laser-based SLAM and path planning on the robot with WebGUI to make your robot navigate around.