The WebCommander tool#
The WebCommander is a web page hosted by ARI that can be accessed from any modern web browser that is able to connect to ARI. It contains visualizations of the state of ARI’s hardware, applications and installed libraries, as well as tools to configure parts of its behaviour.
Accessing the WebCommander website#
Ensure that the device you want to use to access the website is in the same network and able to connect to ARI.
Open a web browser and type in the address bar the host name or IP address of ARI’s control computer, and try to access port 8080:
If you are connected directly to ARI, which means using robot as access point, you can also use:
It contains different tabs.
Start-ups tab#
Plugin: Startup
Description: Displays the list of PAL Robotics software that is configured to be started in the robot, and whether it has been started or not.
Each application, or group of applications, that provides a functionality, can choose to specify a startup dependency on other applications or groups of applications.
There are three possible states:
Green: All dependencies satisfied, application launched.
Yellow: One or more dependencies missing or in error state, but within reasonable time. Application not launched.
Red: One or more dependencies missing or in error state, and maximum wait time elapsed. Application not launched.
Additionally, there are two buttons on the right of each application. If the application is running, a “Stop” button is displayed, which will stop the application when pressed. If the application is stopped or has crashed, the button “Start” will be displayed, which will start the application when pressed. The “Show Log” button, allows to display the log of the application.
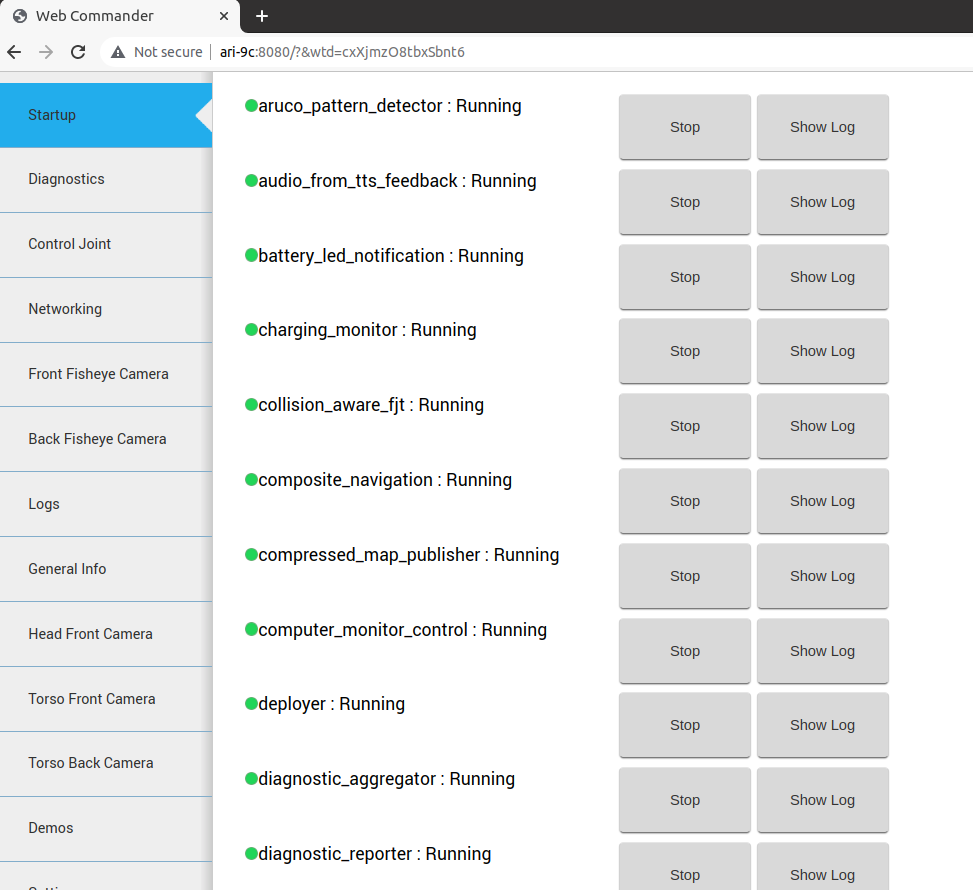
How to manipulate start-ups, create new ones or visualize logs is better explained in Configure an application to launch at start-up.
The startup extras tab#
Plugin: Startup
Description: This tab is optional, if present it will contain a list of PAL software which is not started by default during the boot up of the robot. These are optional features that need to be manually executed by the user.
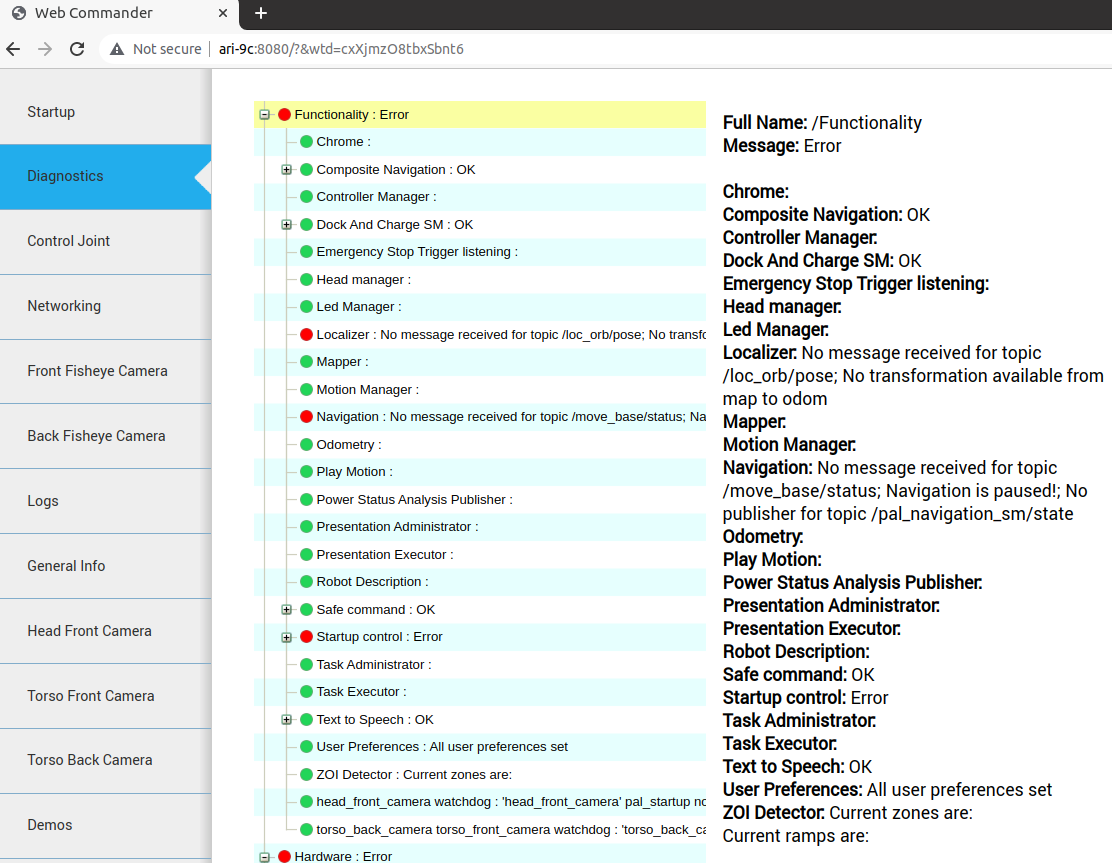
Diagnostics tab#
Plugin: Diagnostics
Description: Displays the current status of ARI’s hardware and software.
The data is organized in an hierarchical tree. The first level contains the hardware and functionality categories.
The functionalities are the software elements that run in ARI, such as vision or text to speech applications. Hardware diagnostics contain the hardware’s status, readings and possible errors. Inside the hardware and functionality categories, there’s an entry for each individual functionality or device. Some devices are grouped together (motors, sonars), but each device can still be seen in detail.
The colour of the dots indicates the status of the application or component.
Green: No errors detected.
Yellow: One or more anomalies detected, but they are not critical.
Red: One or more errors were detected which can affect the behaviour of the robot.
Black: Stale, no information about the status is being provided.
An example of this display is shown in the figure below. The status of a particular category can be expanded by clicking on the “+” symbol to the left of the name of the category. This will provide information specific to the device or functionality. If there’s an error, an error code will be shown.
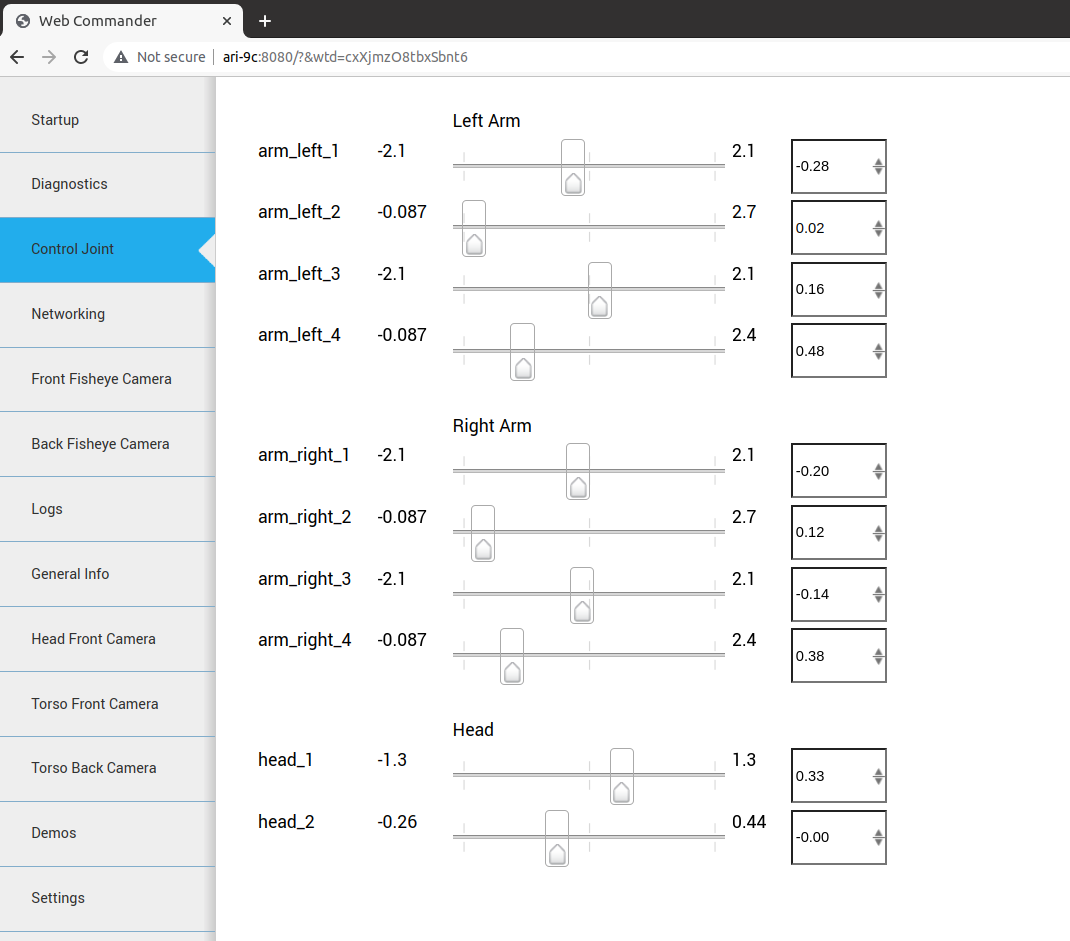
Control Joint Tab#
Plugin: JointCommander
Description: Enables moving individual joints of ari with sliders.
Networking tab#
Description By default, the controls for changing the configuration are not visible in order to avoid access by multiple users.

If the Enter button is pressed, the tab connects to the network configuration system and the controls will appear.
When a user connects to the configuration system, all the current clients are disconnected and a message is shown in the status line.
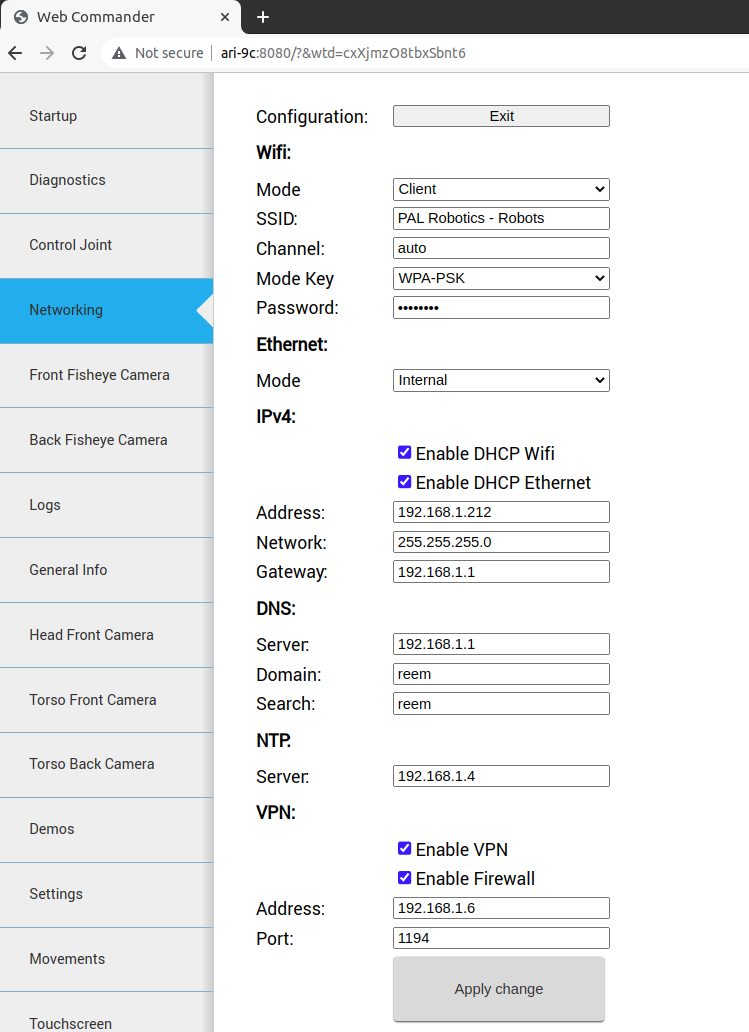
Further description on the Networking Tab and how to change it settings are available in ARI networking .
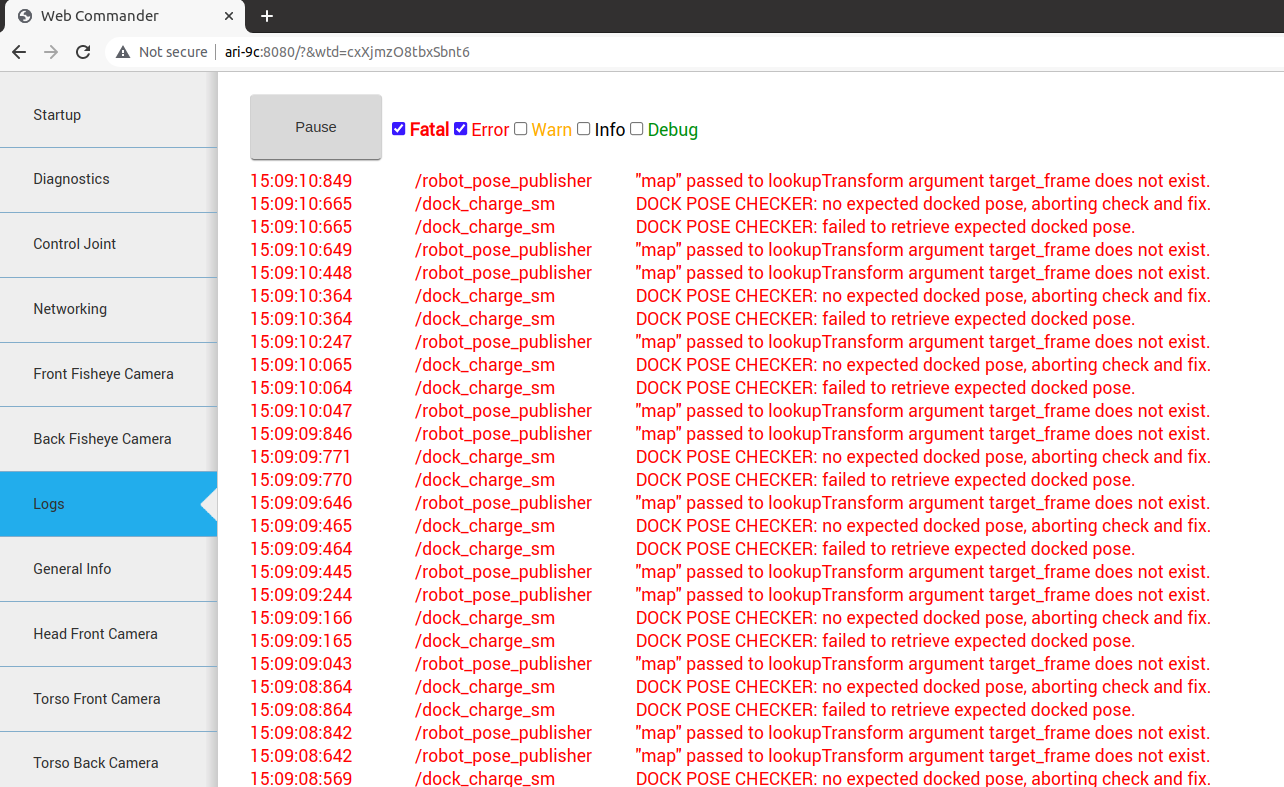
Logs Tab#
Plugin: Logs
Description: Displays the latest messages printed by the applications’ logging system.
The logs are grouped by severity levels, from high to low: Fatal, Error, Warn, Info and Debug.
The logs are updated in real time, but messages printed before opening the tab can’t be displayed.
The log tab has different check-boxes to filter the severity of the messages that are displayed. Disabling a priority level will also disable all the levels below it, but they can be manually enabled. For instance, unchecking Error will also uncheck Warn, Info and Debug levels, but the user can click on any of them to reenable them.
General Info Tab#
Plugin: General Info
Description: Displays the robot model, part number and serial number.
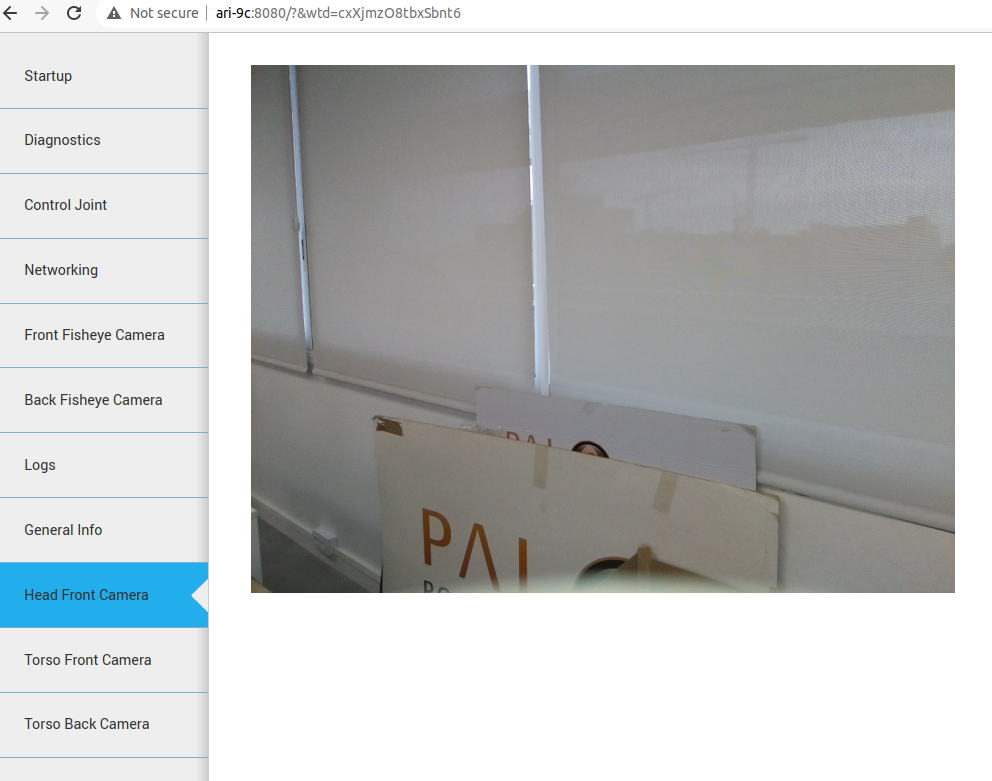
Video Tab: specific to cameras of the robot#
Plugin: Video Description: Displays the images from a ROS topic in the WebCommander. This can be Head Front Camera, Torso Front Camera, Front Fisheye Camera, Back Fisheye Camera, Torso Back Camera (configuration depends on ARI cameras purchased)
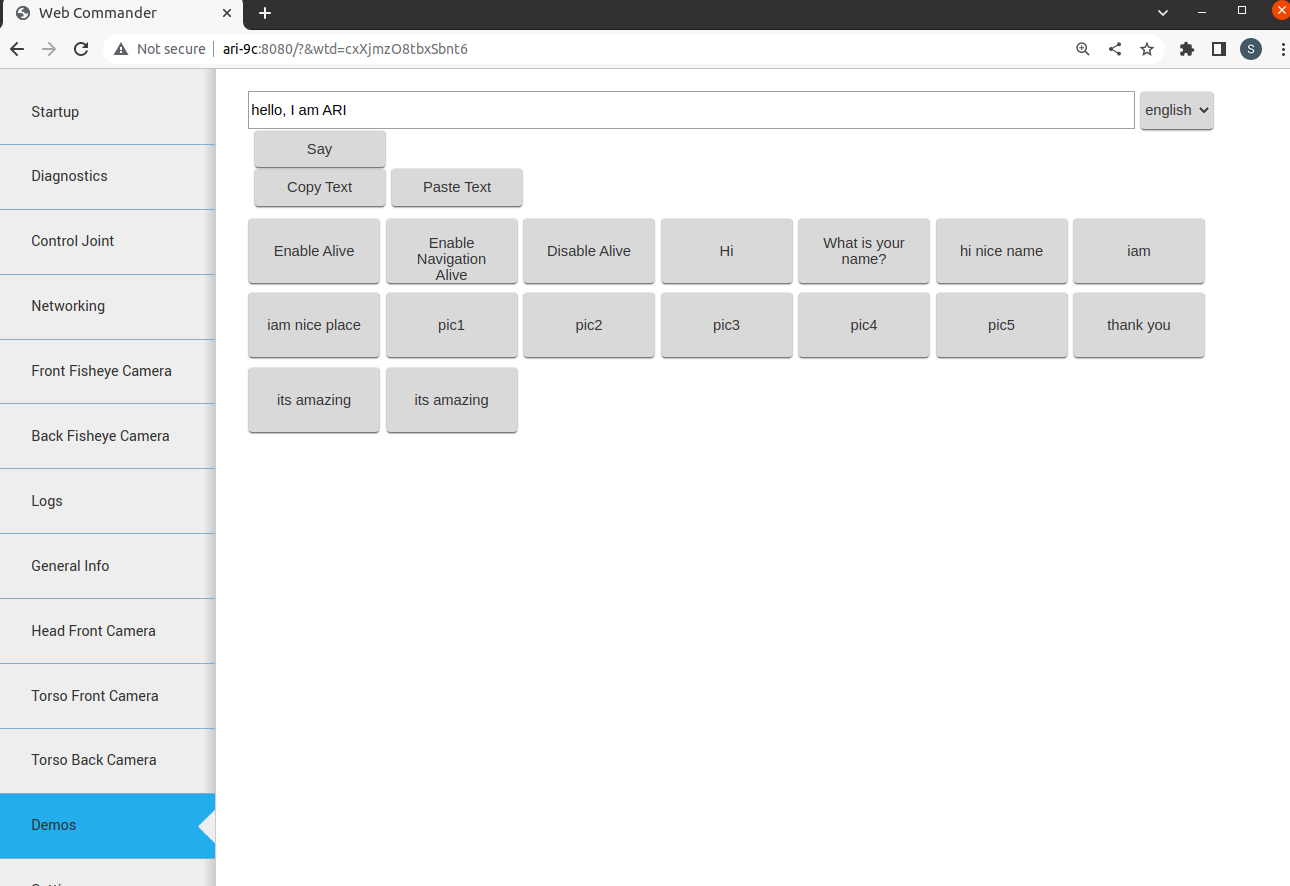
Robot Demos#
Plugin: Commands Description: This tab provides buttons to start and stop different demos and synthesize voice messages with ARI, using either predefined buttons or by typing new messages in a text box
Settings Tab#
Plugin: Commands
Description: The settings tab allows to change ARI’s behaviour.
Currently it allows to configure the language of ARI for speech synthesis or adjust the robot’s volume. It is possible to select one from a drop down list. Changing the text-to-speech language will change the default language when sending sentences to be spoken by ARI.
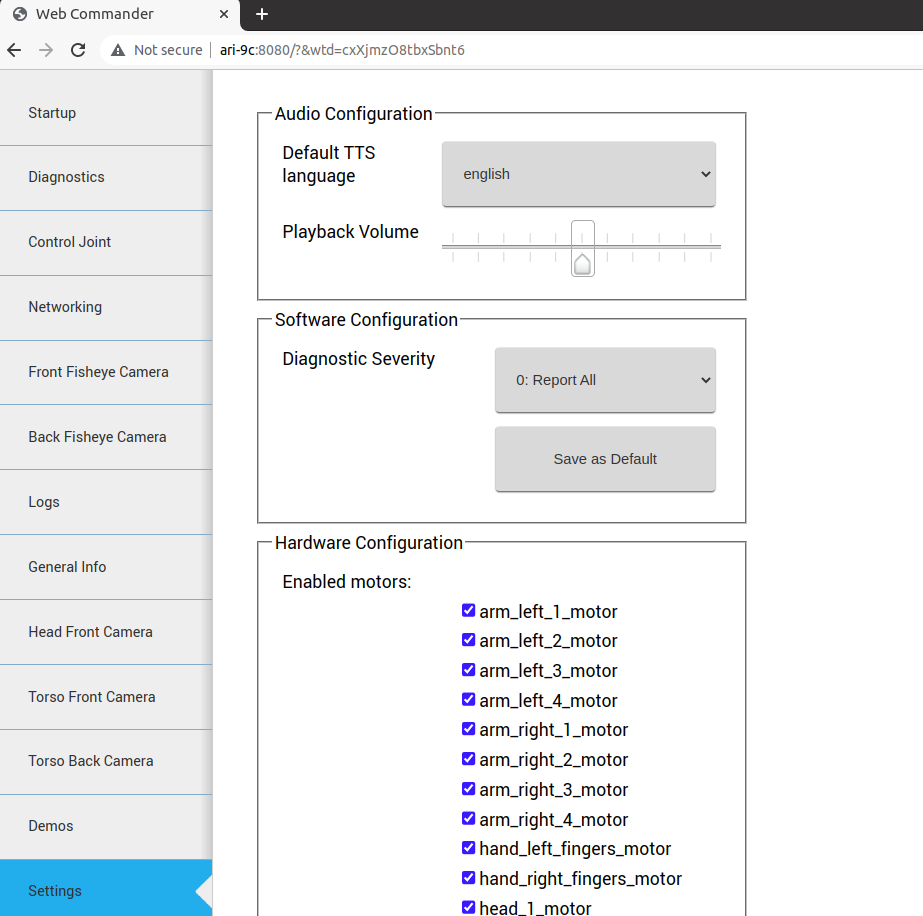
Software Configuration The Settings tab allows the user to configure some software of the robot. For example, the user can change the Diagnostic Severity reporting level so that, depending on this value, the robot will report certain errors by means of its LED stripes, voice, etc.
Hardware Configuration The Settings tab allows the user to configure the hardware of the robot. Hardware configuration will let the user to disable/enable the different motors.
For instance, to disable the “head_1_motor”, untick the head_1_motor checkbox in the “Enabled motors” options. Then press the “Save as Default” button at the bottom of the section. Reboot the robot for the above selected configuration to be taken into effect.
Remote Support The Settings tab is equipped with the remote support connection widget. A technician from PAL Robotics can give remote assistance to the robot by connecting through this widget. Using an issue in the support portal, the PAL technician will provide the IP Address and the Port, this information need to be filled in the respective fields of the widget and then pressing the Connect button will allow for the remote assistance. If the robot needs to be rebooted, the customer has to activate the remote support after each reboot because it is not persistent.
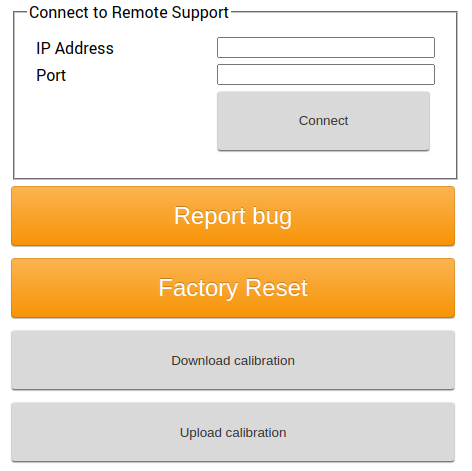
At any point of time after the connection had established, the remote connection can be terminated by clicking the Disconnect button.
Note
After clicking the Connect if the widget pops back to the normal, instead of showing the connection status, then it means that the robot is either not connected to internet (or) there should be some network issue.
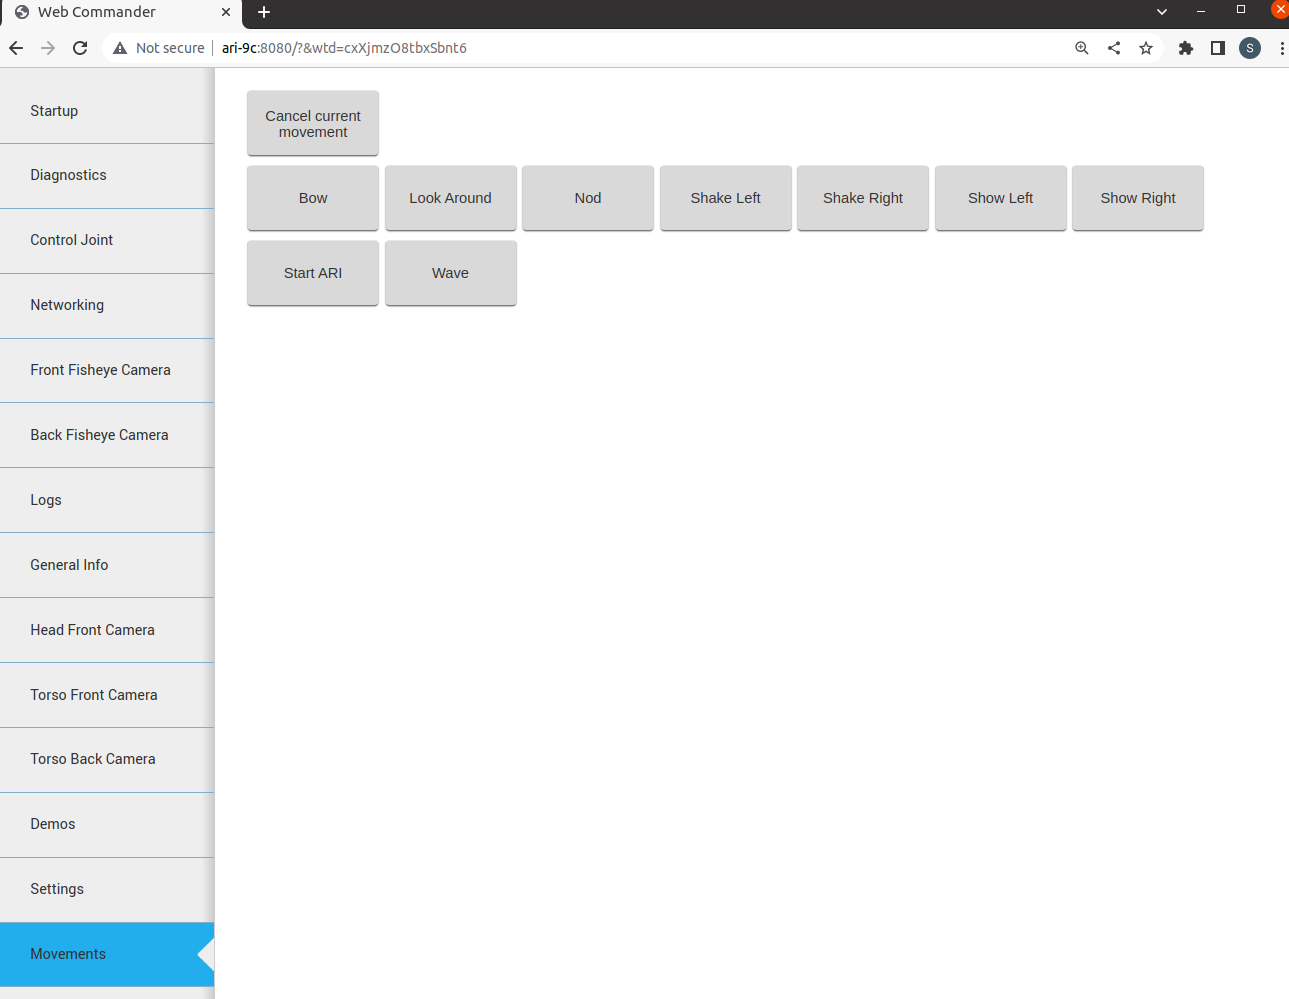
Movements Tab#
Plugin: Movements
Description: Enables playing pre-recorded motions on ARI.
The movement tab that can be seen in the next figure allows a user to send upper body motion commands to the robot. Clicking on a motion will execute it immediately in the robot. Make sure the arms have enough room to move before sending a movement, to avoid possible collisions.
Movements sent through this interface take into account the surroundings of the robot, if a motion is expected to move the right arm and there is an obstacle detected by the sensors in the right side of the robot, the complete movement will not be executed.
For the same reason, a movement might be aborted if something or someone gets too close to the robot while performing a motion.
To disable these safety features, the “Safety is enabled” button must be clicked, it will then turn red and the next movement command sent will not take into account the sensors information. For security reasons, the disable safety will only affect the next movement command sent. Sending multiple unsafe movements requires pressing the “Safety is enabled” button once before each command.
Advanced: modifying the Web Commander configuration#
The WebCommander is a configurable container for different types of content, and the configuration is done
through the /wt parameter. On the robot’s startup, this parameter is loaded by
reading all the configuration files in /home/pal/.pal/wt/.
For a file to be loaded, it needs to have a .yaml extension containing valid YAML syntax describing ROS Parameters:
within the /wt namespace.
Parameter format#
In the box below, an example of how a WebCommander configuration is displayed. It is a YAML file, where
/wt is a dictionary and each key in the dictionary creates a tab in the website with the key as the title of the tab.
Each element of the dictionary must contain a “type” key,whose value indicates the type of plugin to load.
Additionally, it can have a parameters key with the parameters that the selected plugin requires.
wt:
    "0. Startup":
        type: "Startup"
    "1. Diagnostics":
        type: "Diagnostics"
    "2. Logs":
        type: "Logs"
    "3. Behaviour":
        type: "Commands"
        Parameters::
            buttons:
              - name: "Say some text"
                say:
                      text: "This is the text that will be said"
                      lang: "en_GB"
              - name: "Unsafe Wave"
                motion:
                      name: "wave"
                      safe: False
                      plan: True
The Parameters: in the box of this section would create four tabs. Named “0. Startup”, “1. Diagnostics”, “2. Logs” and “3. Behaviour”, of the types Startup, Diagnostics, Logs and Commands respectively. The first three plugins do not require Parameters:, but the Command type does, as explained in the Command Plugin section. Mostly, there is a Plugin for each tab of the Web Commander.
Video Plugin Configuration#
Description: Displays the images from a ROS topic in the WebCommander.
Parameters:
topic Name of the topic to read images from, for instance: /head_front_camera/color/image_raw/compressed
Commands Plugin Configuration#
Description: Contains buttons that can be programmed through parameters to perform actions in the robot.
Parameters:
buttons A list of buttons, where each button is a dictionary with 2 fields. The name field is the text displayed on the button, and the second field name determines the type of button and is a dictionary with the configuration of the button.
wt:
    "Example Buttons":
        type: "Commands"
        Parameters::
            buttons:
                - name: "Hi"
                  say:
                        text: "Hello, my name is ARI, it is nice to meet you"
                        lang: "en_GB"
                - name: "Wave"
                  motion:
                        name: "wave"
                        safe: True
                        plan: True
                - name: "Change to Localization"
                  remote_shell:
                    cmd: "rosservice call  /pal_navigation_sm  \"input: 'LOC'\""
                    target: "control"
There are 3 types of buttons: say, motion and remote_shell
say Sends a text to the Text-To-Speech engine. It requires a text field containing the text to be said,
and lang containing the language in the format language_country specified in the RFC 3066.
motion Sends a motion to the motion manager engine. Requires a name field specifying the name of the
motion, and two boolean fields plan and safe that determine to check for self-collisions and collisions
with the environment respectively. For safety reasons they should always be set to True.
remote_shell Enables the execution of a bash command in one of the robot’s computers. Requires a cmd
field containing a properly escaped, single line bash command, and a target field that can either be
control or multimedia, indicating to execute the command in the control computer or in the multimedia
computer of the robot.