How-to: How to activate collision detection#
The collision_detector package provides a safety measure to prevent damages
when the robot collides with an object in the environment. The ROS node
can be initialised and stopped whenever the user wants through the WebCommander.
A configuration file allows you to setup the behaviour of the detector. You can define the list of interfaces where the collision detection should be applied, and also the desired joints with their specific tolerance values.
When the node is started, all the data from that configuration file is loaded into the detector and it will continuously check the motor effort readings corresponding to the joints you specified.
The detection is performed by comparing the actual effort readings and the expected effort computed by the theoretical robot model. This difference is normalised and compared with the tolerance limits set in the configuration file. If it exceeds that value, the node considers that a collision occured.
Starting the collision detector#
Open the WebCommander (type http://tiago-0c:8080/ in a browser. Check The WebCommander tool for details on how to connect to the robot through the WebCommander).
Click on the Startups Extras tab on the left menu. You will find the status of the collision detection node as shown
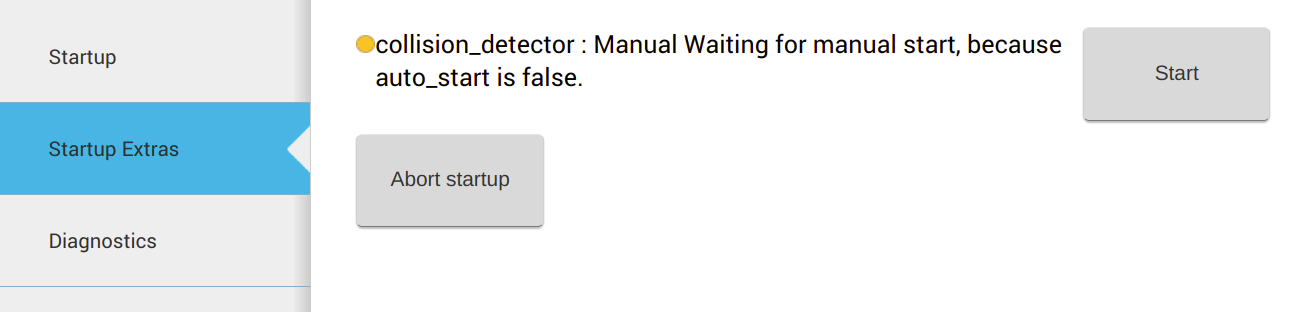
WebCommander menu to start collision detection.#
Press the Start button to start it.
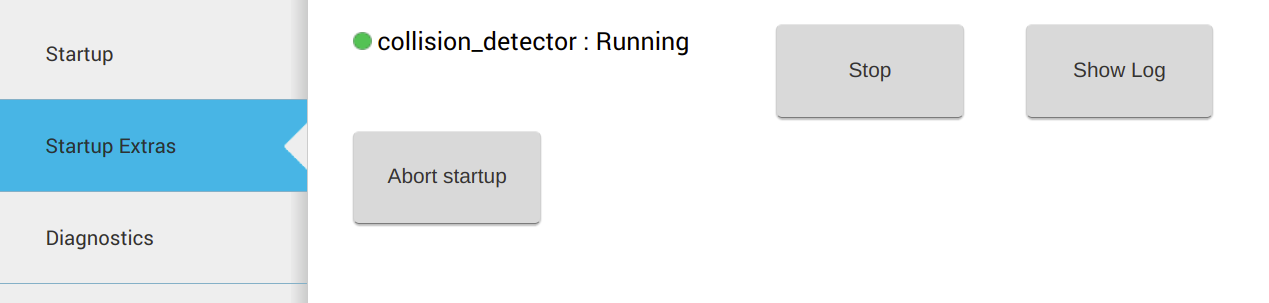
The collision_detector node is now active.#
Once the collision_detector node is ready, it will continuously check the joint
effort readings to detect potential collisions.
Note
The tolerance of each joint is set to a default value that should work in most of the robots. However, just to make sure that your robot does not provide false positives, it is recommended to check the configuration and tune it if necessary. We describe this process in the Fine tuning the collision detector subsection.
Testing the collision detector#
Once you have the collision detector started, you can execute a motion to
test the detector. You can run any motion in the WebCommander (under the
Movements tab). As the motion plays, try to collide with the robot
arm using your hands or body as shown in the image below.
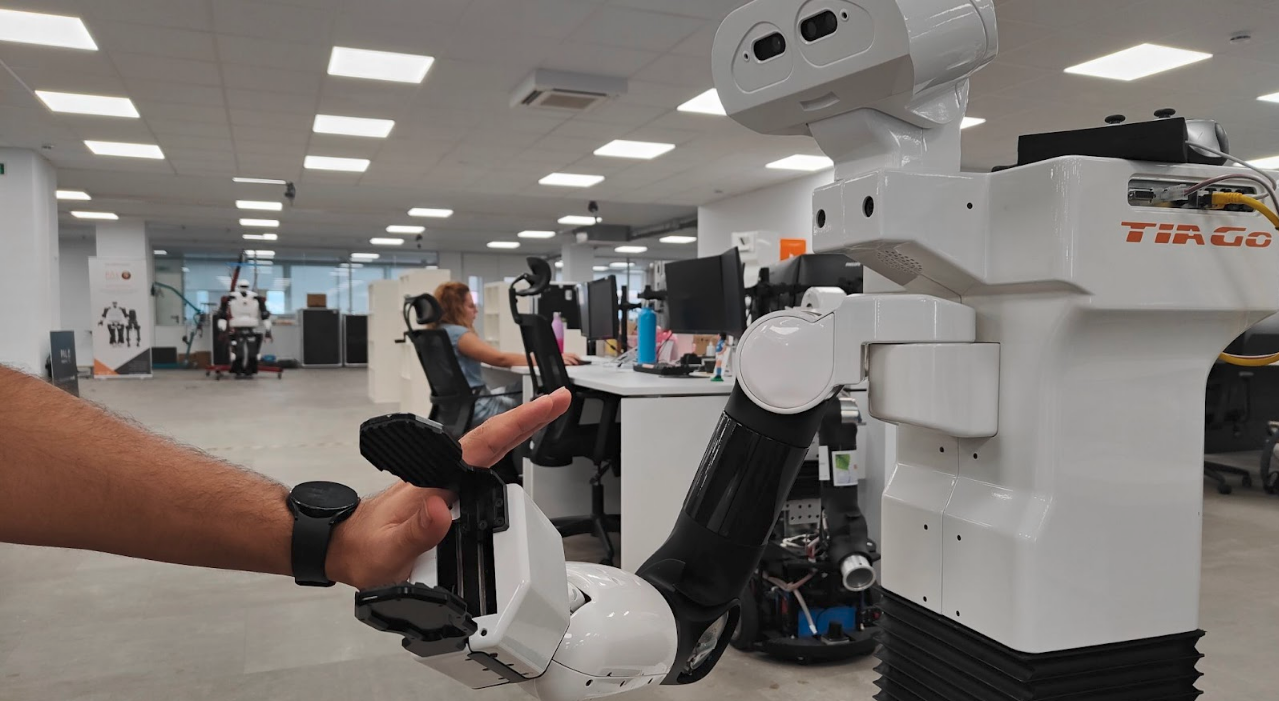
Testing the collision detection.#
Whenever a collision is detected, the robot should stop the motion, and trigger a warning advice through voice and LEDs. At this point, you need to restart the robot controllers as described in Restarting the controllers after a collision detection.
If the system detects false collisions, it means that the default parameters should be tuned. We next describe how to do so.
Fine tuning the collision detector#
It is recommended to double check that the default tolerance is convenient for your robot. If false positives are triggered, you can tune the joint tolerance to achieve a better performance.
Follow the next steps to tune these tolerances:
Step 1. Open a terminal in your development environment and set it to properly communicate with the robot:
$ export ROS_MASTER_URI='http://tiago-0c:11311'
Step 2. Launch the rqt_reconfigure plugin to tune the required parameters:
$ rosrun rqt_reconfigure rqt_reconfigure
You will be presented with an interface like this:

The rqt_reconfigure interface.#
Step 3. Select the collision_detector node on the left panel. The right
panel will display the actual joint tolerance values. Use the sliders to update
the parameters values.
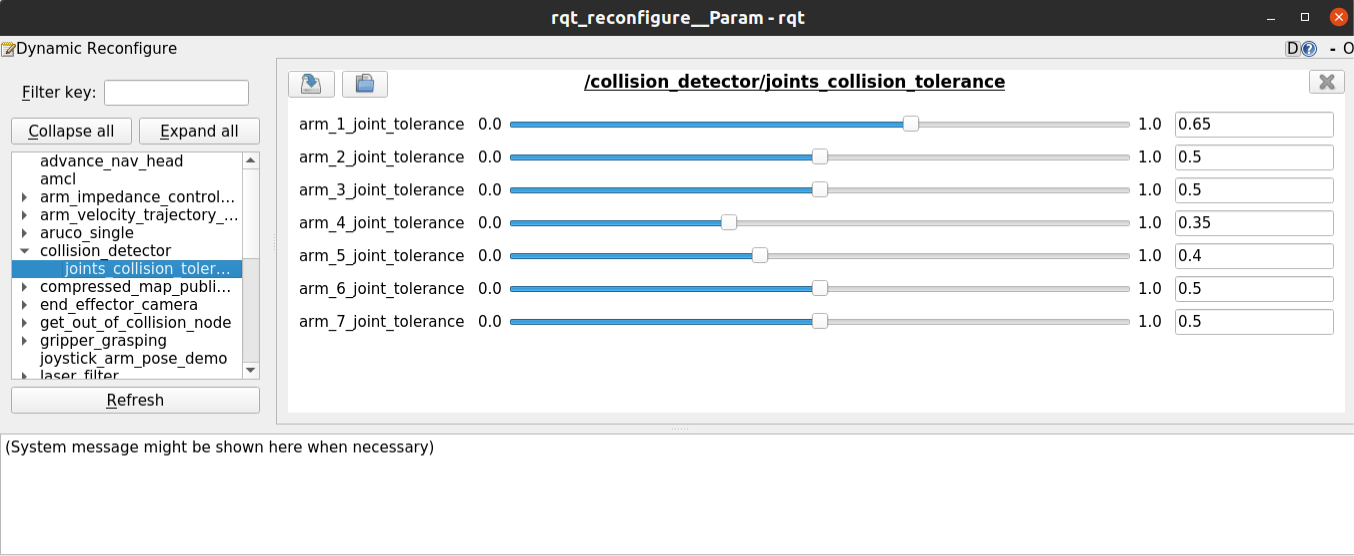
Sliders to update the parameters values through the rqt_reconfigure GUI.#
Step 4. Check the log file of the node (through the WebCommander GUI) to know which joint has produced the collision and update its values accordingly.
Press the Show Log button in the WebCommander to see the log file of the node.#
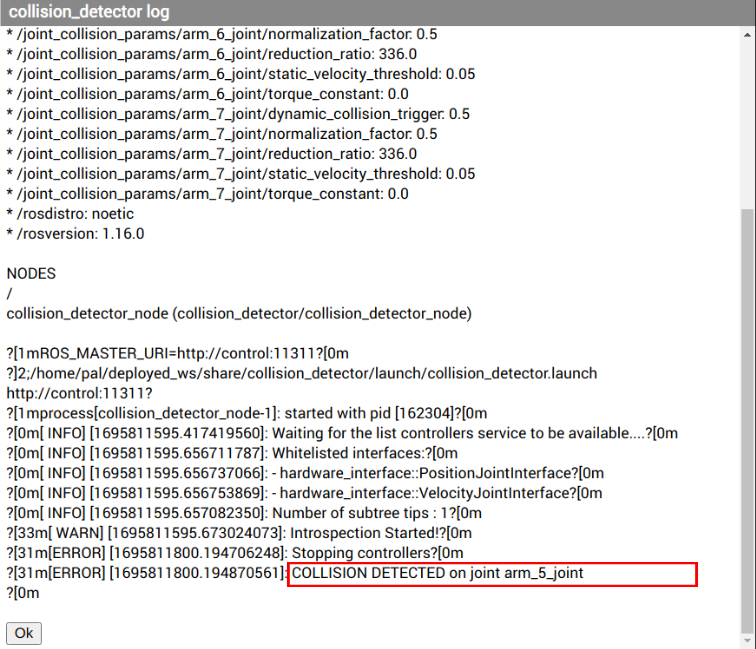
Checking the joints producing collisions in the log file.#
In the above example, we can see that the joint that complained was the
arm_joint_5. We should thus increase its tolerance:

Updading the values for the joint arm_joint_5.#
You can repeat this process as many times as you need to find the suitable values for your robot. Keep in mind that after a collision has been detected, it is necessary to restart the controllers to continue moving the robot as described in Restarting the controllers after a collision detection subsection.
Step 5. Once the correct tolerance values are found, you need to set them as default values. To do so, you need to modify the collision detector configuration file, which is stored in the permanent partition of your robot. Follow the next steps to do so.
Open a new terminal in your computer and run the following commands:
$ ssh pal@tiago-0c
$ sudo su # the password is palroot
$ rw
$ chroot /ro
You are now in the permanent partition, so be careful! To update the default tolerance values, open the configuration file using any editor you prefer and update the values with those that you found out in the previous step:
$ rosed collision_detector tiago_joint_collision_params.yaml
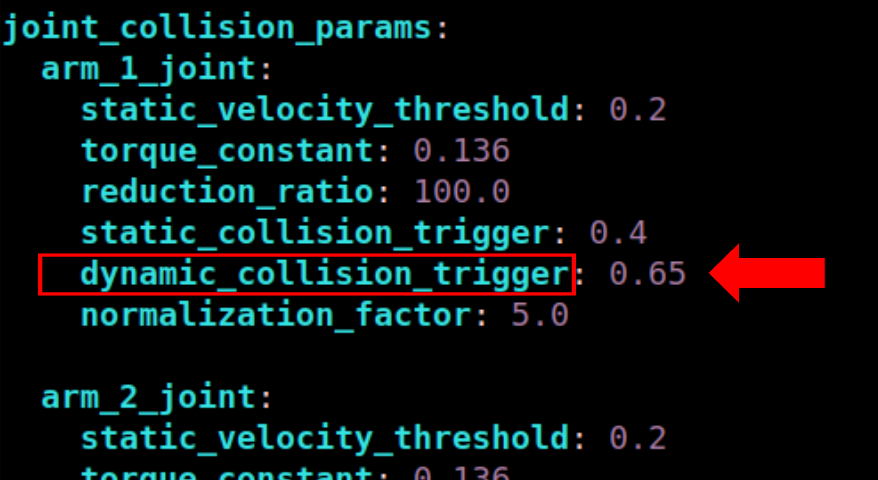
Example of updated values in the collision_detector node configuration
file.#
Finally, save the changes and exit the permanent partition:
$ exit
$ ro
$ exit
Restarting the controllers after a collision detection#
After a collision has occured, the robot will be blocked. To restart the controllers you need to enter the robot:
$ ssh pal@tiago-0c
And run the following command:
$ pal_restart_deployer
After few seconds the robot should go back to its normal operational state.