Accessing your robot’s sensors#
In this tutorial we’ll learn how to access to the different sensors of your robot.
Accessing the cameras#
Most of the sensor readings of PAL’s robots can be visualized in rviz.
Though you can also use image_view or rqt_gui. Let’s have a look at both
procedures.
rviz visualization#
In order to start the rviz GUI with a predefined configuration you need the
<robot>_bringup package corresponding to your robot. It is available from your PAL developer docker image (see
Developing with the SDK Docker image and ROS if you have not yet configured your developer environment).
Once in your Docker, execute the following command to install
tiago_bringup:
1apt install pal-gallium-tiago-bringup
Then start rviz:
1export ROS_MASTER_URI=http://tiago-0c:11311
2rosrun rviz rviz -d `rospack find tiago_bringup\`/config/tiago.rviz
(do not forget to replace tiago-0c with your own robot’s ID!)
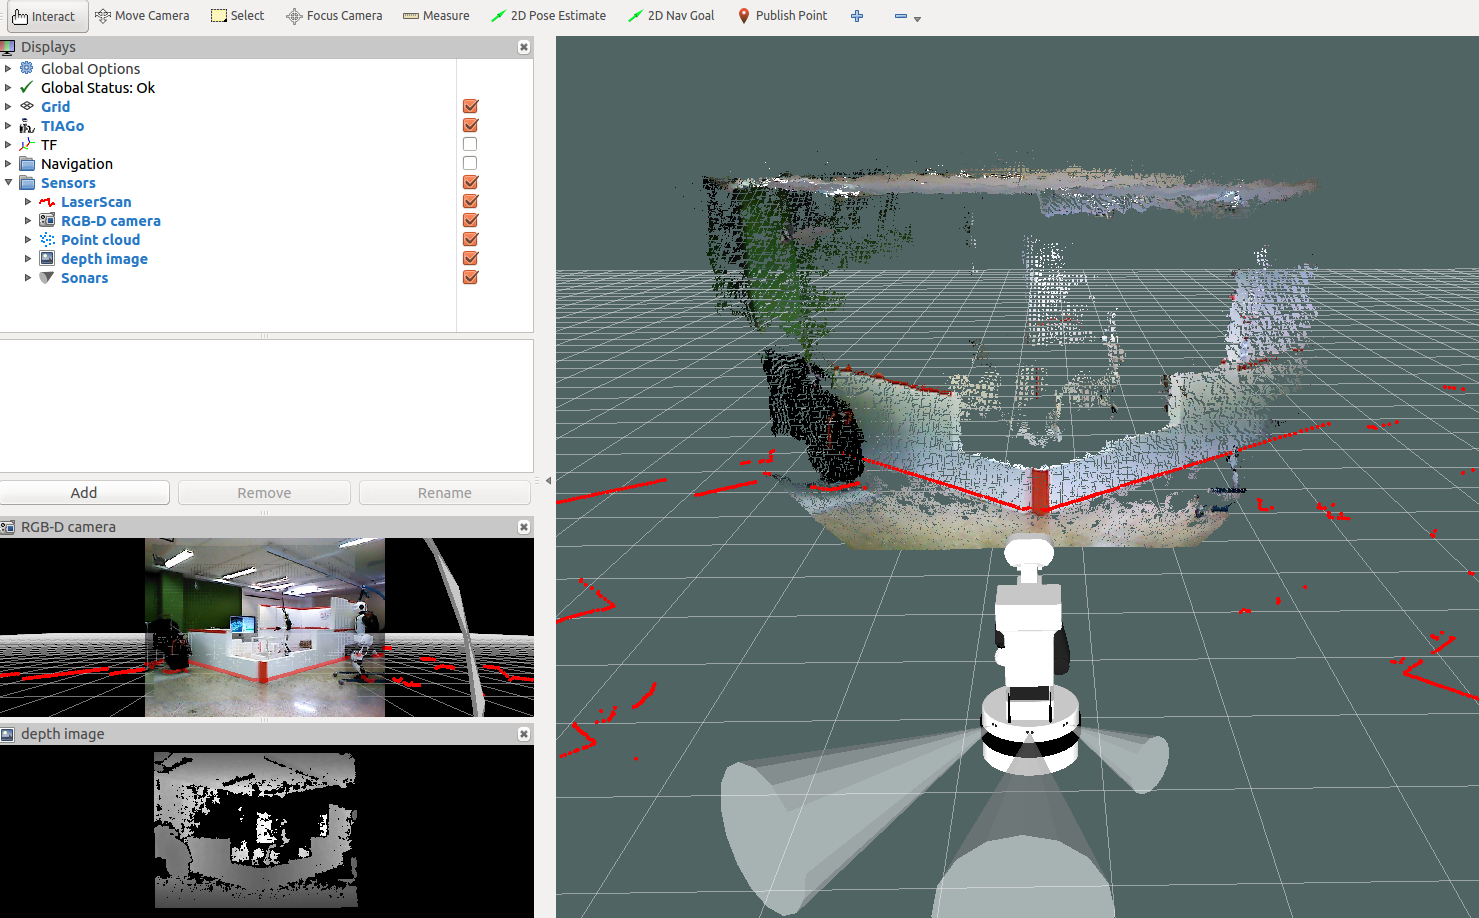
The image below shows how the robot’s RGB-D cameras.
Once in your Docker, execute the following command to install
ari_bringup:
1apt install pal-gallium-ari-bringup
Then start rviz:
1export ROS_MASTER_URI=http://ari-0c:11311
2rosrun rviz rviz -d `rospack find ari_bringup\`/config/ari.rviz
(do not forget to replace ari-0c with your own robot’s ID!)
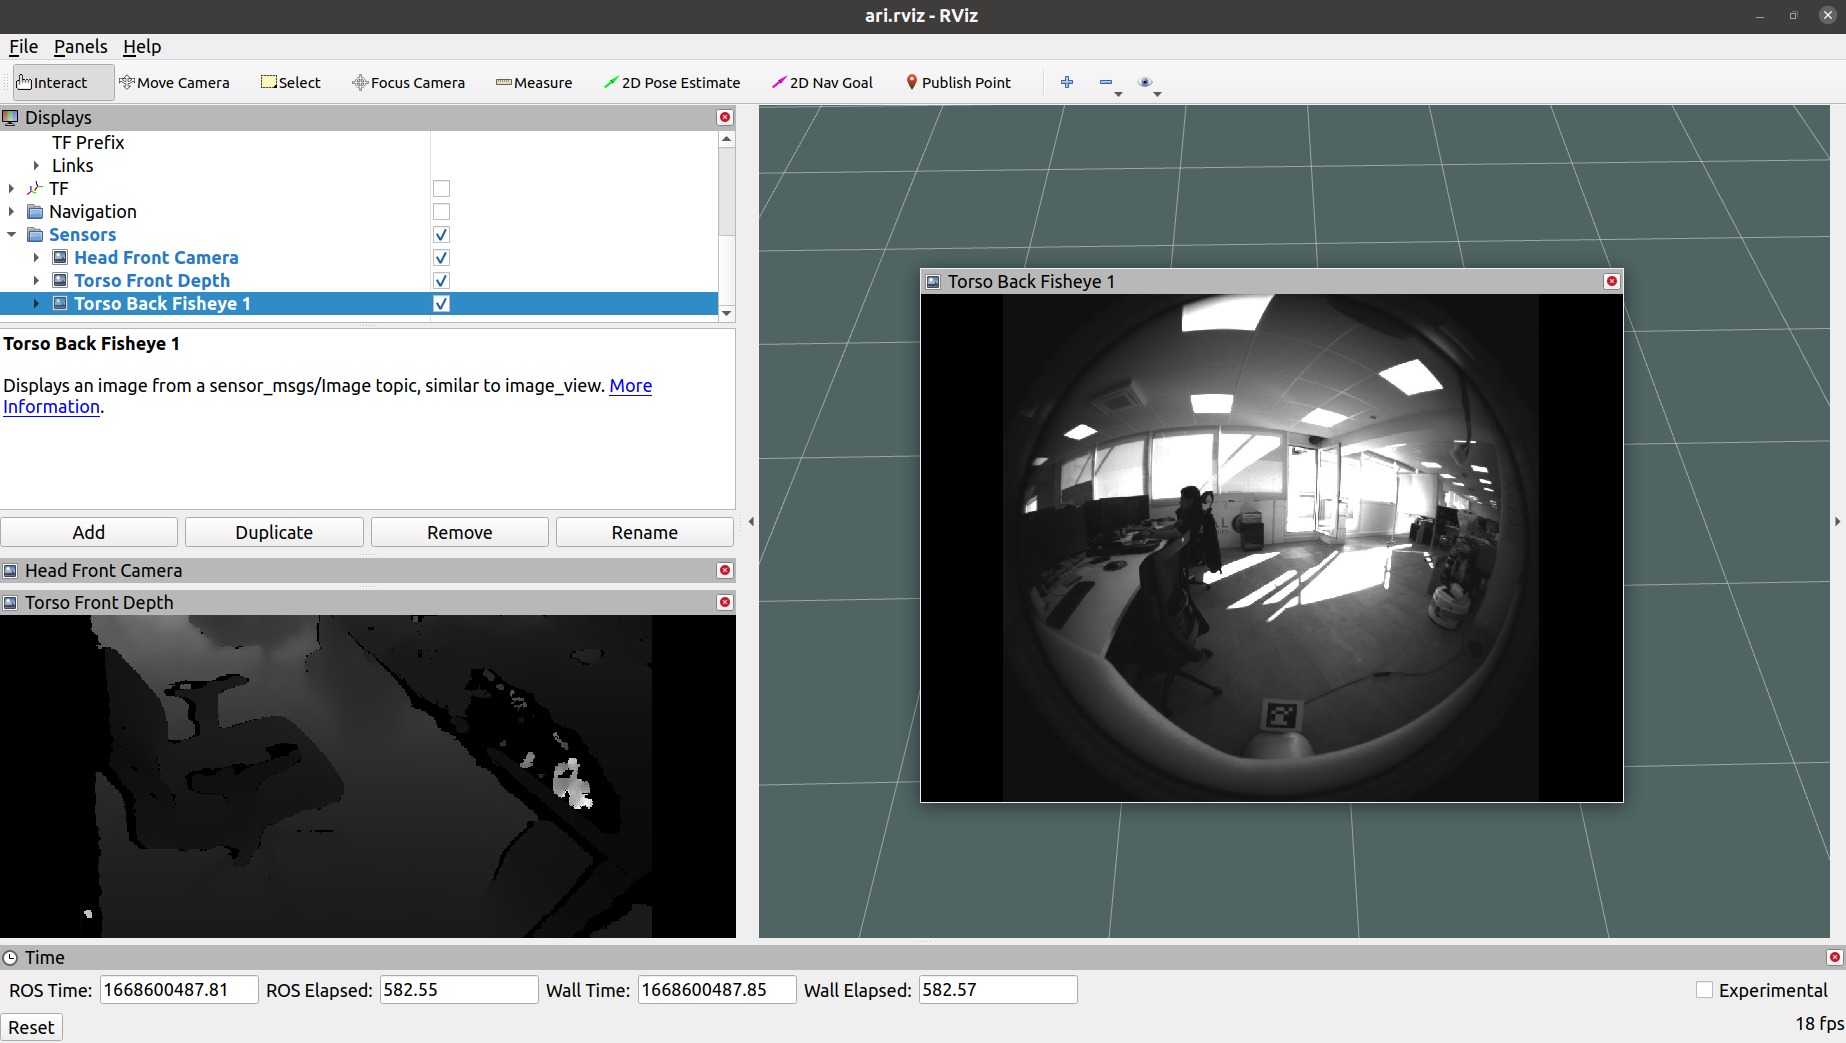
The image below shows how the torso front and back cameras are visualized in
rviz.
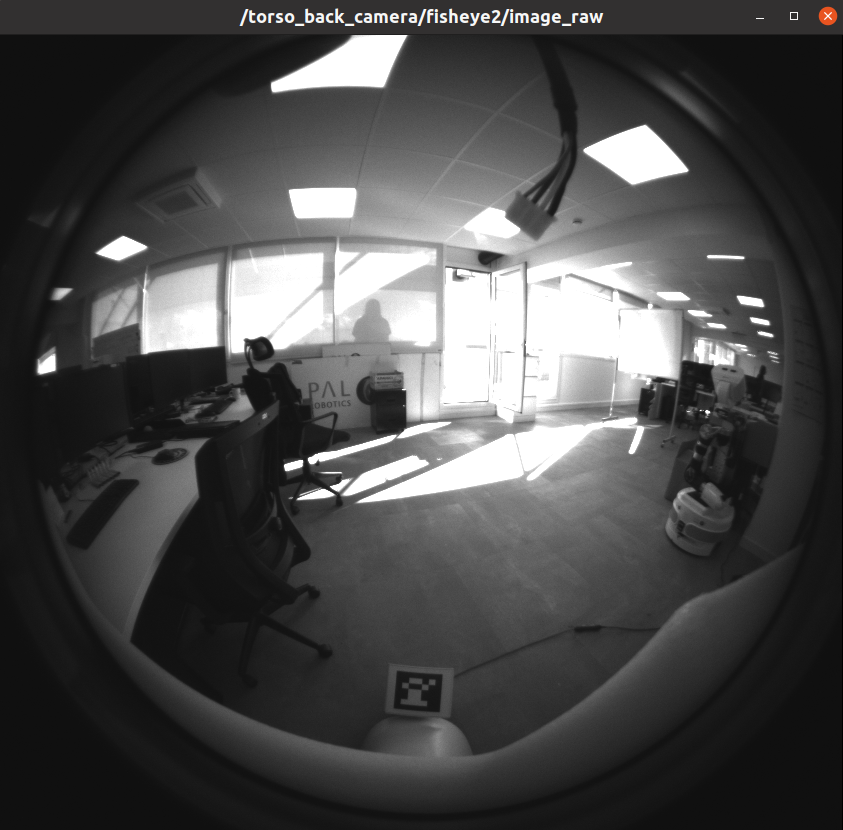
image_view visualization#
Run image_view tool to visualize the desired camera as follows:
1export ROS_MASTER_URI=http://<robot>-0c:11311
2rosrun image_view image_view image:=/torso_back_camera/fisheye2/image_raw _image_transport:=compressed
Note
Adapt the topic to your robot. Running rostopic list | grep camera is a
quick way of getting the list of available camera topics.
When visualizing images from an external computer through WiFi, it is recommended to use the compressed topic to reduce bandwidth and latency.
rqt_gui visualisation#
You can also use rqt_gui, a tool that allows incorporate multiple plugins
and thus, have a better understanding of the system. One such example is
rqt_human_radar (see ros4hri_tools), a plugin for rqt_gui, where
additional visualization tools for ROS4HRI can be combined.
To use rqt_gui, follow the next steps:
Run
rqt_gui:1export ROS_MASTER_URI=http://<robot>-0c:11311 2rosrun rqt_gui rqt_gui
In the top menu, select:
Select the topic of the camera you want to visualize. In the image below we are visualizing the /torso_back_camera/fisheye1/image_raw/*.

Accessing the microphones#
Please refer to Microphone array and audio recording to learn how to access the audio data.