Visual programming#
What is a Visual Programming webapp?#
Visual programming is a Web User Interface application that allows you to create and execute robot programs. The main advantage of Visual Programming is the user friendly interface. So, you can create programs with minimal technical skills.
To access the Visual Programming select the puzzle icon in the left menu bar of webGUI.
Interface#
Visual Programming webapp consists of a homepage with a list of previously created programs and a visual editor for creating and editing programs.
Homepage#
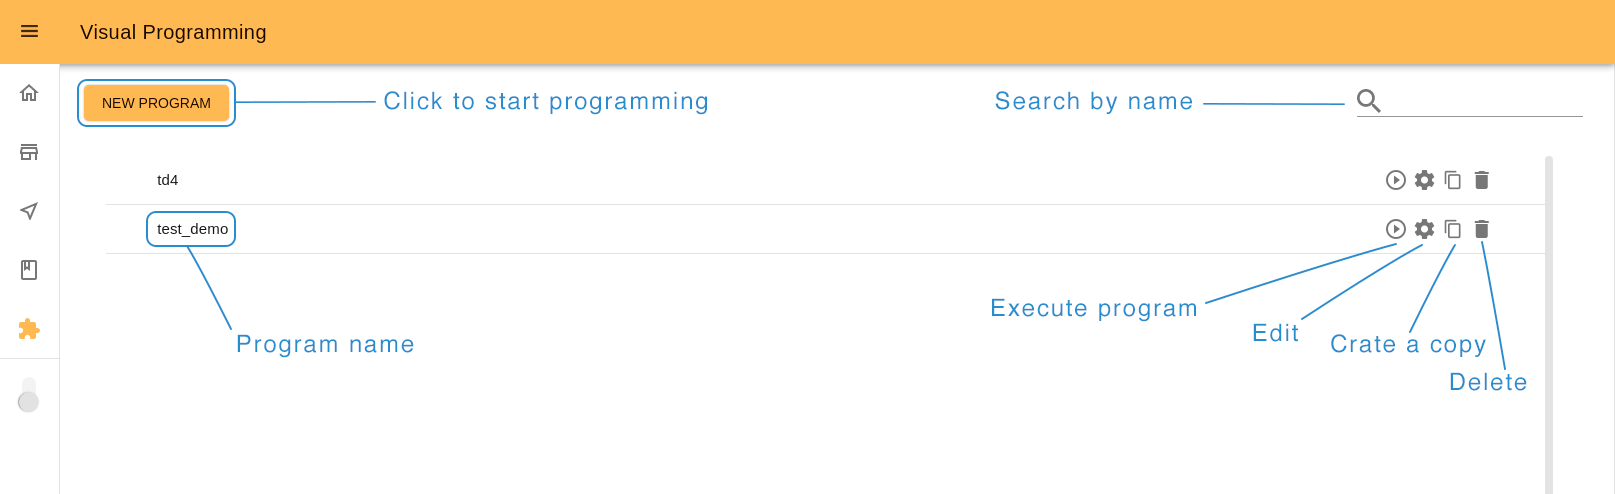
The homepage serves to store a list of all created programs, to manage them and to create new ones.
The interface of homepage has:
a button to create a new program,
a list of programs created earlier,
search engine (loupe icon) for quick navigation through the list.
Each program on the list has:
icon to start program execution.
icon to edit the program.
icon to create a copy of choosed program.
icon to remove the program.
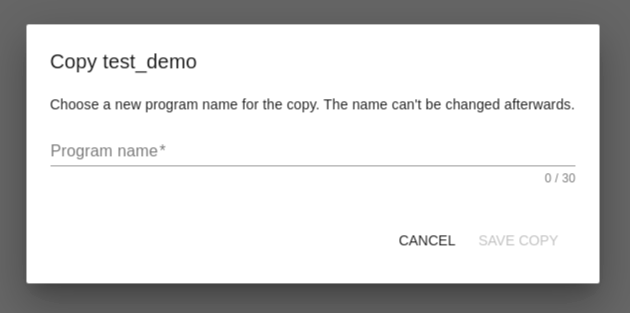
In case you clicked the Copy icon, the system will ask you to choose a new program name, because the program names should not be repeated. Be careful when choosing the name, as it cannot be changed later.
If you click the New Program button or the Edit icon, you will be redirected to the visual editor.
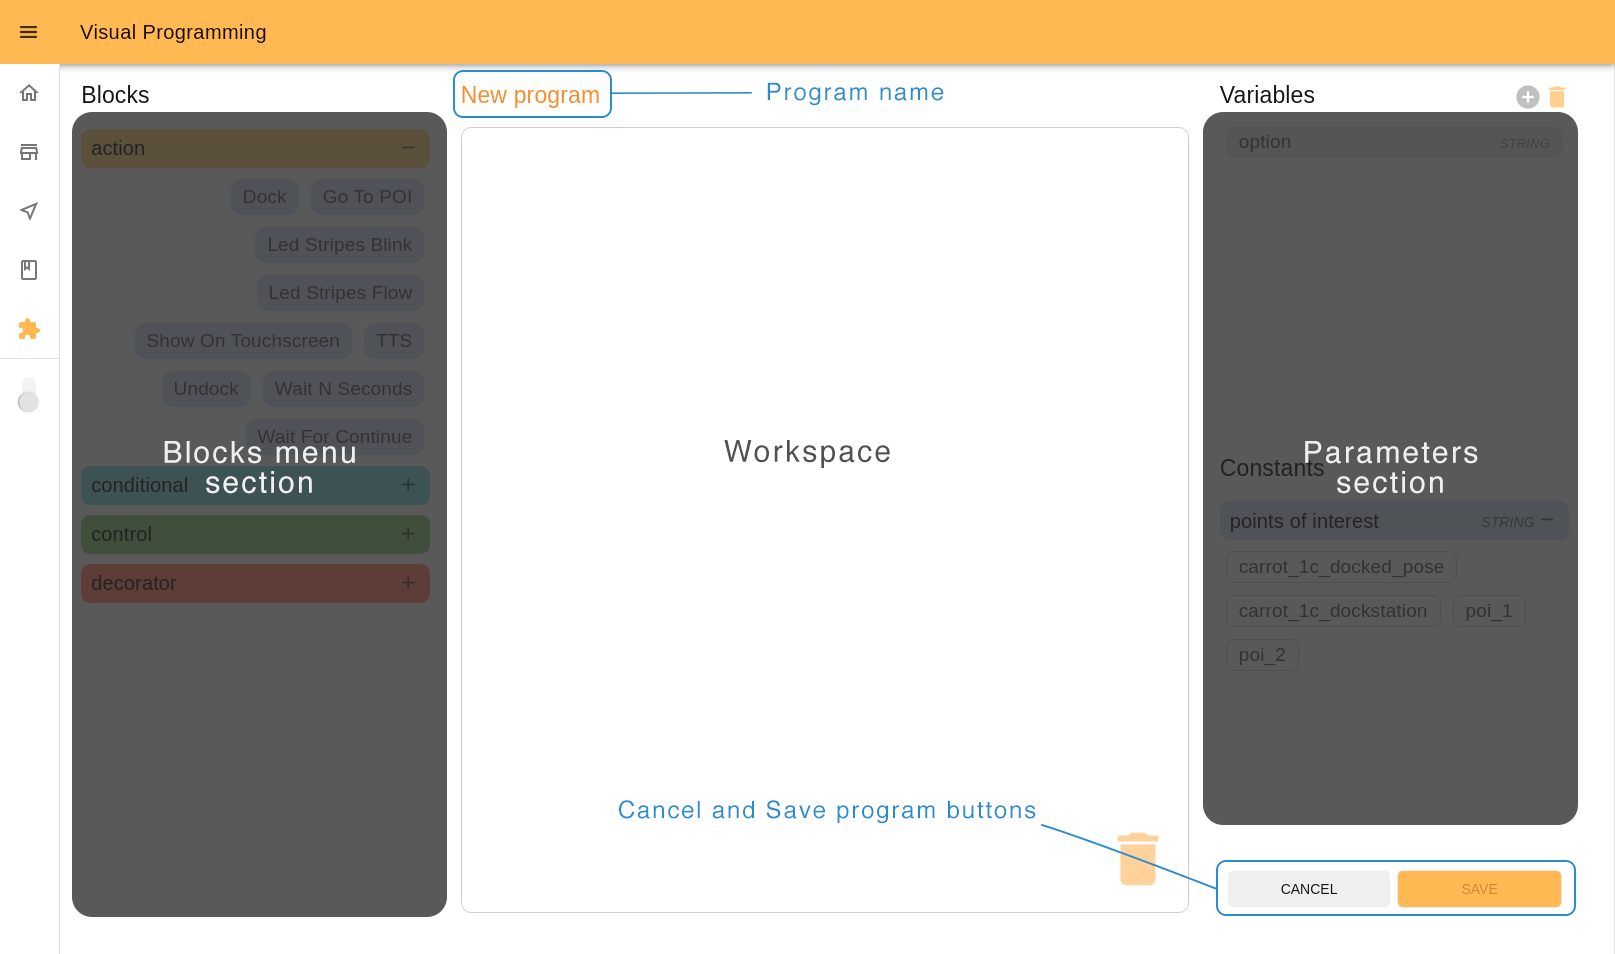
Editor#
The visual editor is the main tool of this application. The interface consists of three sections: two columns with interactive blocks on the sides and a Workspace in the center.
Blocks#
Note: some blocks may be not available or can be different depending on the model of robot.
A program is a set of instructions that will be executed by the robot.
A block is an instruction in the program. There are four types of blocks used:
actions, which represent specific actions for the robot to do.
conditionals, which evaluate when a step should be executed.
controls, which allow modifications to the normal order of instructions and .
decorators, which modify how other instructions are performed, for example repeating them.
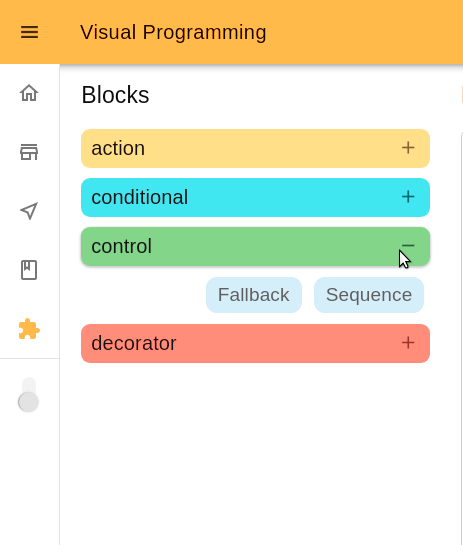
Blocks section is a menu of program blocks grouped by functions. By clicking on the group headers (with plus/minus icon), you can open or close the tab with the blocks in this group.
Workspace#
The Workspace is an interactive area where you can create programs by adding blocks in the order of their execution. Programs are executed in sequential order, starting at the top.
Add a block to the Workspace
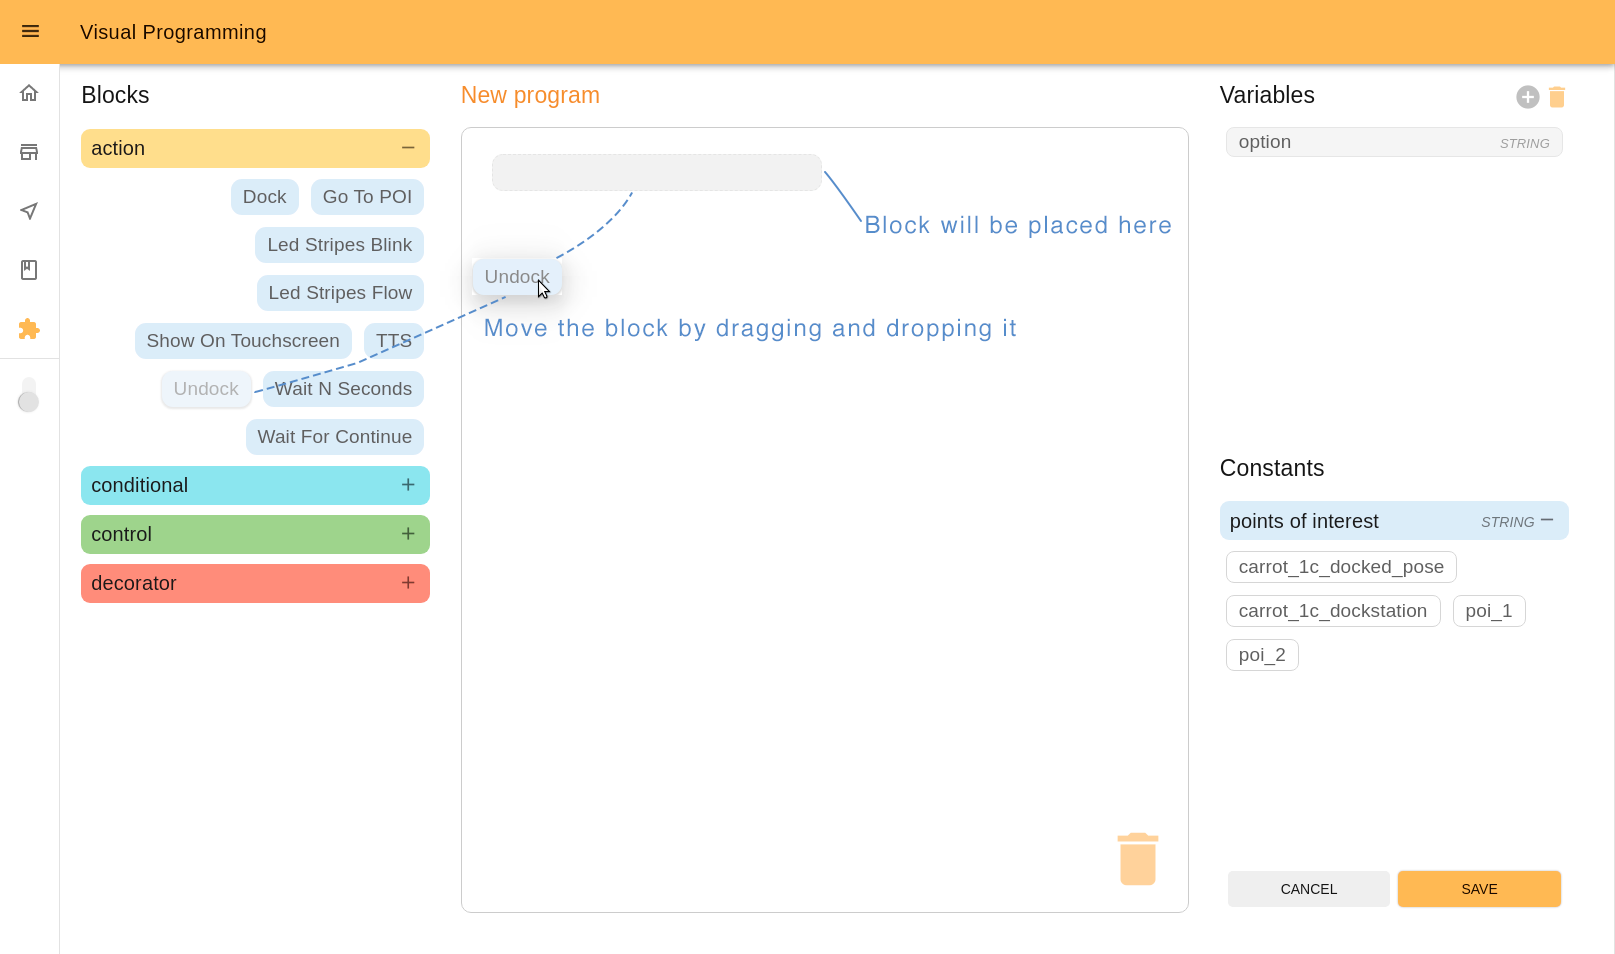
To add a block to the Workspace, drag it with the cursor or double-click on it. If you drag the block, the shadow on the Workspace will indicate where you can place it. In the case of double clicking on it, the block will be automatically added to the end of the queue.
Move blocks inside the Workspace: Children blocks
To move blocks inside the Workspace drag it to the desired position.
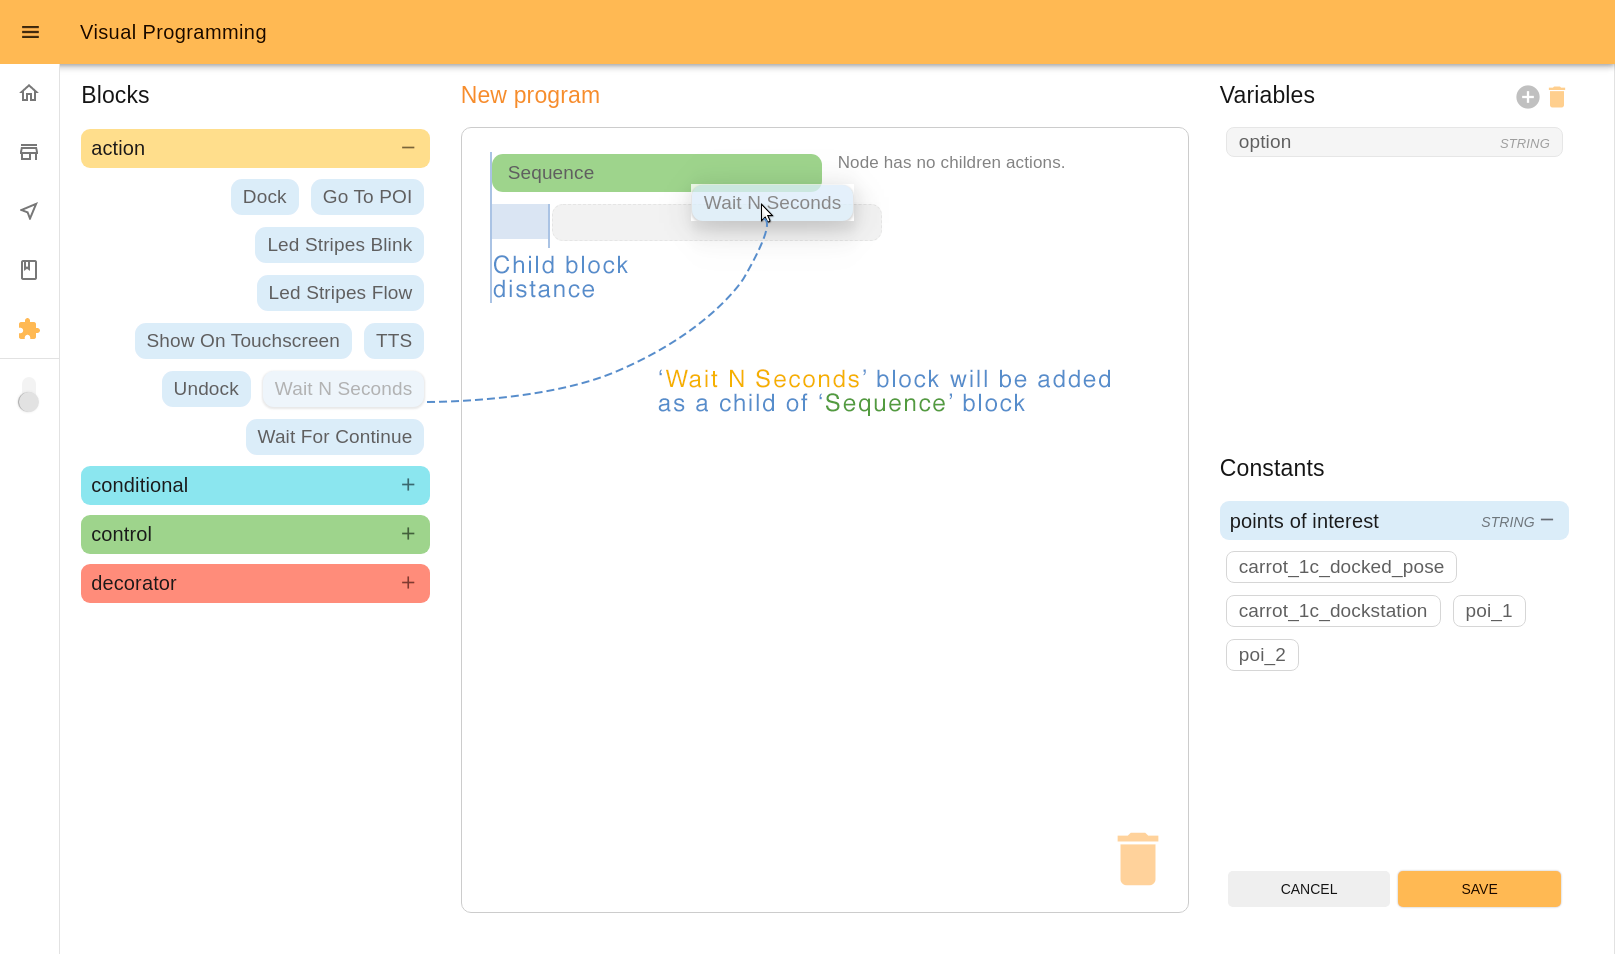
Certain types of blocks may have children blocks, as indicated by the indentation. In the case of Conditionals and Controls children blocks will be executed or not according to the parent’s configuration. In the case of Decorators children blocks will see their behavior modified accordingly.
To find further information see the Blocks library.
When you are dragging a block to the Workspace or inside it, look at the shadow that indicates you where you can move the block: under it, below it or as its child.
You can edit relations between parent and child blocks any moment during the editing process. To move the block, click an arrow icon on the left of it.
Delete blocks
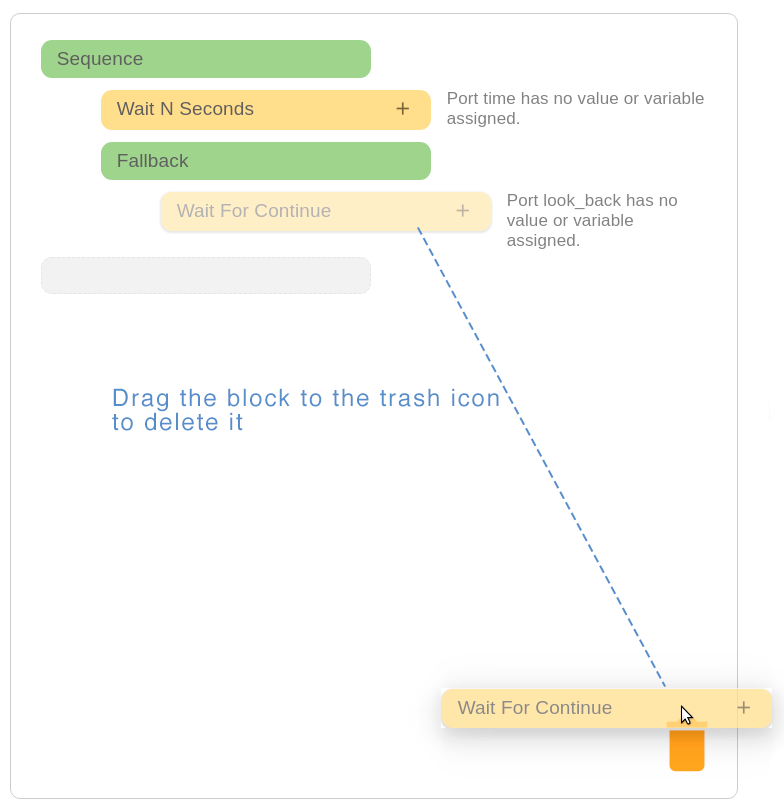
To delete any block from the Workspace, drag it to the trash icon and drop it over the icon.
Blocks with ports
Blocks may have ports. It allows adding variables or constants from the right menu. Those ports represent parameters that set up how the action works or return values.
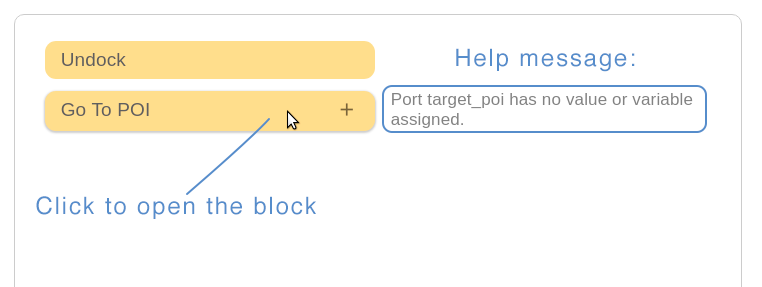
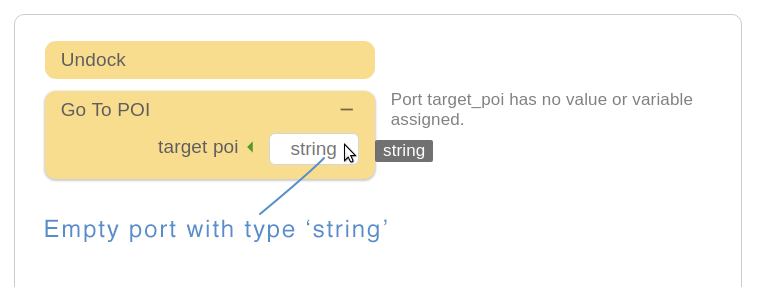
Also near the block you can see a short message that indicates what you should do. Grey text means that it is “a recommendation”, red text - it is a critical error you must resolve. Click the block with the plus icon to open it.
Ports are directional, that is a port is either read for Input ports, written to for output ports or both for in-out ports. Green arrows (or one arrow) between port name and port input indicate the direction of the port.
Ports also have a type, which means that they only accept certain types of data, for example text, or numbers. If you hover the cursor over the port you will see a tooltip with the port type.
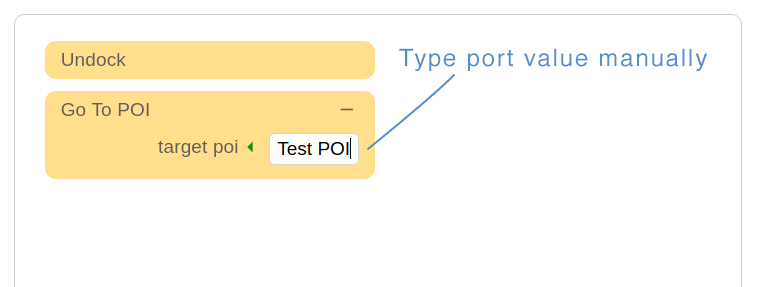
There are different ways to add a value to the port. First, is typing it manually.
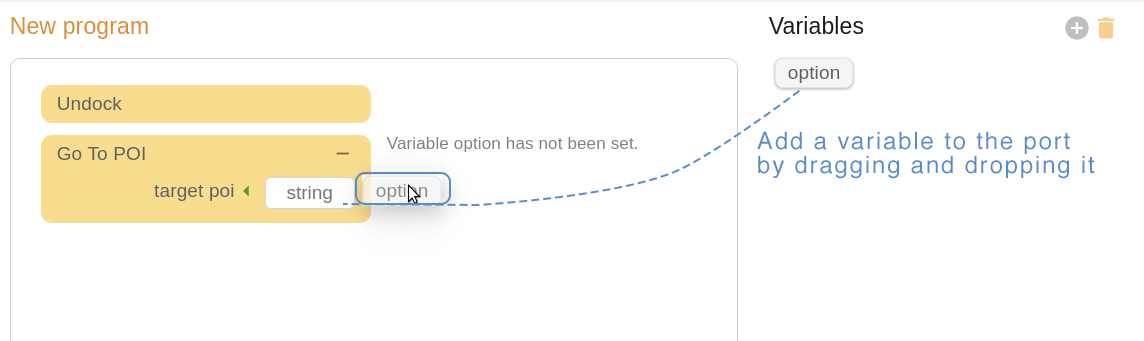
Second, by adding a variable from the right menu.
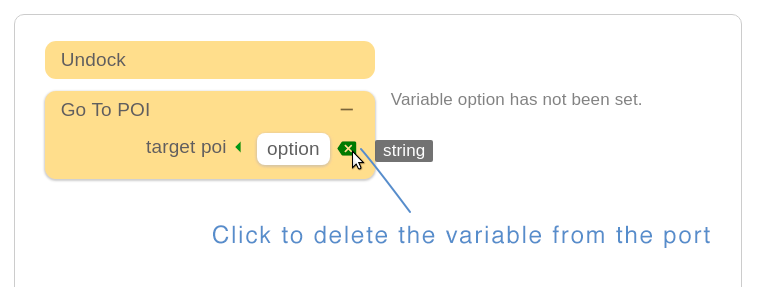
To delete the added variable from the port, click the X icon near ir.
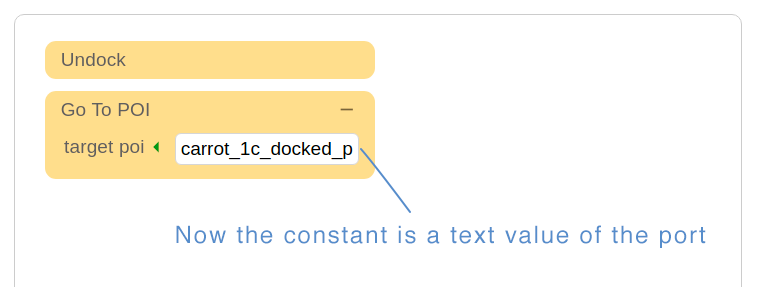
The third way to add value is by using constants. Drag and drop the constant you chose and it will convert to the text value of the port.
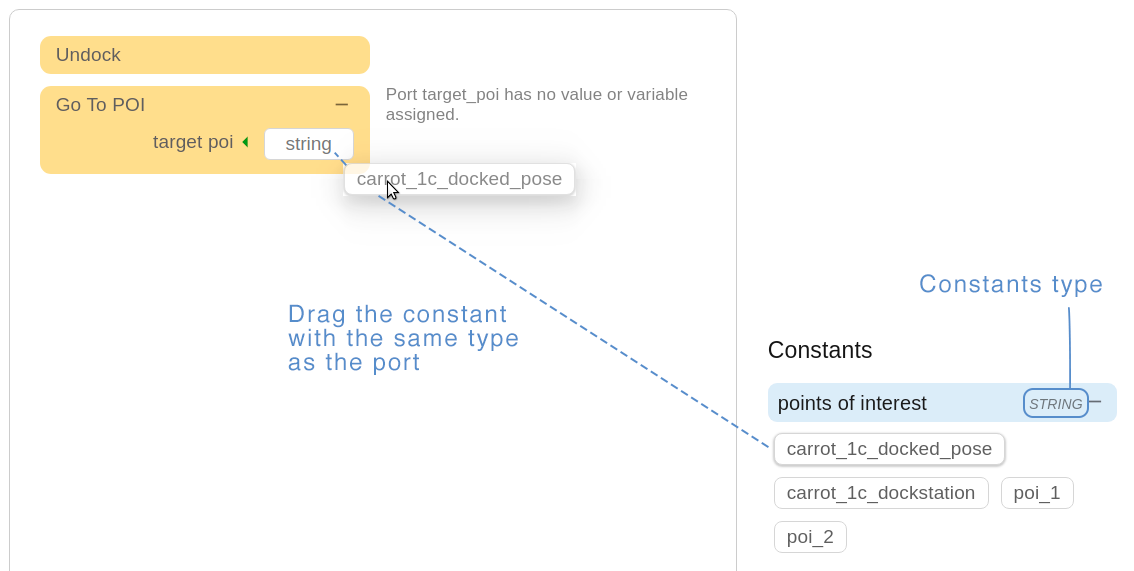
The result:
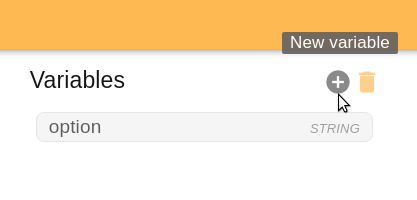
Variables#
Variables are used to store information for the program. Usually they will be used first in an output port to store the result of an action and then used in input ports to be read. Variables are also typed.
To create a new variable, click the Plus icon.
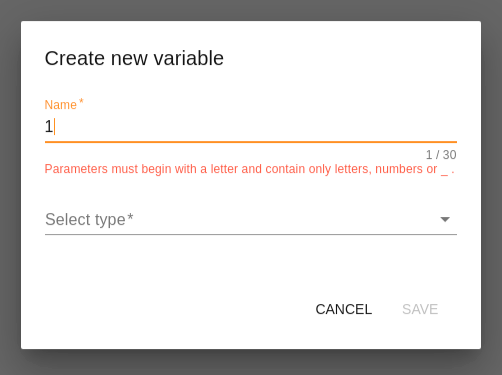
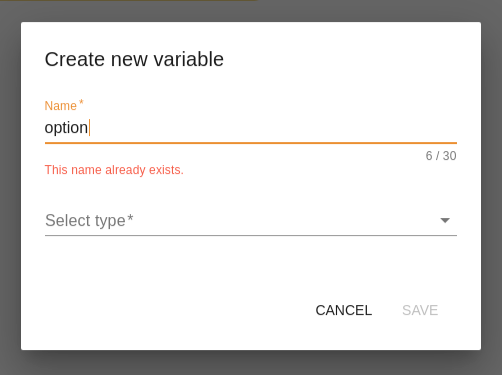
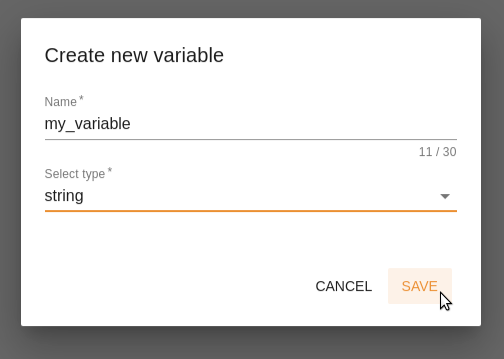
You will open a popup window where you should fill the Name and Type fields.
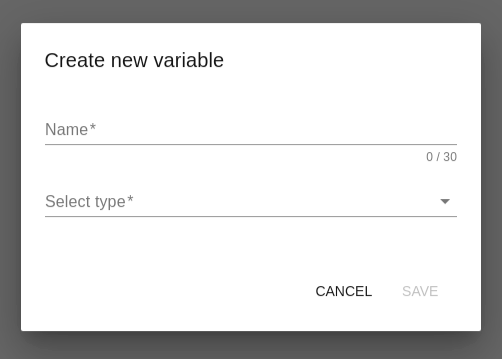
The name of the variable must start with a letter and can consist of only letters, numbers and _ symbol. Also it must not be repeated. In each case you will see an error message.
Click Save to add a new variable to the list.
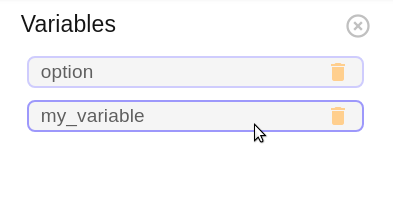
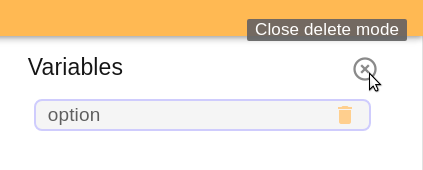
To delete a variable, active Delete mode by clicking the Trash icon.
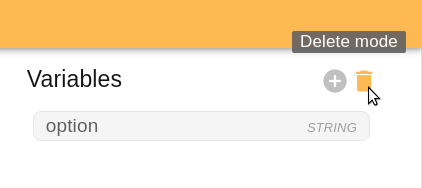
Choose the variable you want to delete.
Confirm your choice.
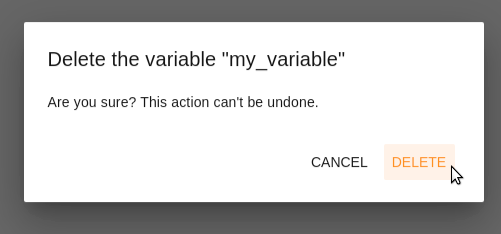
Confirm your choice.
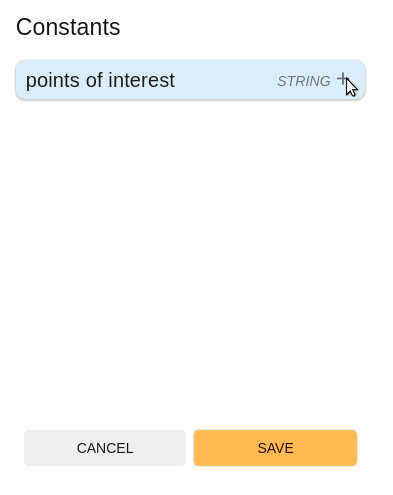
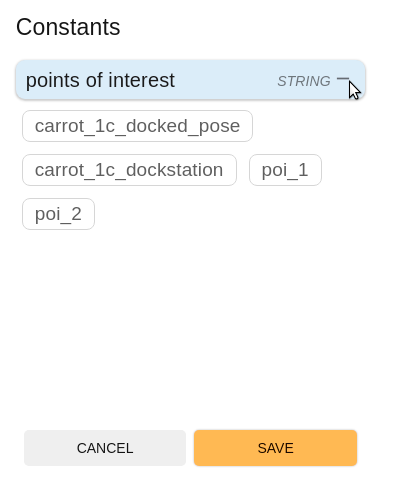
Constants#
Constants are used to list values that may be of interest for the programmer, for example, existing POIs on the system.
Like the block menu, constants are grouped by type. In the example, we only have
string constants. If there is a lot, it is convenient to use opening and
closing tabs.
How to create a program?#
Programming process#
As it mentioned above, the program is a set of instructions that will be executed by the robot. Programs are executed in sequential order, starting at the top. A block is an instruction in the program. Check the Blocks library before starting to know more which functions each block has.
So you should add blocks to the Workspace in the desired order and assign corresponding value to the block ports using variables or constants. Pay attention to the prompts on the Workspace. They indicate next steps or important errors.
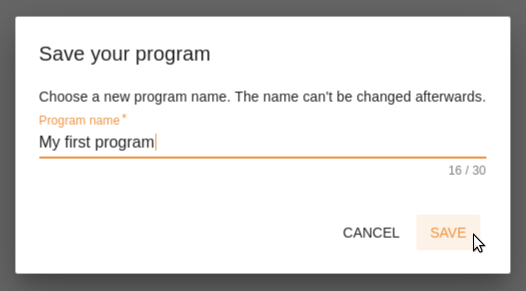
Save program#
To leave the edition process without storing changes, click the CANCEL button in the lower right corner of the page.
To store your progress, click the SAVE button and choose a name for your program. The name cannot be changed afterwards.
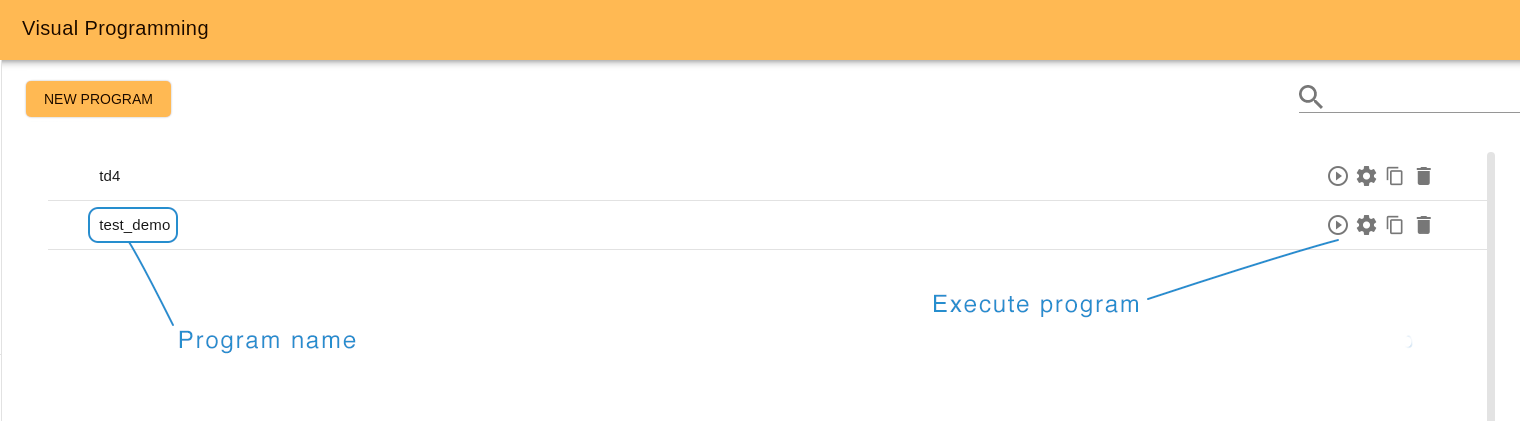
How to execute a program?#
To execute the program go to the Visual Programming homepage and click the Play icon of the chosen program.
Blocks library#
Note: some blocks may be not available or can be different depending on the model of robot.
Actions#
Actions are executed by the robot and can either Succeed or Fail.

Different actions available

The dock action makes the robot connect to a dock station in front of it.

The Undock action will disconnect the robot from a dock station.
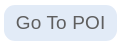
The Go To POI action instructs the robot to navigate to a POI in the current map. The action will SUCCEED when the robot reaches the target POI, if for any reason the robot is unable to reach the POI the action will FAIL.
target poi [String Input Port]: Name of the POI to navigate to.
The Led Stripes Blink action instructs the robot to blink the leds in the configured pattern for some time, switching back and forth between two colors.
effect duration [float Input Port]: Total duration of the effect.
first color [string Input Port]: Color in format R,G,B,A 255 (i.e. white is 255,255,255,255).
first color duration [float Input Port]: Duration of the first color.
second color [string Input Port]: Color in format R,G,B,A 255 (i.e. white is 255,255,255,255).
second color duration [float Input Port]: Duration of the second color.

The Show On Touchscreen action shows a list of buttons on the small TFT screen on the back of the TIAGo base, and then waits for a user to press one of the buttons.
options [string Input Port]: Comma-separated list of buttons to show on the TFT.
selected option [string Output Port]: The option selected by the user will be stored in this port.

The TTS action will make the robot speak a sentence.
text [string Input Port]: Text to be read by the robot.
lang [string Input Port]: Language code in which the robot should speak (i.e. en_GB for british english).
The Wait N Seconds action will halt the execution of the program for the configured amount of time.
time [unsigned int Input Port]: Number of seconds the robot should wait.
The Wait For Continue action will stop the robot until an external signal is sent.
look back [float Input Port]: if a signal was sent less than look back seconds ago the action will consider it valid and continue.
The Wait For Path action will stop the robot in place and wait until a path is available to the configured POI.
target poi [string Input Port]: POI to which the robot will try to trace a path.
Conditionals#
Conditionals are used to redirect the program flow according to different conditions. Conditionals must be used in chains that start with an IF, have zero or more ELSE IFs and may finish with an ELSE block.

If the values of both ports match execute the children of this block.
value A [any Input Port]: A value to compare, it may be of any type, but both ports must have the same type.
value B [any Input Port]: B value to compare, it may be of any type, but both ports must have the same type.
If the values of both ports match execute the children of this block.
value A [any Input Port]: A value to compare, it may be of any type, but both ports must have the same type.
value B [any Input Port]: B value to compare, it may be of any type, but both ports must have the same type.

In case all the previous IF and ELSE IF blocks in the chain have failed, execute this block’s children.
Control#
Controls modify the behavior of the program sequence.


Children of a Fallback block will be executed in order until one of them SUCCEEDS, and then it will SUCCEED. If no block SUCCEEDS then it will FAIL.
A Sequence block encapsulates a set of blocks, executing them in order until one of them FAILS, in which case it will FAIL. If all of them SUCCEED it will SUCCEED as well.
Decorator#
Decorators modify how blocks behave on success and failure situations.


A Repeat block will repeat its children blocks in order a number of times, as long as they SUCCEED.
num cycles [integer Input Port]: Number of times to repeat the children blocks.

A Retry Until Successful block will keep executing its children actions in order until all of them SUCCEED, up to the configured number of times.
num attempts [integer Input Port]: Maximum number of tries, can be set to 0 to retry indefinitely.