ARI Motion Builder#
Overview#
The Motion Builder is a webapp that allows you to create prerecorded motions and execute them.
The features of Motion Builder tool include:
Creating, Editing, Deleting Motions
Adding, Editing and Deleting keyframes
Positioning the robot in any keyframe
Managing joints and groups used for the motion
Executing the motion at different speeds for testing purposes
Store the motion
The interface of Motion Builder consists of a list of the motions and a user-friendly editor, where you can create, edit and test motions without special technical skills.
Start page interface#
The start page of Motion Builder serves not only to display stored motions but also to manage them. From here you can execute any motion, create copy and edit it, edit motion, delete it. Functions “Edit” and “Delete” are active only for motions created by the user.
Motions that have a star icon are default motions and can’t be edited or deleted. Click “Copy and edit icon” to use them as an example or a part of a new motion.
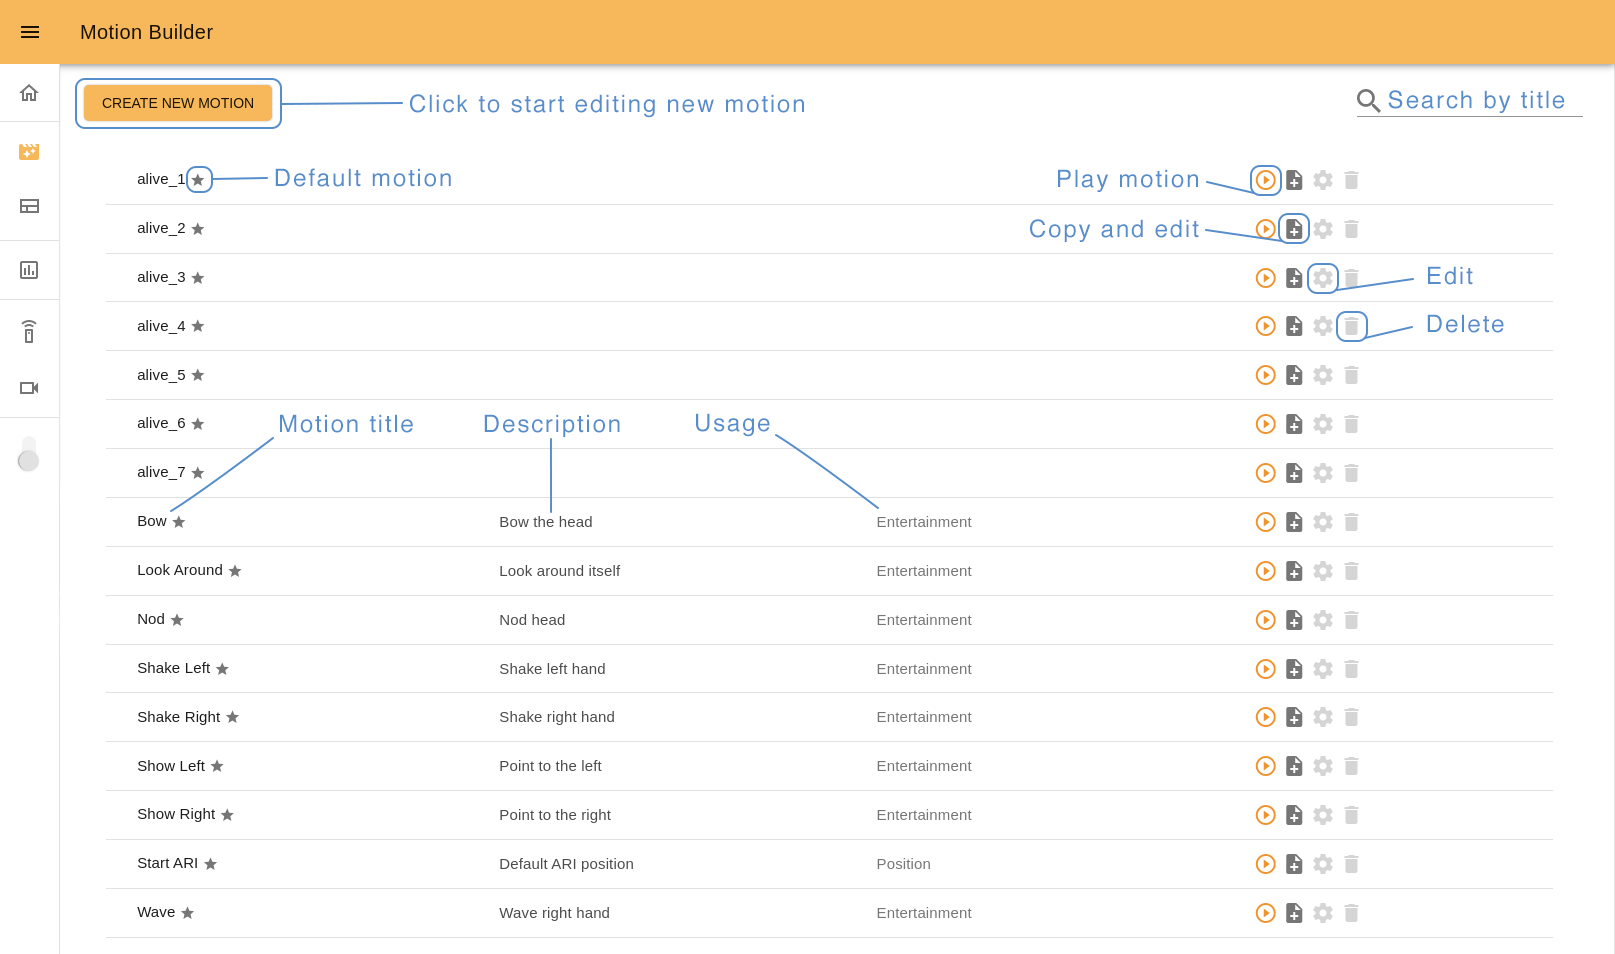
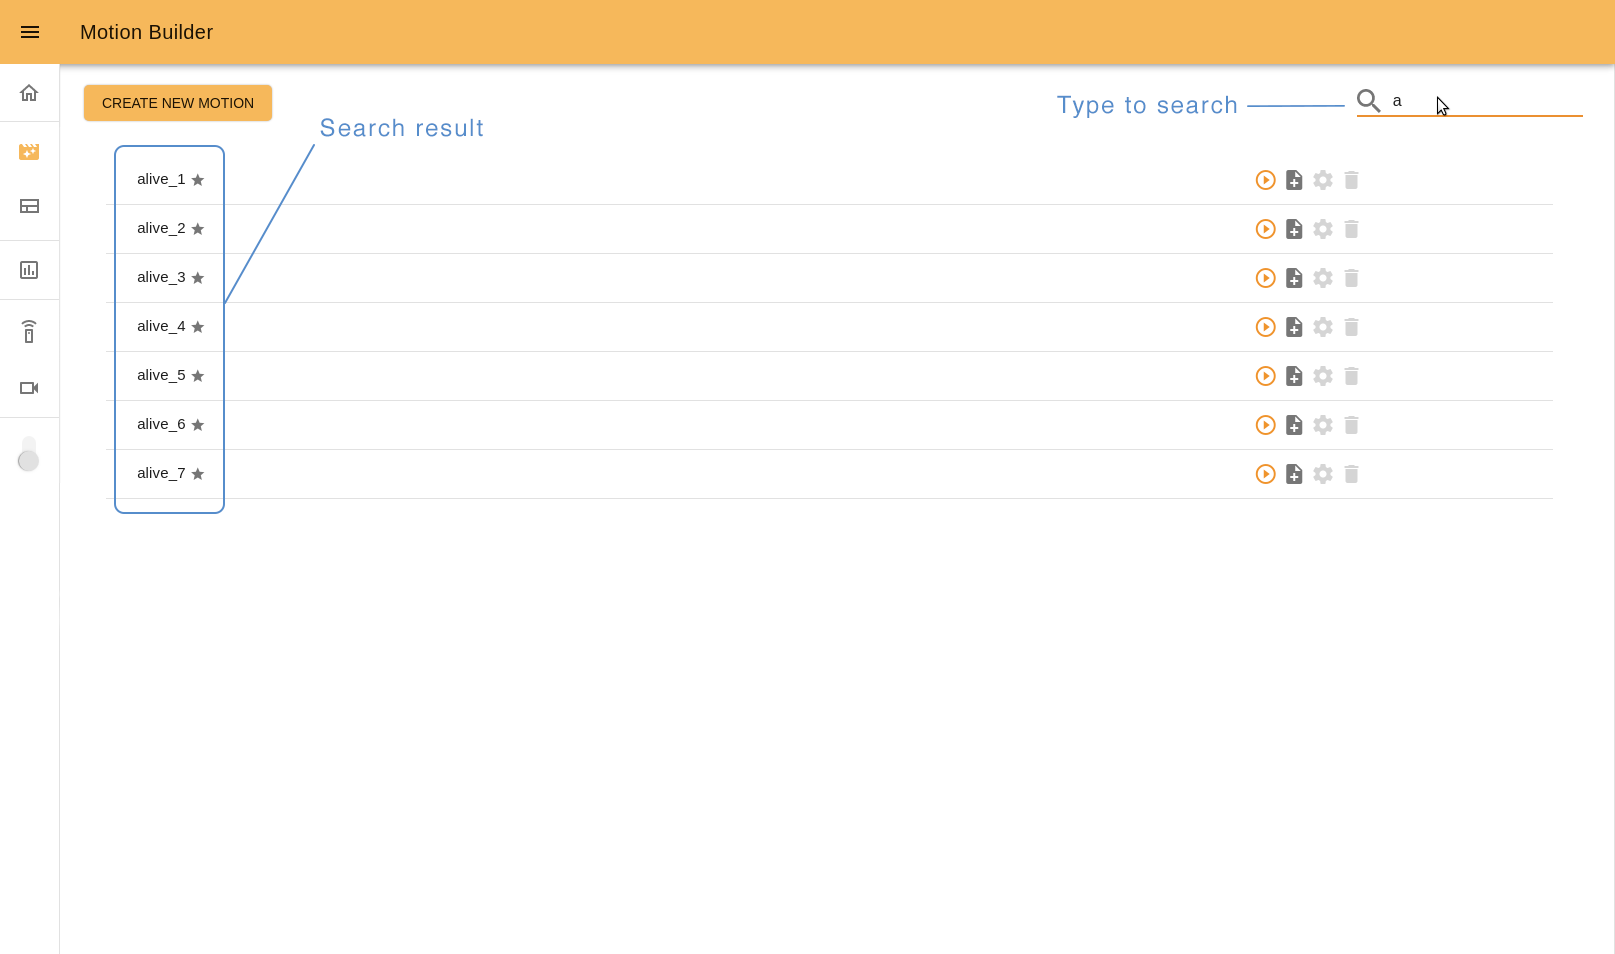
Use Search input (loupe icon) to browse the list easier. Start type the name of the motion you are looking for and you will see the corresponding results.
To open Motion Builder editor click “Create new motion” button, “Copy and edit” or “Edit” icons.
It’s important to know before starting#
Each movement consists of a group of robot motors poses (keyframes) that the user has to define and capture.
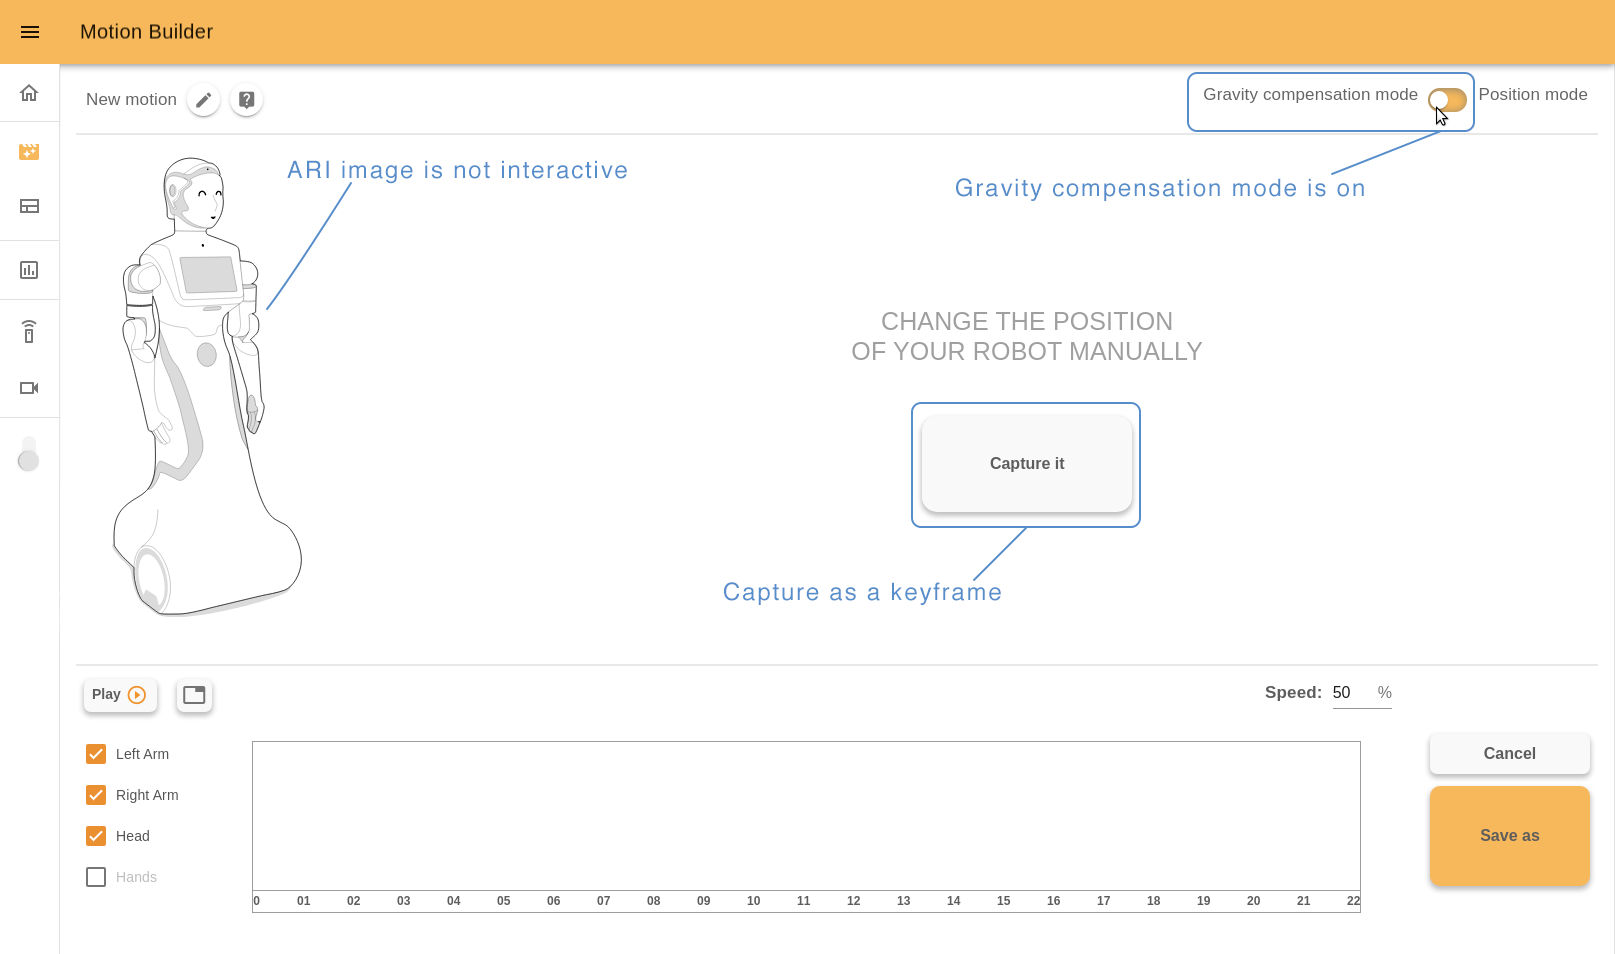
The first you need to do is to position the robot in the desired keyframe. There are two ways to do it: by positioning the robot manually (Gravity compensation mode - optional package) or by using online Editor tools (Position mode).
In Gravity compensation mode the robot doesn’t have a motor control. You can freely fix the position of the robot’s motors (head, arms and hands) by moving them manually. In Position mode you can control the robot position by using the online tools: sliders and joystick. You can switch between different control modes instantly.
So to create a whole movement, capture the robot’s keyframes in the desired order.
Editor interface#
Let’s see what the interface Motion Builder has and how to interact with it.
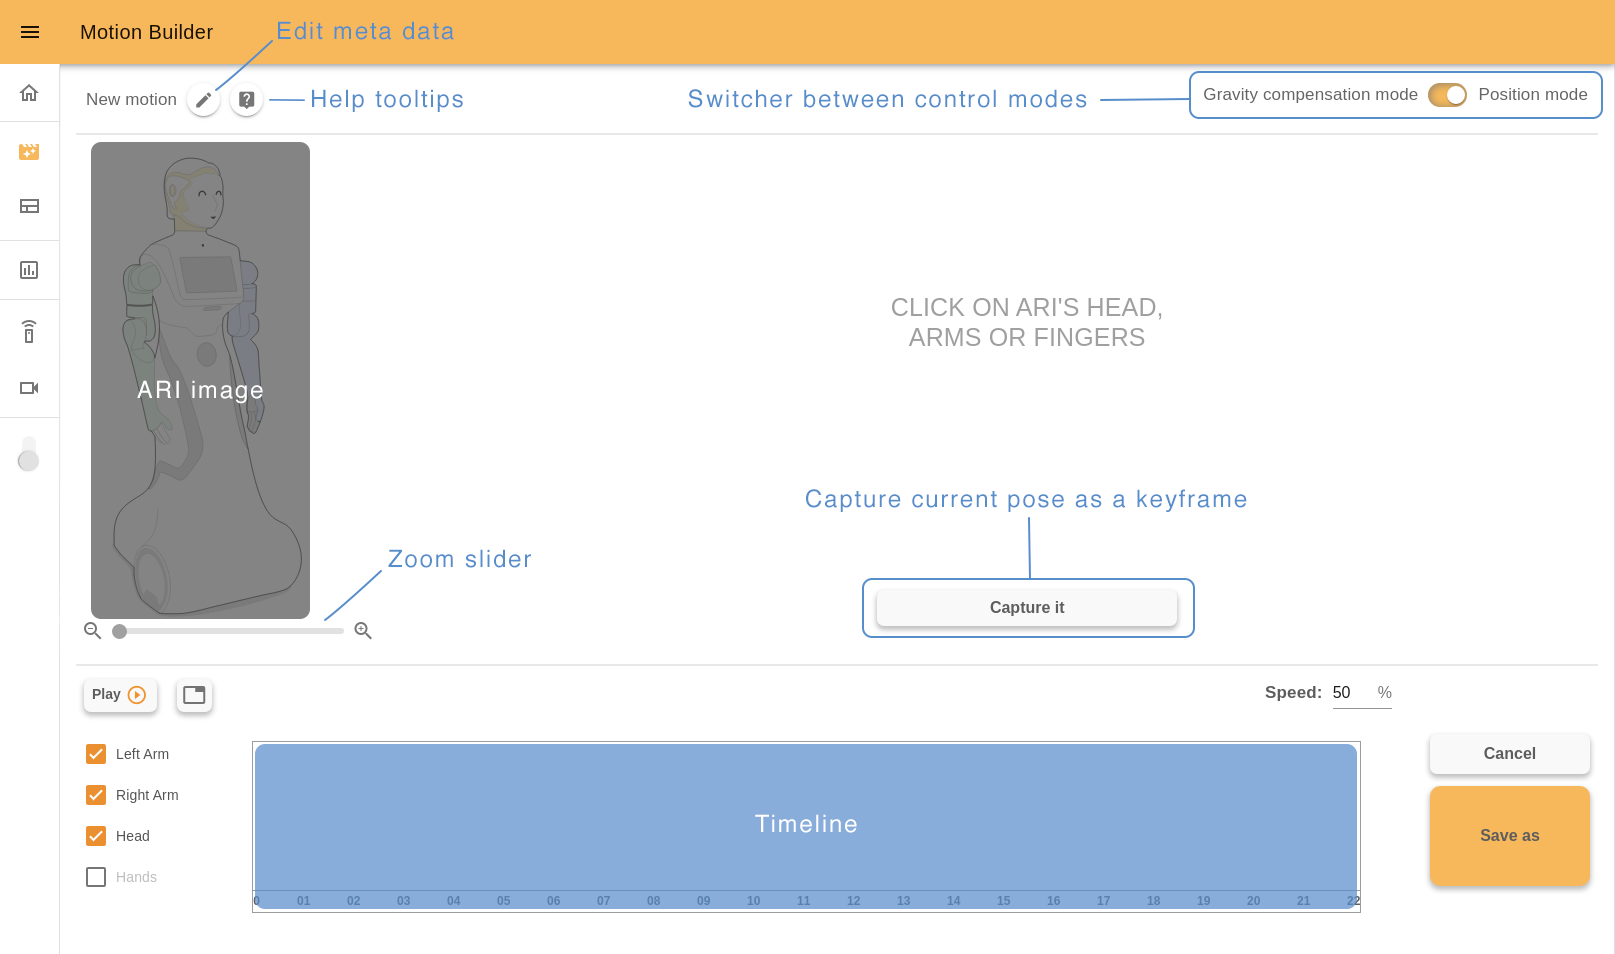
On the left top of the page there is a current motion name, “Edit meta” button and “Help mode” button.
Edit meta popup#
Click the “Edit meta” button to set meta data of your motion: required ROS name, title, short description, and usage. This info is displayed on the Motion Builder start page (normally the ROS name is not shown but if a motion title wasn’t set previously, ROS name is used instead of it).
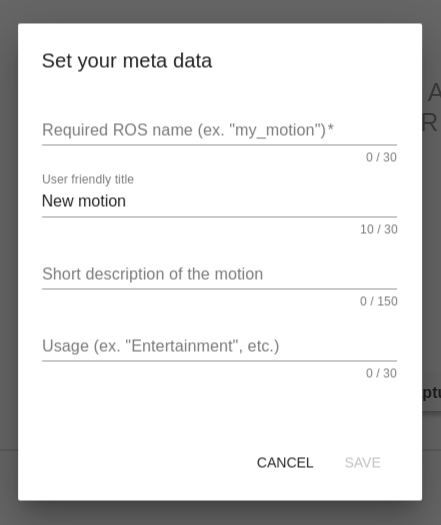
ROS name is a required field. It should be a unique word that describes the motions, starts with a letter and consists of the letters, numbers and _. It’s not allowed to change it after saving a new motion. Examples, “nod”, “shake_1”, “shake_2”, etc.
User friendly title should be a word or short phrase that helps you quickly understand what the motion does. It’s not a required field but it’s a good practise to fill it as well. Examples, “Nod”, “Shake Left”, “Shake Right”, etc.
In a short description field, you can describe some important details of the motion to distinguish it easily from the others. Examples, “Nod head”, “Shake right hand”, “Shake left hand”, etc.
In a usage field define the main usage of the motion. It is also a good practise to fill it because in the Command desks webapp (“Motions” desk), you will see all your motions divided precisely by Usage names. Examples, “Entertainment”, “Greeting”, “Dance”, etc.
Help tooltips#
“Help mode” button shows/hides help tooltips on the screen. If you click this button you will see blue icons with question signs. Hover the cursor over any icon to read a tip about Motion Builder usage.
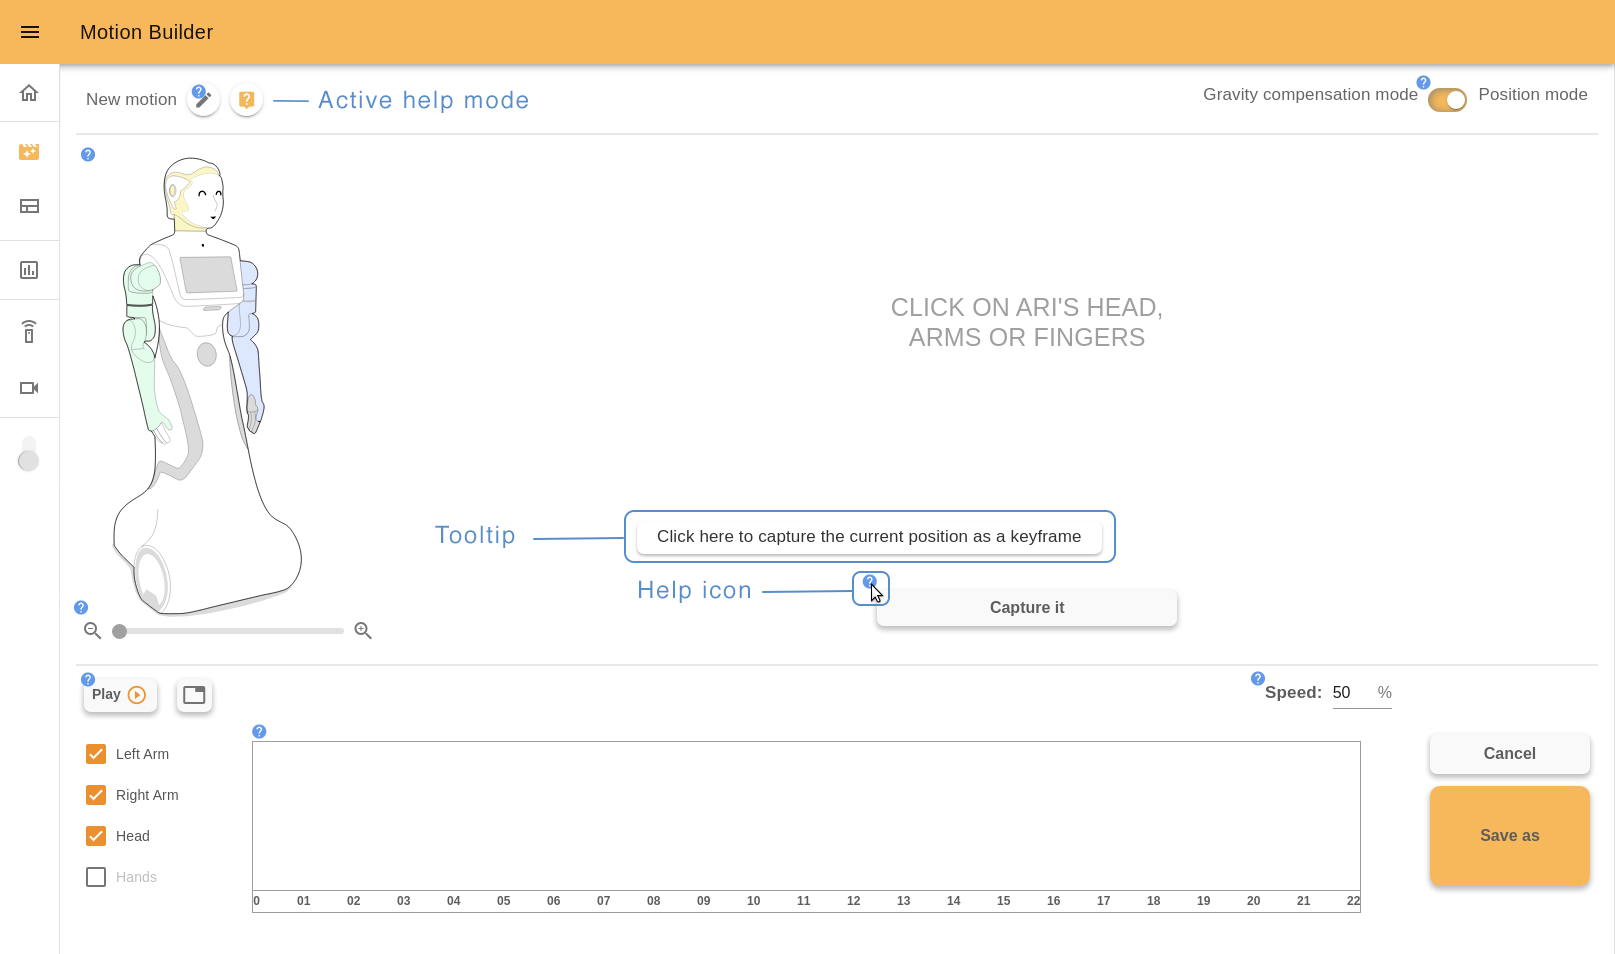
Position mode#
On the right top of the page there is a switcher between different control modes. You can use it any moment during the editing process.
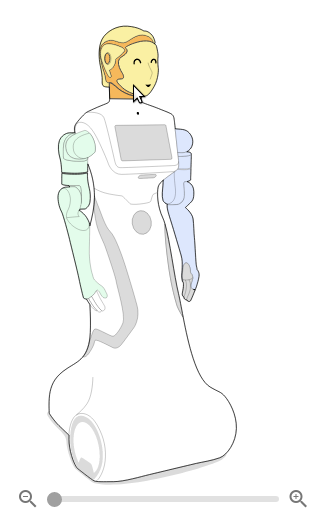
When the Position mode is active, you can interact with the ARI image and choose the part of the robot to control. Use a zoom slider under it to change the image size.
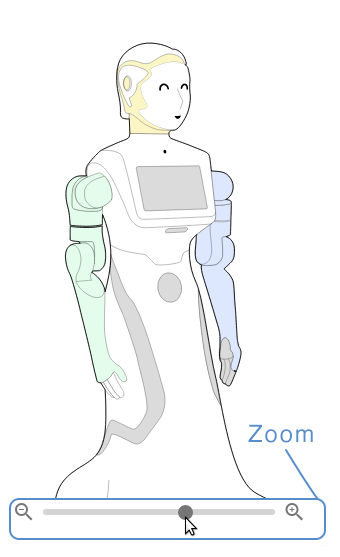
The painted parts are available to choose. For example, click ARI’s head to control it.
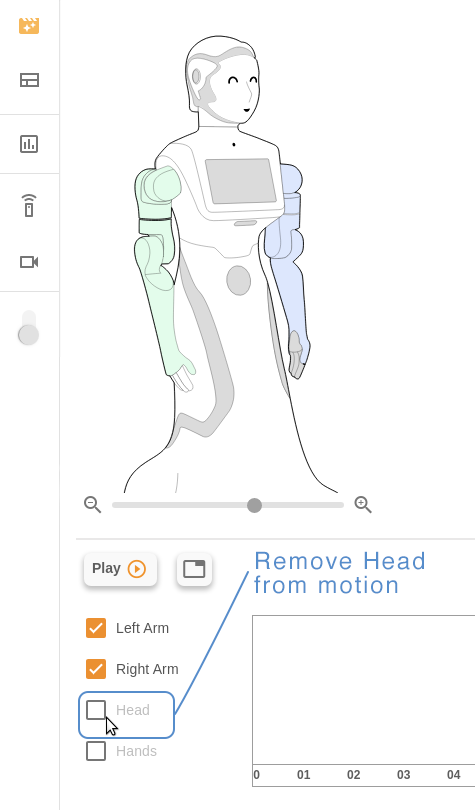
You also can manage joints and groups used for motion. Check the box with joints names on the bottom left of the page to add or remove it. In the example below we removed ARI’s head from the motion and now it’s not painted on the interactive image.
Joystick#
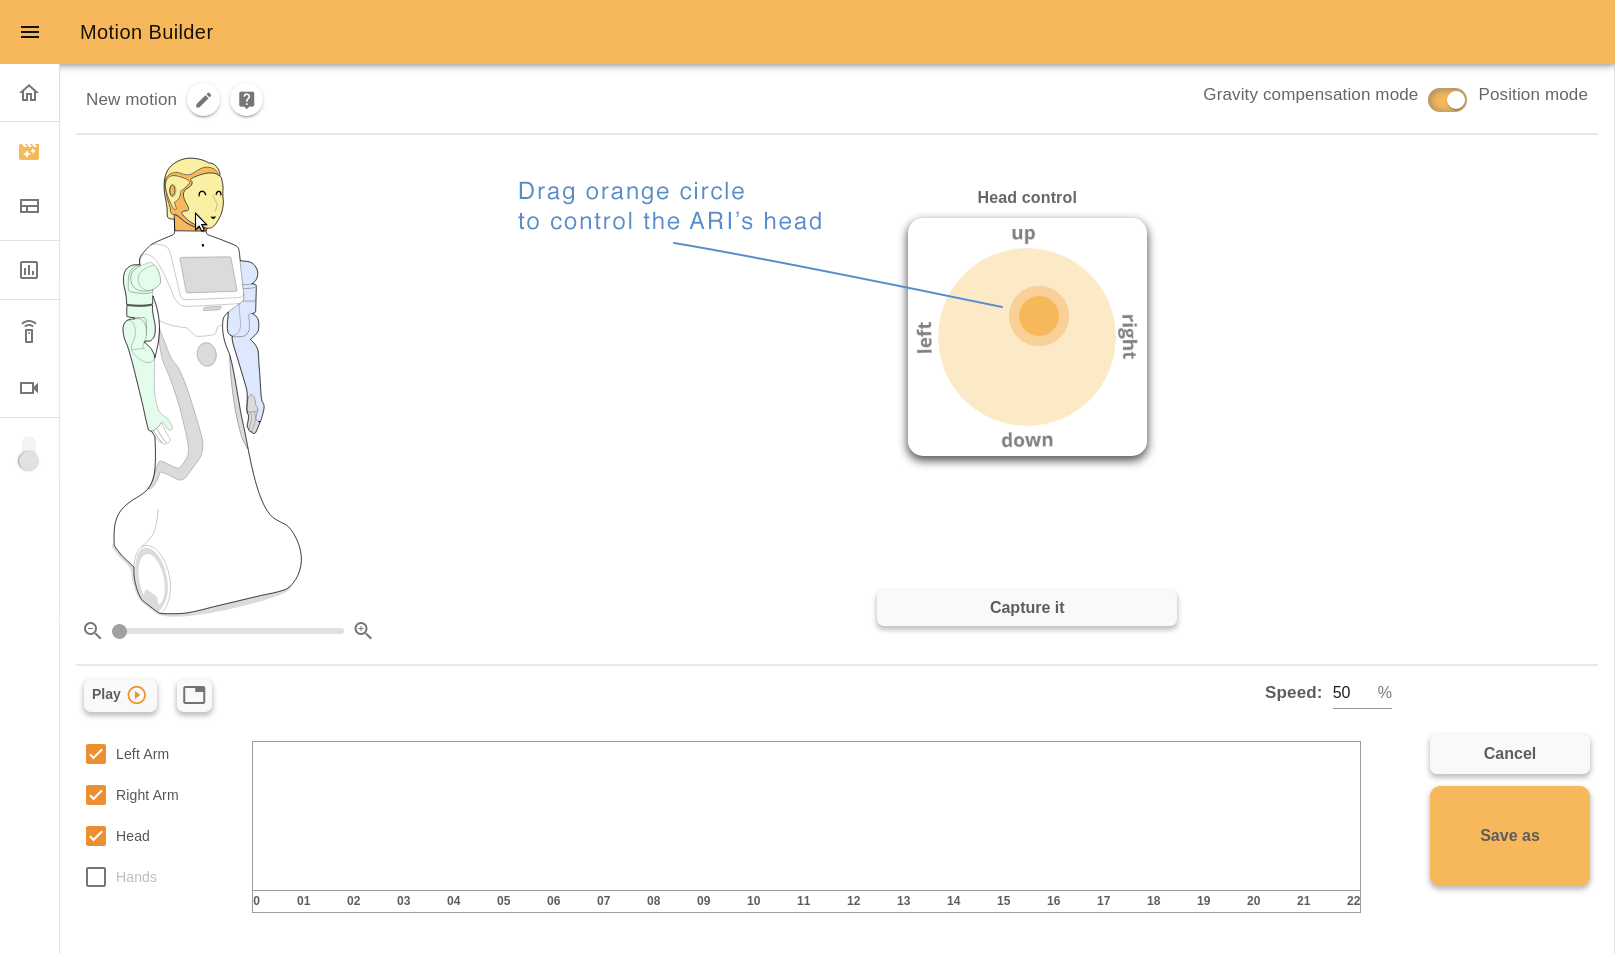
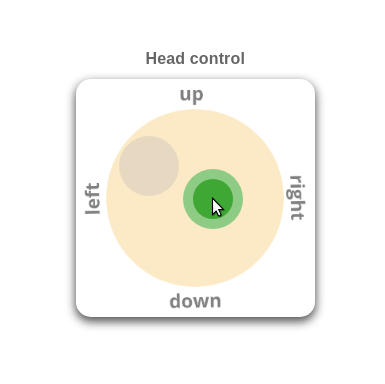
To control ARI’s head use a joystick. Just drag the orange circle (green when the cursor is over it) and watch how the pose of the robot’s head changes.
When you move a joystick quickly, for a short time it’s possible that the robot didn’t change its pose yet. In this case you will see a grey circle that shows the current pose of the head. When the robot has the same pose as the joystick, the grey circle will disappear.
Click the “Capture it” button to store the keyframe.

Sliders#
Sliders are used to control other groups of robots joints. Let’s click ARI’s arm.

ARI’s arm consists of a group of joints. You can create complex motion by changing the joints pose by separate.
Each joint has a title and a description image. To control the joint, drag a slider circle or change the position number in the input field (type a desired number or use arrows).
Click the “Capture it” button to store the keyframe.
Gravity compensation mode (optional package)#
When the Gravity compensation mode is chosen, ARI’s image will not be interactive. You should change the robot pose manually and click the “Capture it” button to store the keyframe.
Timeline#
After creating a new keyframe it will appear graphically on the timeline as a pointer.
If the pose of any joints group was changed, opposite the corresponding checkbox will appear a colored line. The colors match with the color of the joints group on ARI’s image. For example, orange for the head, green for the right arm, blue for the left arm.

Each pointer is a keyframe you captured. It is situated on the timeline relatively to the time the robot needs to implement the motion. By dragging you can move the keyframe on the timeline.

By double clicking you can open a context menu of the selected keyframe.
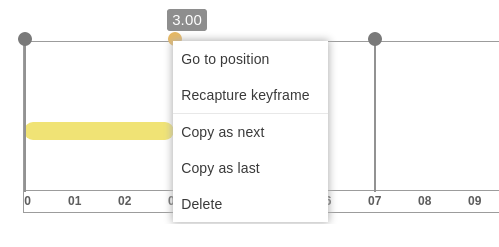
Go to position - robot will move to the captured position.
Recapture keyframe - the selected keyframe will be replaced with the current pose of the robot.
Copy as next - copy this keyframe right after it.
Copy as last - add copy to the end of the motion.
Delete - delete one keyframe.
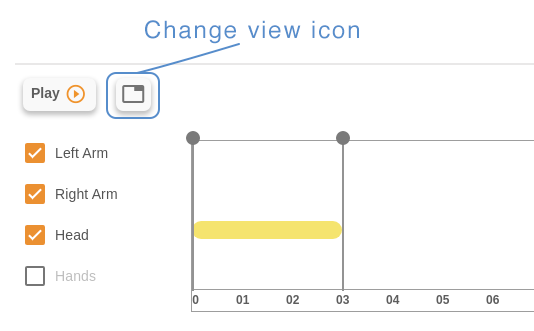
InfoTable#
The timeline has another view mode - infotable. Here you can see detailed info about each keyframe: how long this keyframe lasts (in seconds) and angular position of each joint in radians.

To change the view click a ‘table” icon near the “Play” button.
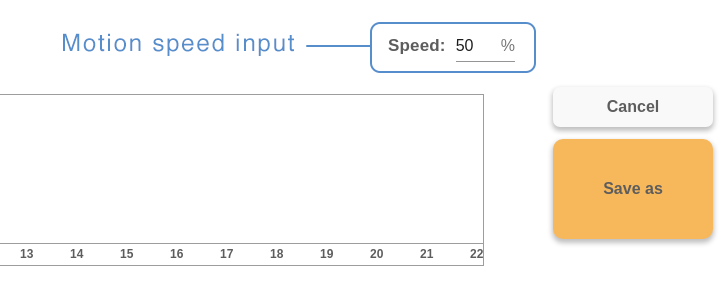
Speed of the execution#
Speed number allows to control the speed of the motion execution. Switch to 100% to execute the motion at full speed, reduce it to slow down the motion.
Play motion#
You can play motion while editing or after it. To play motion from the Editor click the “Play” button under ARI’s image.
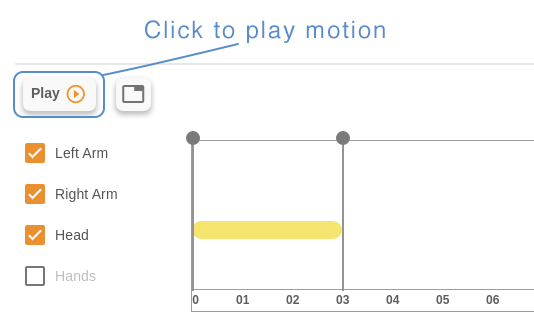
If you want to play the motion from the start page, click the “play” icon of the chosen motion.

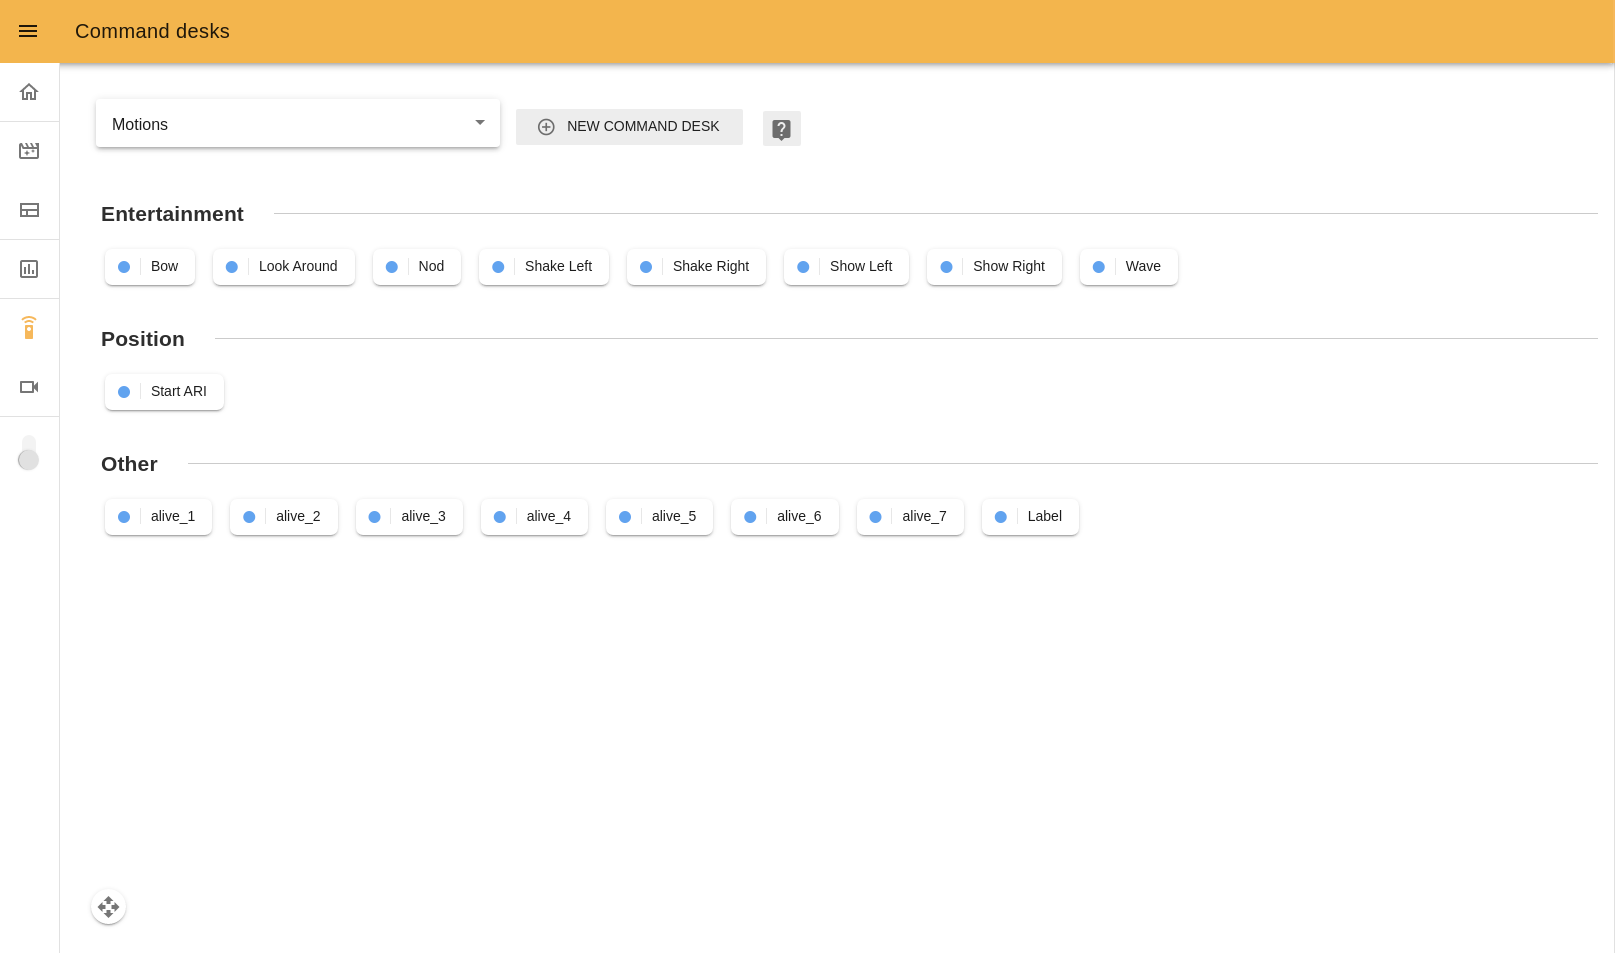
Also you can play motions from Command desks webapp. Open the “Motions” desk and click the corresponding button.
ARI’s touchscreen allows play motions as well. Create a page with buttons using “Page with buttons” or “Slideshow” template and assign any motion to the button on the screen. When a user touches this button, ARI will execute the motion.
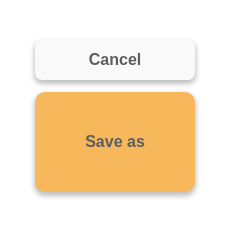
Save motion#
To leave the Editor without saving the changes click “CANCEL”, to store the changes and leave click “SAVE”. Remember that the ROS name is a required field. Fill it before saving a motion and leaving Editor.