Hardware-related API#
Cameras#
The following Figure illustrates the cameras mounted on the robot:
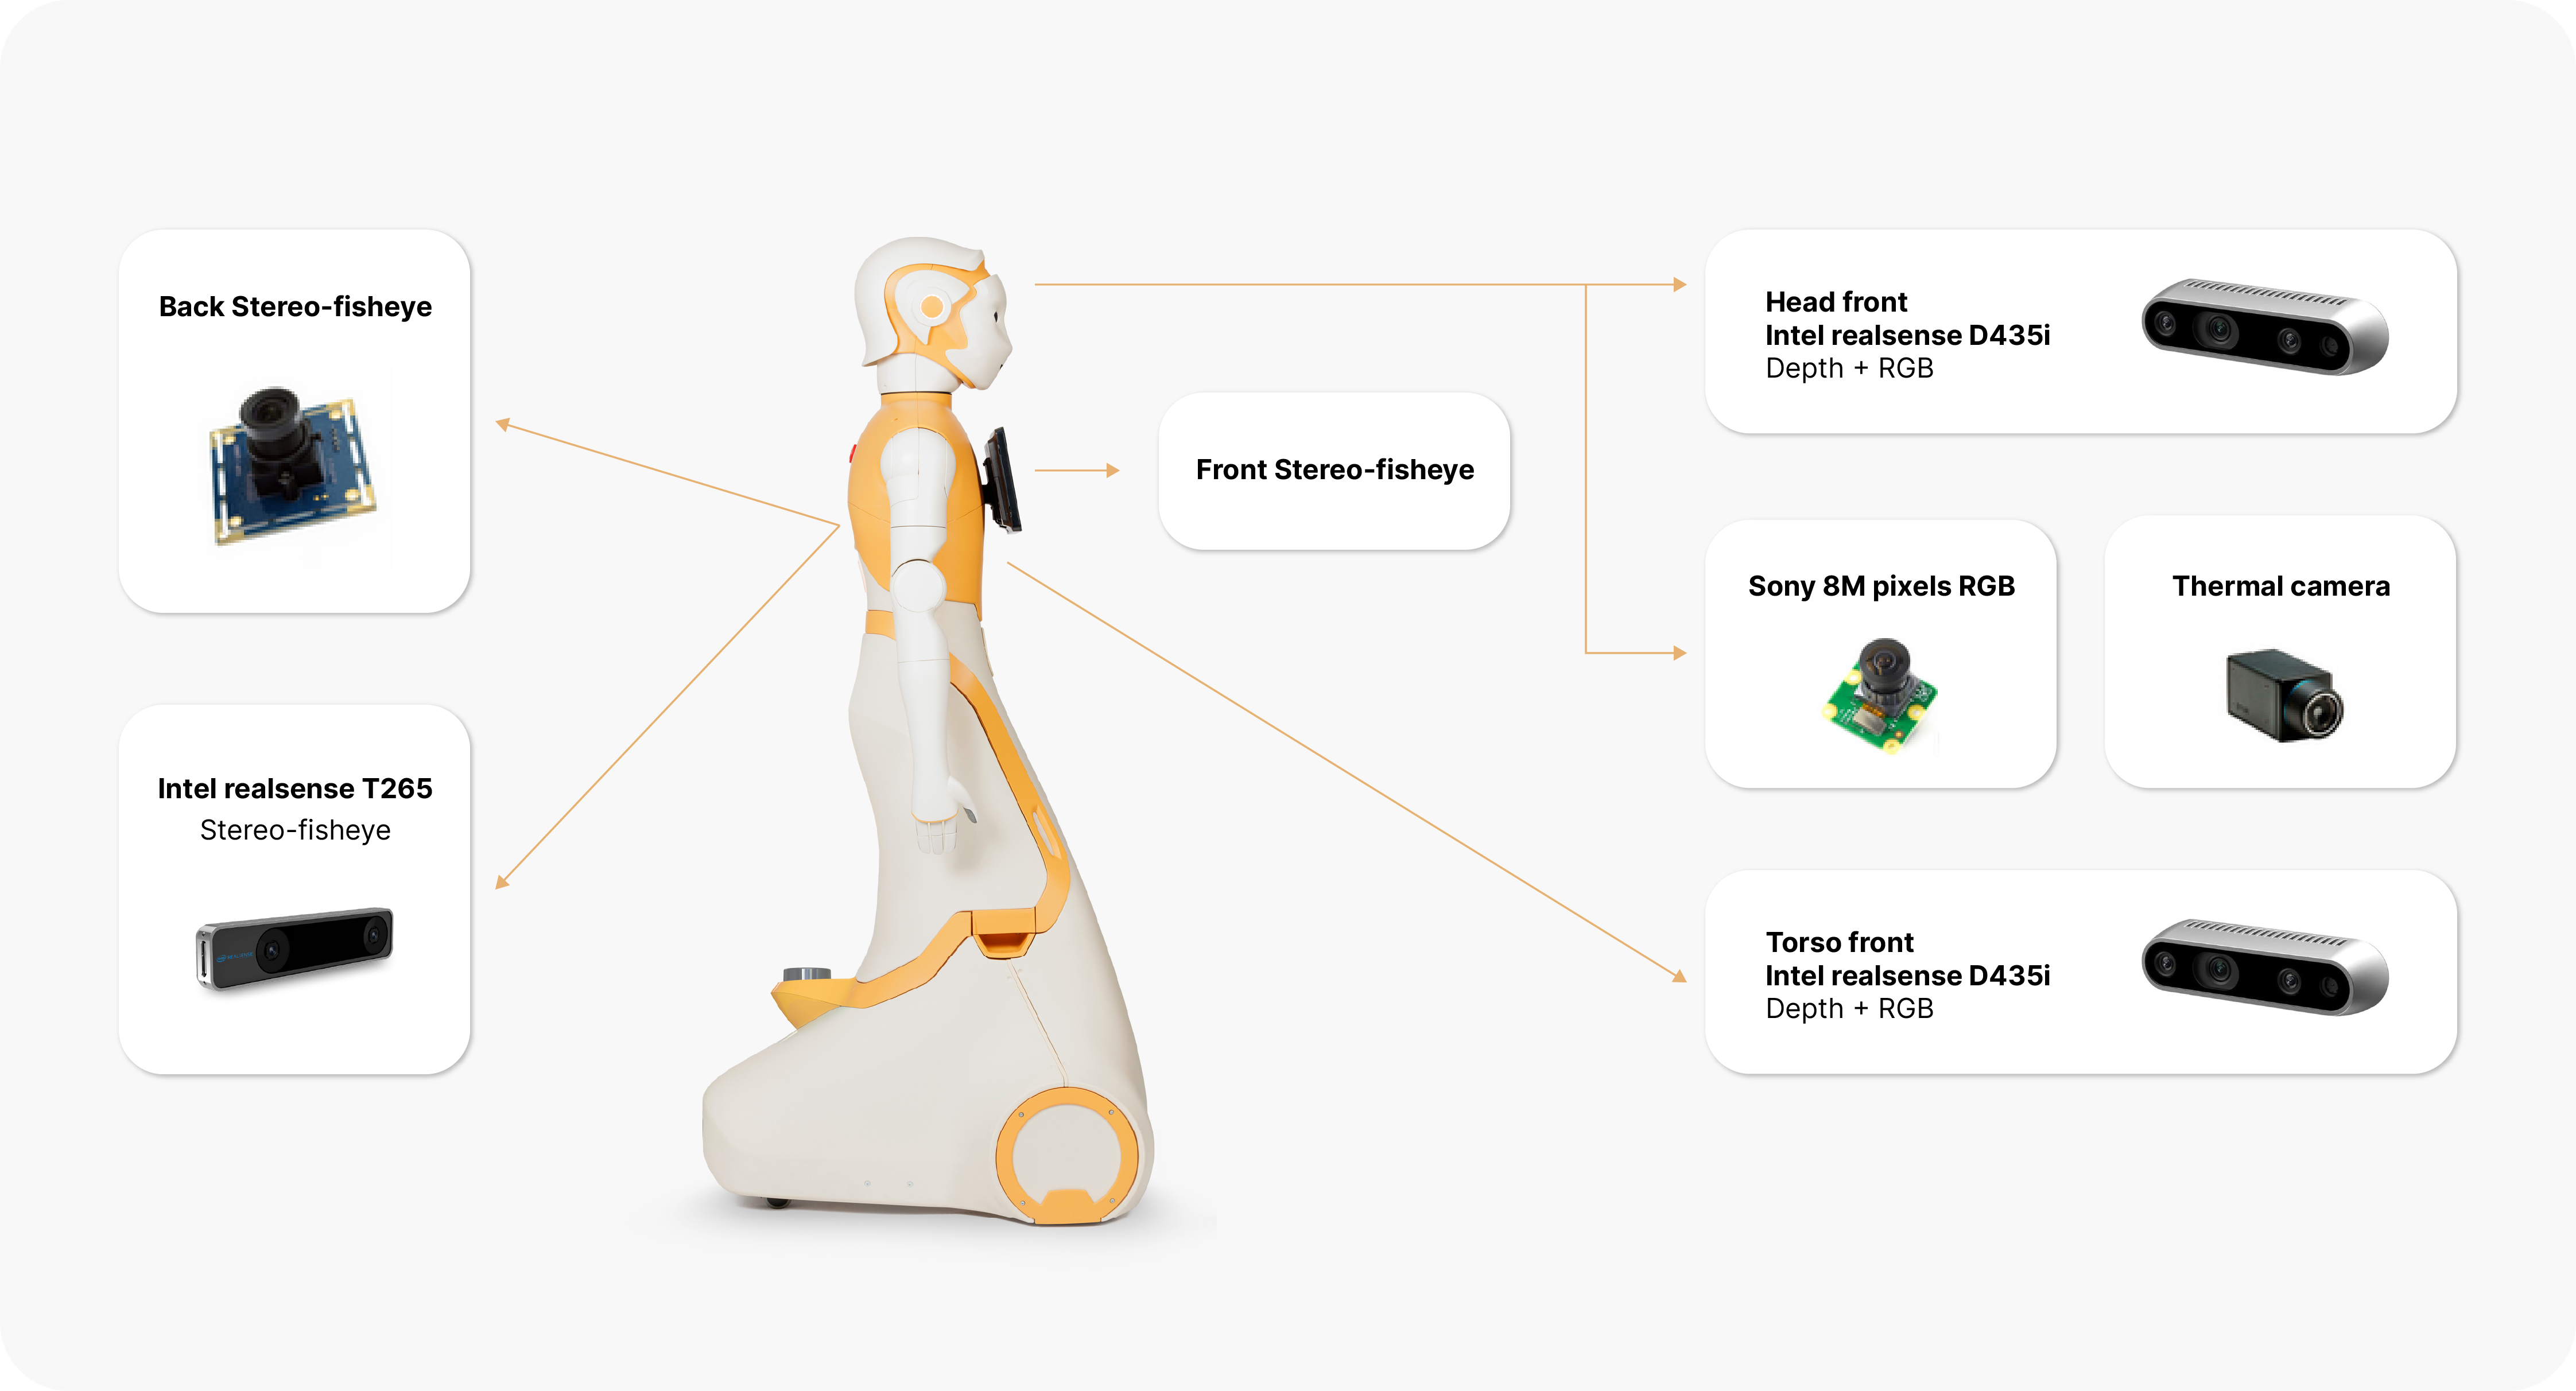
Torso front camera#
Stereo RGB-D camera: This camera is mounted on the frontal side of the torso below the touchscreen and provides RGB images along with a depth image obtained by using an IR projector and an IR camera. The depth image is used to obtain a point cloud of the scene.
Torso front camera-related topics:
/torso_front_camera/aligned_depth_to_color/camera_info/torso_front_camera/aligned_depth_to_color/image_raw/*/torso_front_camera/color/camera_info/torso_front_camera/color/image_raw/*/torso_front_camera/depth/camera_info/torso_front_camera/depth/color/points/torso_front_camera/depth/image_rect_raw/*/torso_front_camera/infra1/camera_info/torso_front_camera/infra1/image_rect_raw/*/torso_front_camera/infra2/image_rect_raw/compressed
Torso back camera#
Stereo-fisheye camera: This camera is mounted on the back side of the torso, right below the emergency button, and provides stereo, fisheye and black and white images.
Head camera#
Either one of these cameras is located inside ARI’s head.
RGB camera: provides RGB images
RGB-D camera: provides RGB-D images
Head camera-related topics:
Optional cameras#
The touchscreen can include up to three more cameras:
thermal camera
RGB camera
RGB-D camera
In order to learn how to access the cameras, please refer to Accessing ARI sensors.
LEDs#

ARI has 4 led displaying devices capable of being controlled via our ROS interface:
- Back ring: a LED ring at the back, below the emergency button, with a
variety of colour options.
- Ears rings: LED ring in each of its ears with a variety of colour
options.
respeaker: LED ring at the speaker.
ID |
#Leds |
Available Effects |
|
|---|---|---|---|
Back |
0 |
40 |
All |
Ear Left |
1 |
16 |
All |
Ear Right |
2 |
16 |
All |
Respeaker |
4 |
12 |
Fixed Color |
Different devices may have different capabilities, and may only be able to show part of the effects.
All led devices are controlled using the same ROS Interface, provided by the PAL Led Manager. This interface allows clients to send effects to one or multiple led devices, for a duration of time and a priority. When a device has more than one effect active at a time, it displays the one with the highest priority, until the duration ends and then displays the next effect with the highest priority. There’s a default effect with unlimited duration and lowest priority that displays a fixed color.
Interfaces#
The led interface is an Action Server: /pal_led_manager/do_effect
A goal consists of:
devices A list of devices the goal applies to.
params The effect type, and the parameters for the selected effect type.
- effectDuration Duration of the effect, when the time is over the previous
effect will be restored. 0 will make it display forever
priority Priority of the effect, 0 is no priority, 255 is max priority
To learn more on how to access the LEDs, refer to Meaning of ARI LEDs colors and patterns and Tutorial: Creating expressions with LEDs.
Animated eyes#
ARI has LCD eyes which provide a collection of eyes expressions. These can be use to support engaging interactions, along with head and arms movements.
The available eyes expressions are:
neutral |
angry |
sad |
happy |
surprised |
disgusted |
scared |
pleading |
vulnerable |
despaired |
guilty |
disappointed |
embarrassed |
horrified |
skeptical |
annoyed |
furious |
suspicious |
rejected |
bored |
tired |
asleep |
confused |
amazed |
excited |
Eyes expression topics:
To learn more about ARI’s expressive eyes, refer to How-to: Control ARI’s eyes.
Speakers and microphones#
ARI has an array of four microphones that can be used to record audio and process it in order to perform tasks such as speech recognition. The microphone is located on the circlar gap of the torso. There are two HIFI full-range speakers just below it.
The ReSpeaker Mic Array V2.0 consists of 4 microphones (https://www.seeedstudio.com/ReSpeaker-Mic-Array-v2-0.html). See ARI microphone array and audio recording for details.
To learn more about how to process speech in ARI, refer to Dialogue management.
ReSpeaker topics:
Joints#
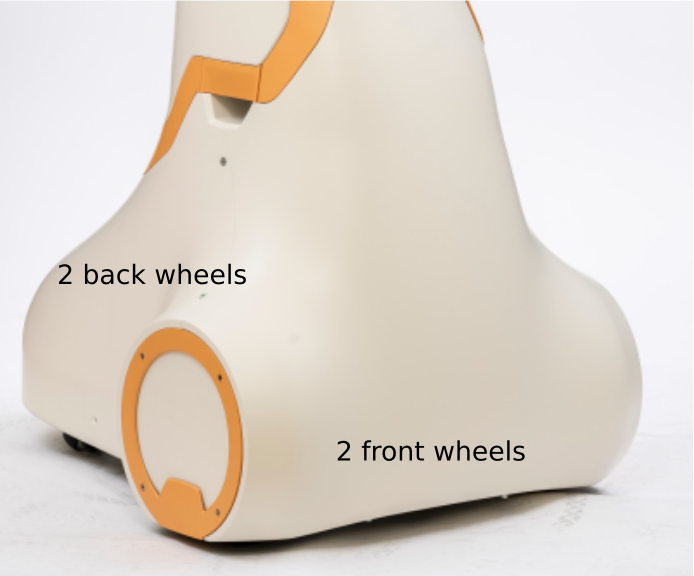
Base#
The base joints of ARI are the front and back wheels of the robot. Take care when wheeling ARI, especially with the smaller back wheels.
The wheels can be controlled using a ros topic, specifying the desired linear and angular velocity of the robot. These velocities are specified in meters per second and are translated to wheel angular velocities internally.
Drive wheels topics:
To get more information on how to move around ARI, please refer to Navigation.
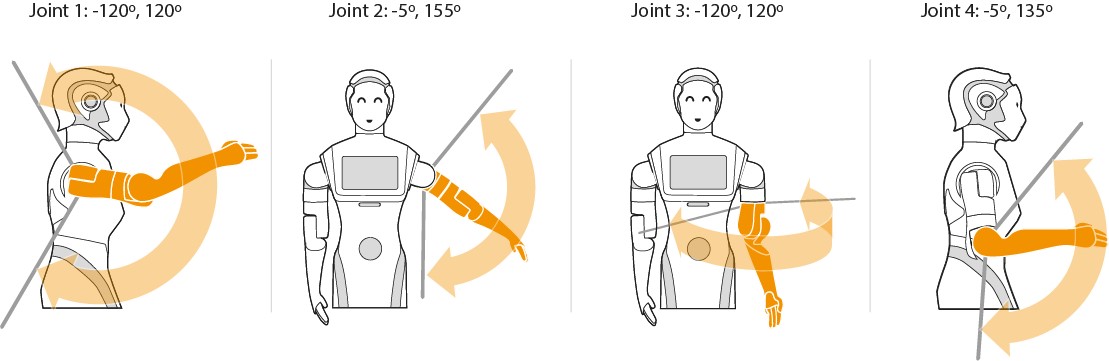
Arms#
ARI’s joints and arm movements are illustrated below:
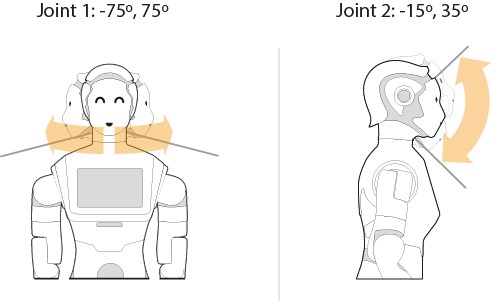
Head joints#
The joint movements for ARI’s head are shown below:
Please refer to the following entries to to learn how to move ARI’s upper body:
upper_body_motion
🚧 How-to: How to ask the robot to move during a script
whole_body_motion_control
move_it
play_motion
LIDAR#
LIDAR topics: