How to plan motions with MoveIt!#
This page is a step by step guide on how to perform collision-free motions on TIAGo using the graphical interface of MoveIt!. Collision-free motion planning is performed by chaining a probabilistic sampling-based motion planner with a trajectory filter for smoothing and path simplification.
Pre-requisites#
You should first have completed 🏁 Getting started
You need to be already familiar with ROS: if not, check the ROS tutorials.
Note
It is recommended to first test the grasping in simulation environment before proceeding with the real robot.
Getting started with the MoveIt! graphical user interface in simulation#
Note
This subsection provides a brief introduction to some basic use cases of MoveIt!. For testing running the simulation is recommended. In order to test it with the real robot please refer to the MoveIt! with the real robot.
Step 1 : Setup simulation and GUI#
Inside a new terminal start a simulation:
ros2 launch tiago_gazebo tiago_gazebo.launch.py world_name:=empty
Now we can start MoveIt with the GUI in another terminal:
ros2 launch tiago_moveit_config moveit_rviz.launch.py
These commands will start the motion planning services along with visualization. Do not close these terminals.
Step 2 : Move groups#
RViz is used as a GUI with a custom plugin for executing and visualizing motion planning.
MoveIt! uses planning groups to generate solutions for different kinematic chains. By selecting different planning groups, the GUI shows only the relevant “flying end-effectors”.
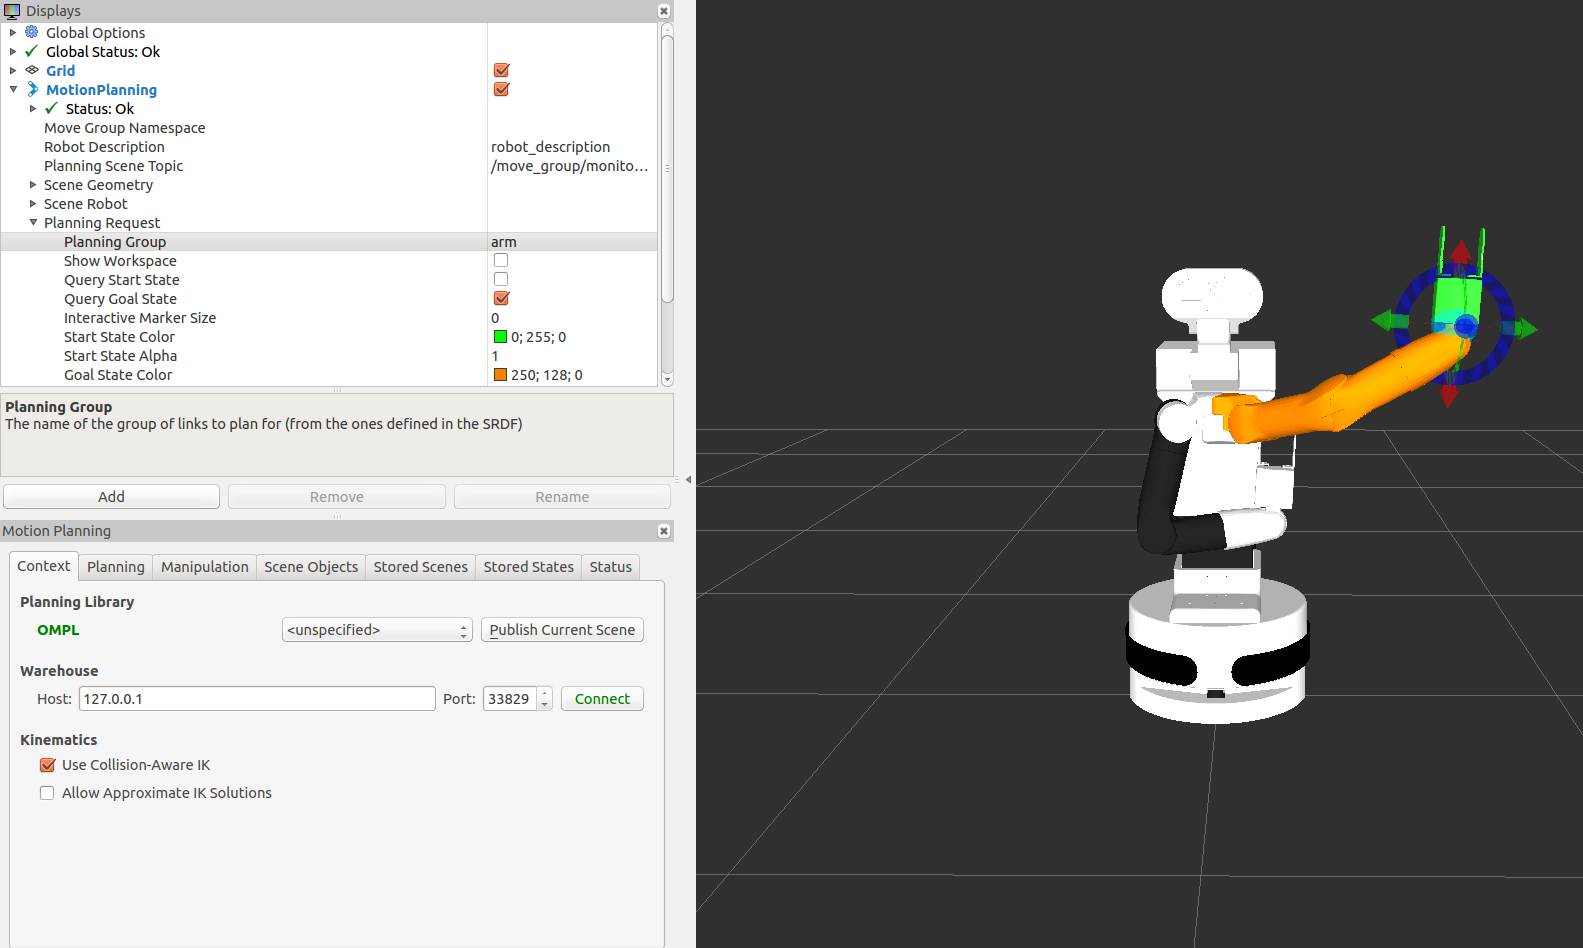
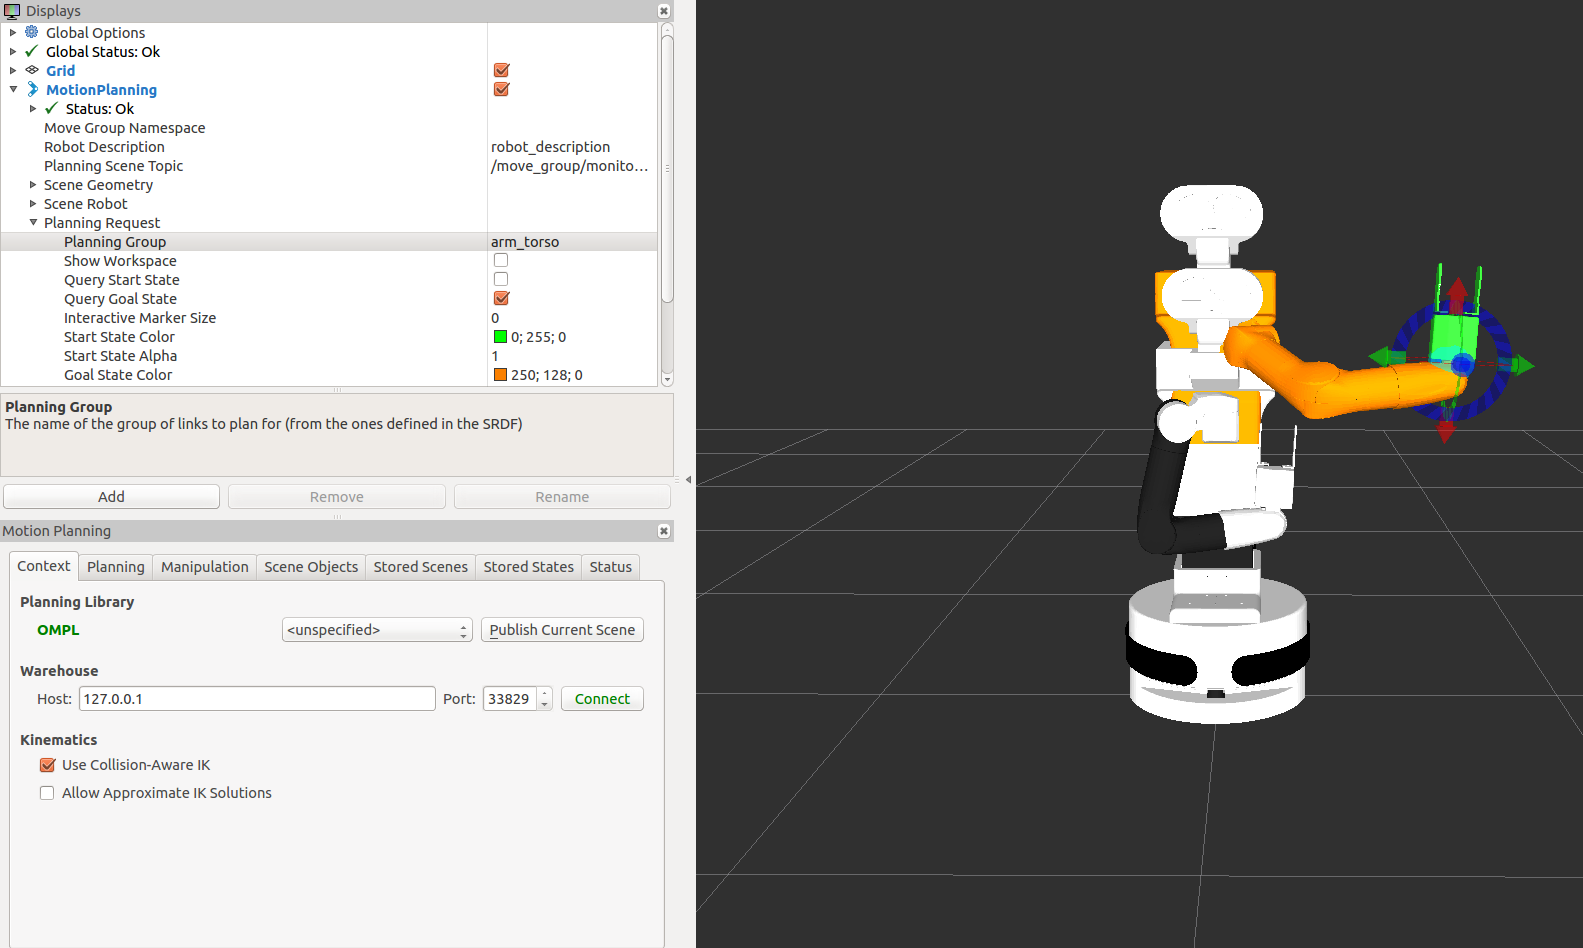
Figure: MoveIt! graphical interface in rviz. PAL’s robots with the planning group “arm” (top) and with the planning group “arm_torso” (bottom).#
Step 3 : Start state and Goal state#
In order to use motion planning, a Start State and Goal State has to be known. To do this with the MoveIt! GUI, navigate to the tab called “Planning” in the display called MotionPlanning. On this tab, further nested tabs provide the functionality to update Start State and Goal State, as depicted below.
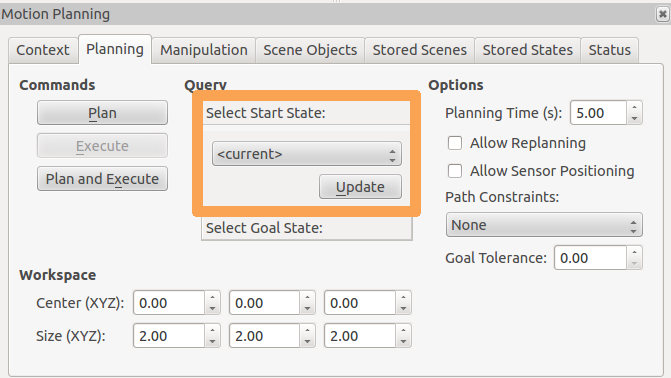
Figure: Tab to set start state#
Figure: Tab to set goal state#
Step 4 : Random poses#
By clicking the “Update” button of the Goal State, new poses can be randomized. Figure: Random poses generated with the GUI below shows a few randomly generated poses.
Figure: Tab to set goal state#
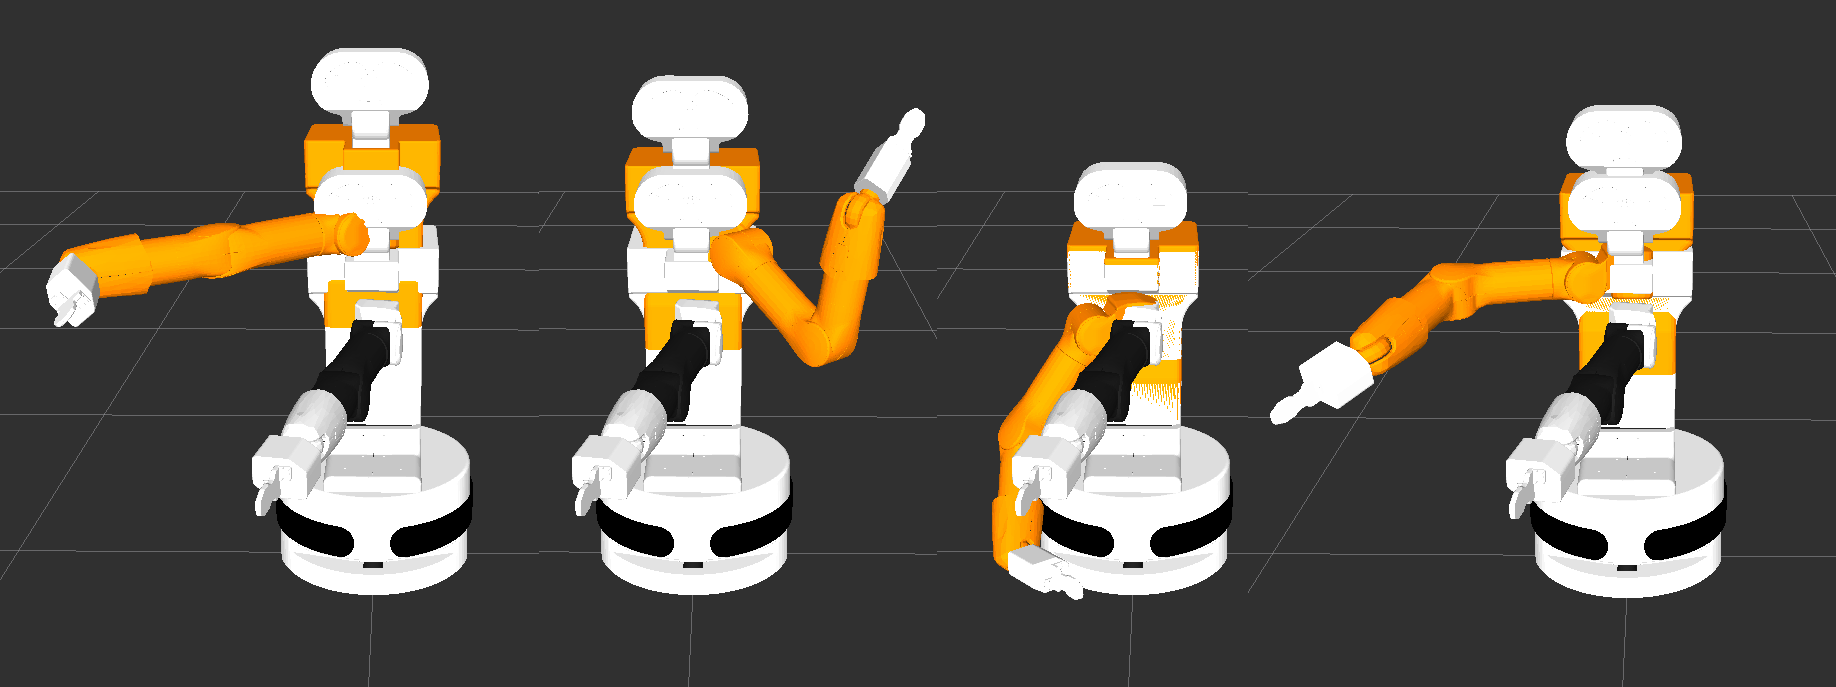
Figure: Random poses generated with the GUI#
Step 5 : Plan and execute#
The sequence of images in Figure: Sequence of plan shows the result of clicking the “Plan and Execute” in rviz. Rviz will visualize the plan before executing.

Figure: Sequence of plan#
Step 6 : Moving the end-effector#
The GUI also allows the operator to define goal poses using the “flying end-effector” method. As below, the 6 DoF pose of the end-effector can be defined by using the visual marker attached. The red, green and blue arrows define the translation of x, y and z coordinates respectively, and the colored rings define the rotation around these axes following the same logic.
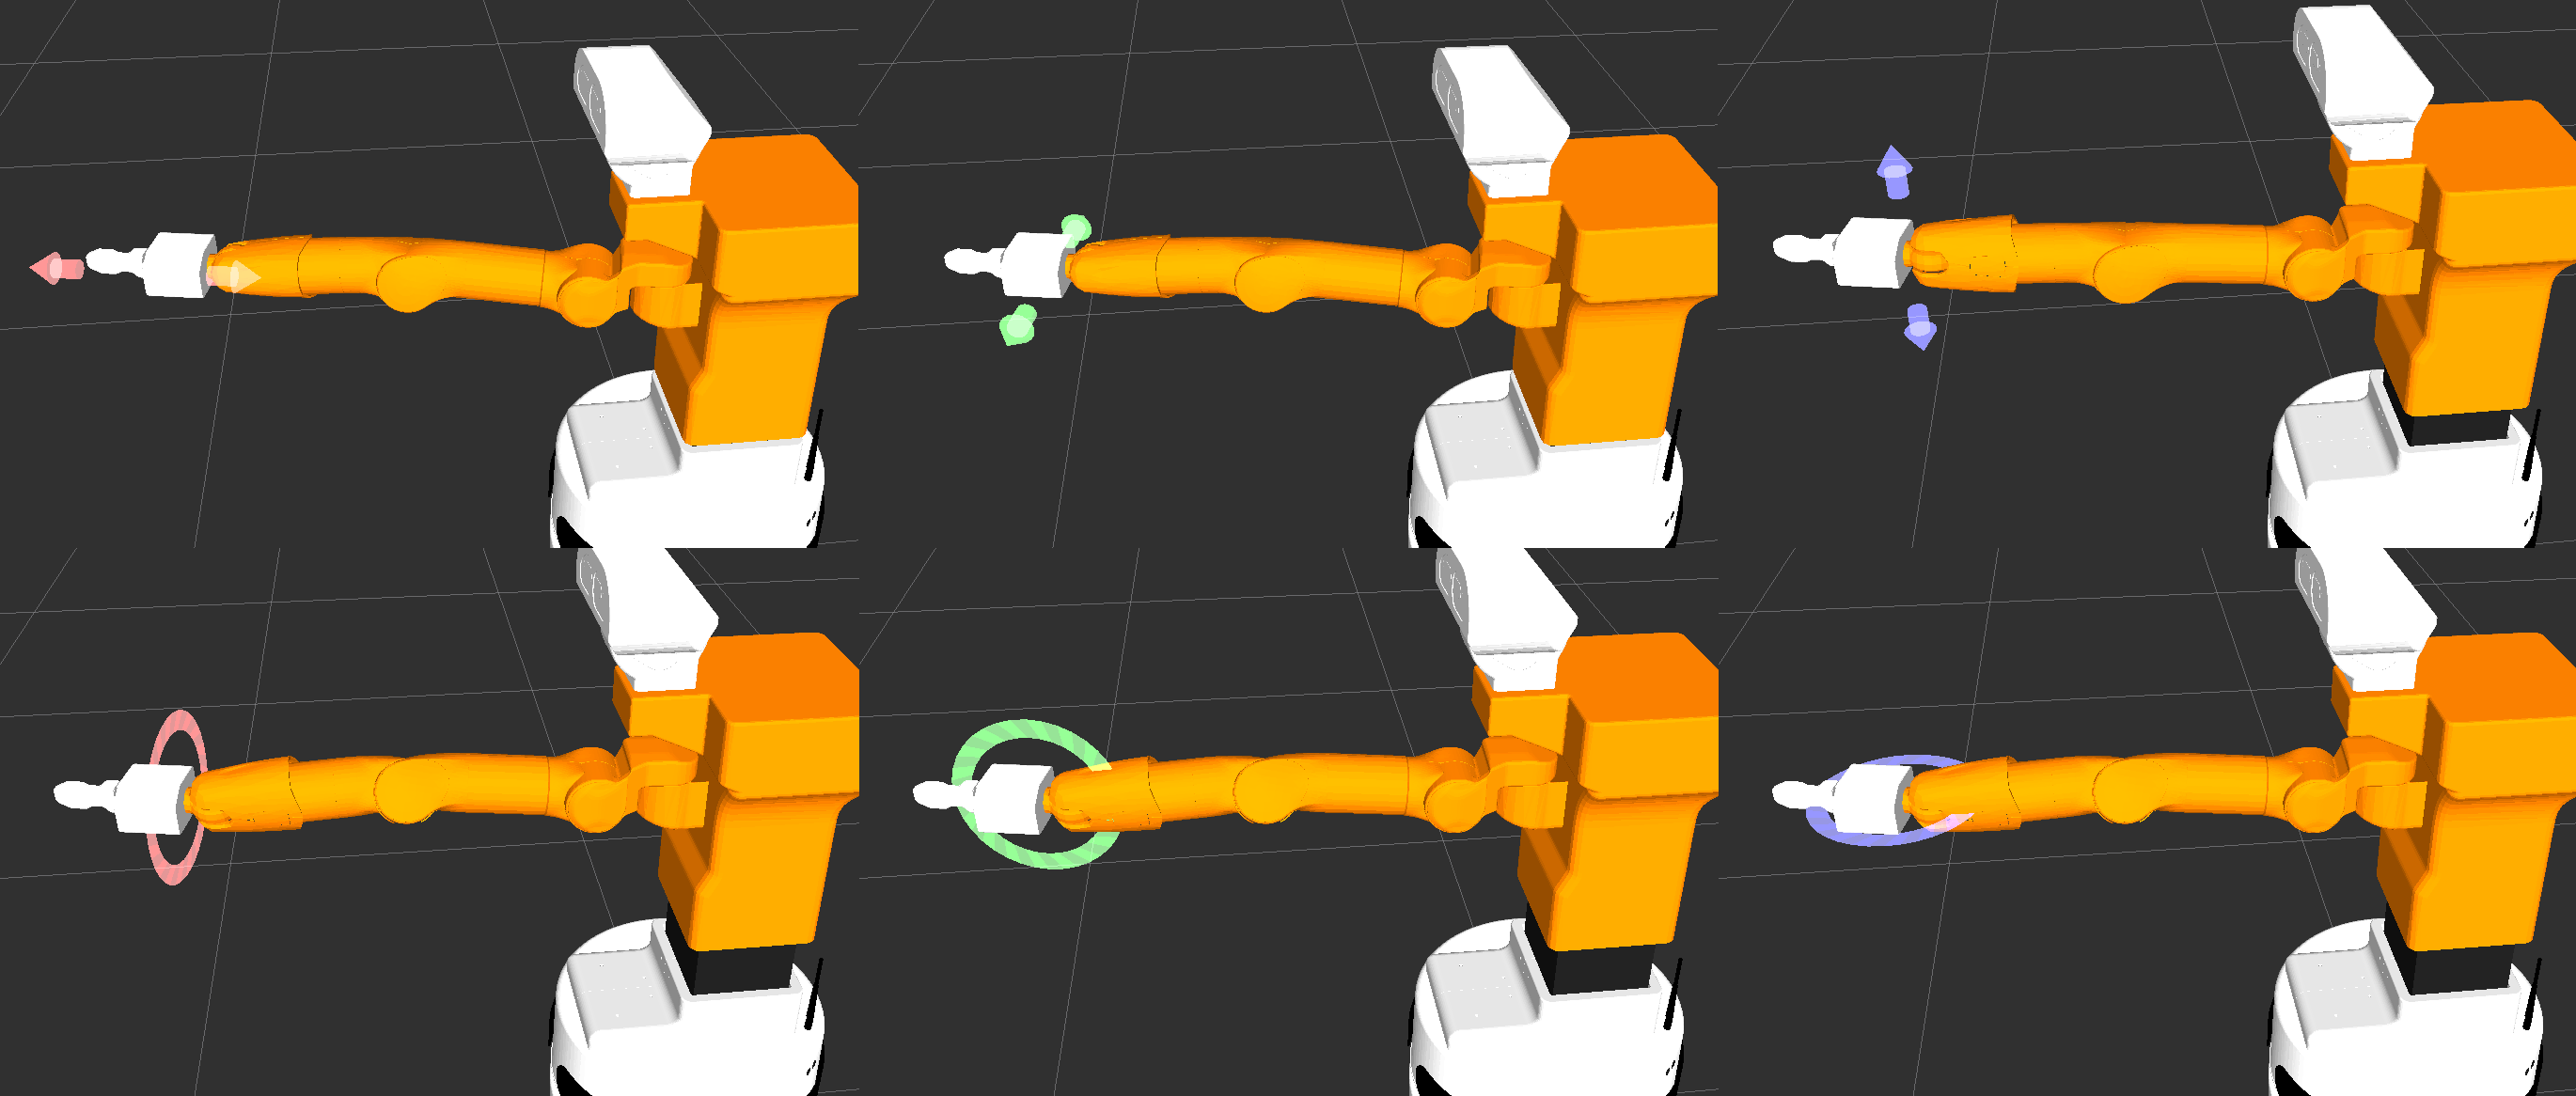
Figure: Use of each DoF#
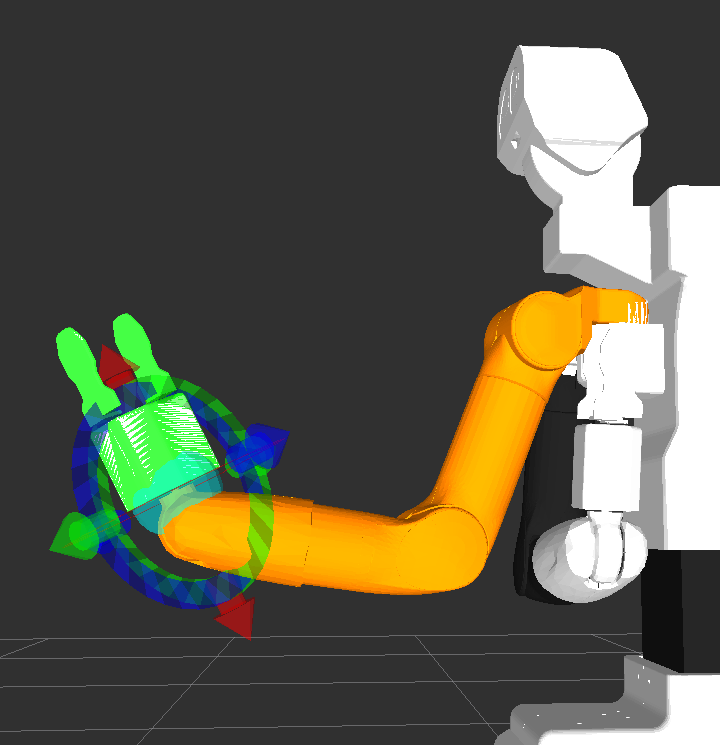
Figure: End-effector tool#
The Planning Scene of MoveIt!#
Note
For in depth understanding of planning scene, see this link.
Adding a collision object to the motion planning environment will result in plans avoiding collisions with these objects. Such an operation can be done using the C++ or Python API, or with the GUI presented in the previous subsection For this demonstration, we are going to use the GUI.
Step 1 : Add a collision mesh#
To add such an object to the planning environment, navigate to the “Scene objects” tab in the planning environment window. Inside the “Add/Remove scene object(s)” section, select “Box” and press the “+” button as shown in Figure: Scene objects tab.
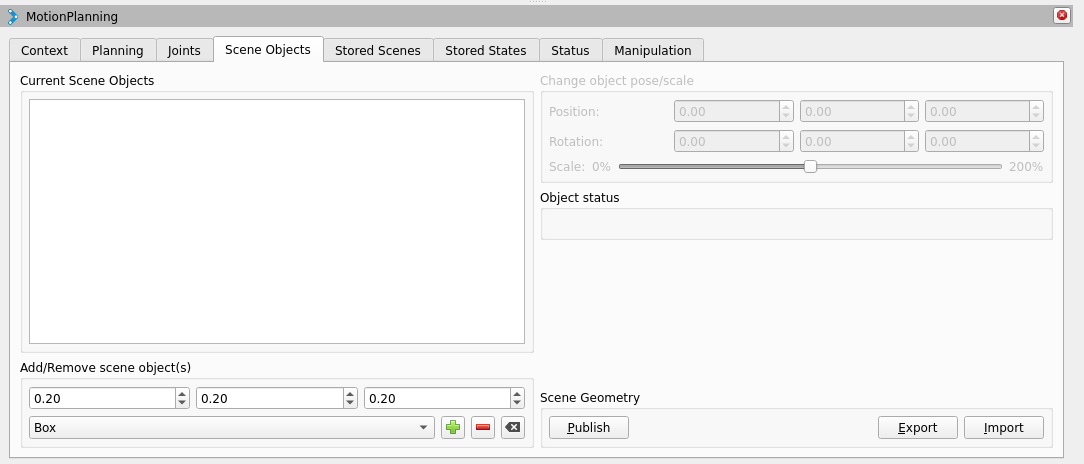
Figure: Scene objects tab#
Step 2 : Move collision mesh#
Place the mesh close to front of the arm, then select the planning group “arm_torso”.
Step 3 : Move end-effector#
Move the end-effector using the “flying end-effector” to a goal position like the image below Make sure that no body part is in red. If a body part is red MoveIt! detected a collision when processing the goal position. Goals resulting in a collision state will not be planned or executed at all by MoveIt!.
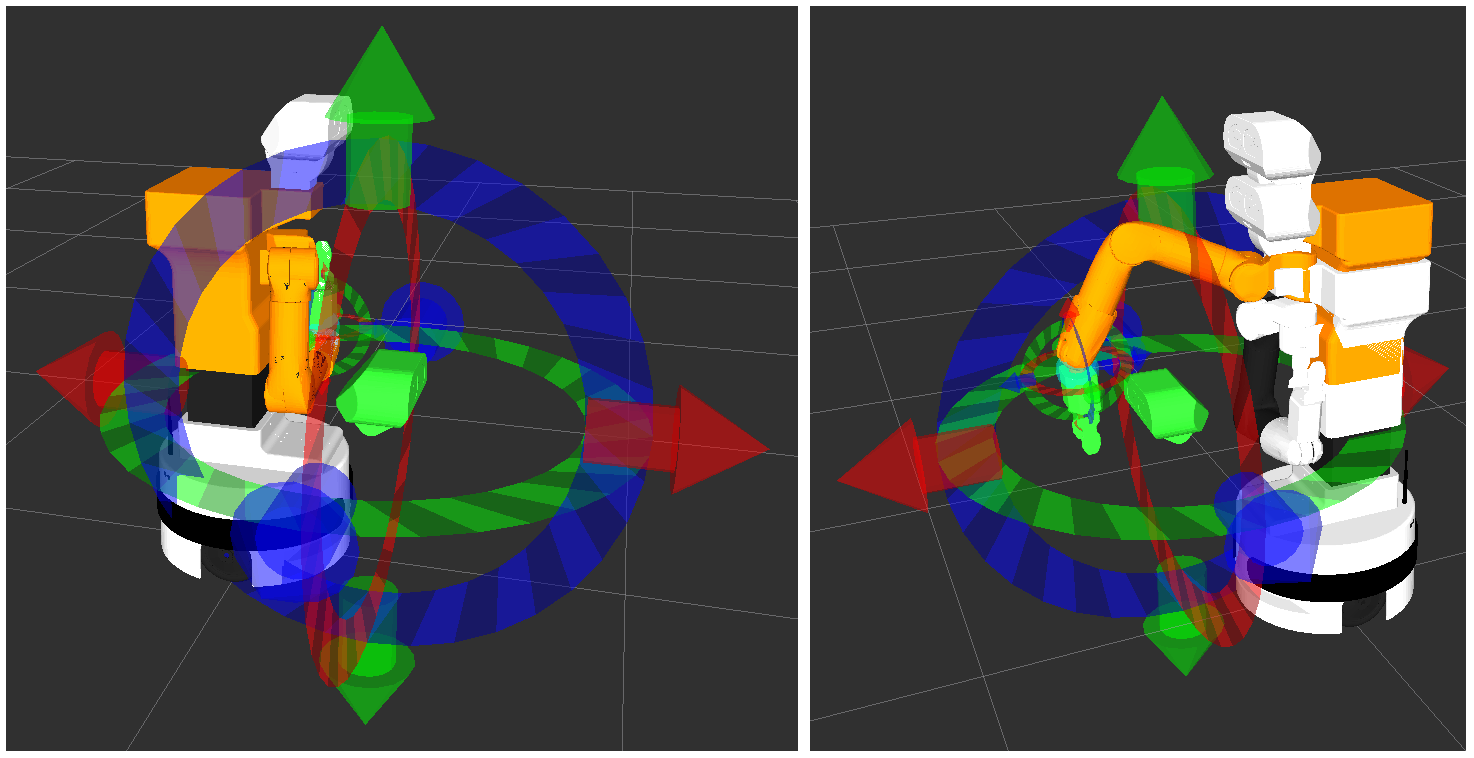
Figure: Example with an object in the scene. Initial pose (left) and goal pose (right).#
Step 4 : Execute motion#
Go the “Planning” tab and click “Plan & Execute”. Since this setup can be a very complex one for the planner, it might fail at the first attempt. Keep re-planning until it is succesful. A succesful plan for the current example is shown below.
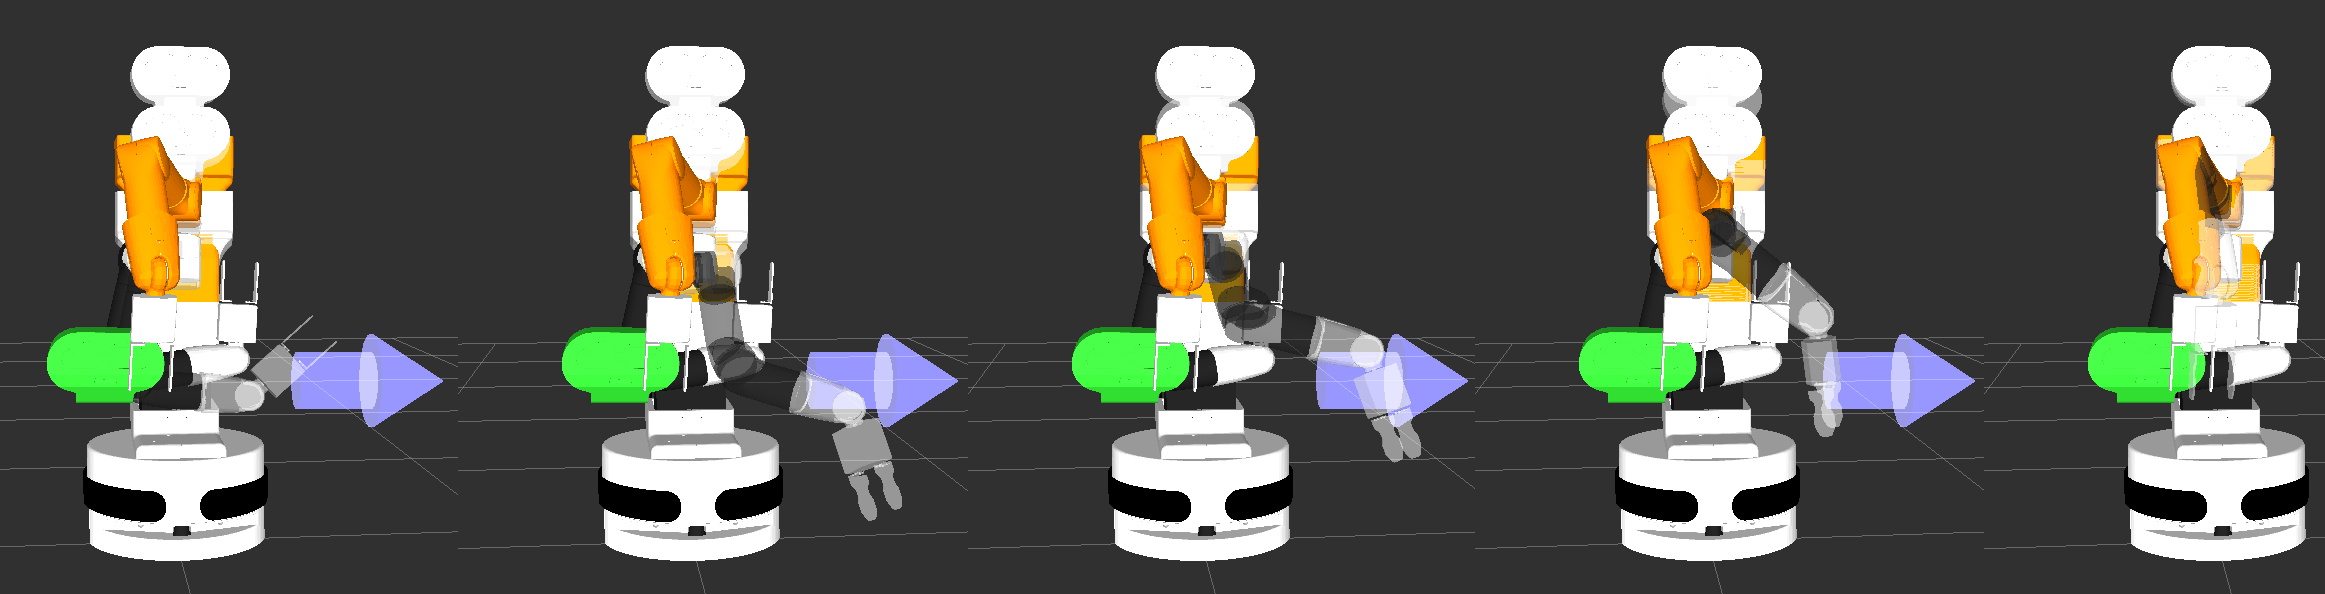
Figure: Example of plan found with the object in the scene.#
End test#
To close the MoveIt! GUI, hit Ctrl-C in the terminal used in step 2. The running instance of Gazebo` can be
used for further work, but keep in mind that the robot will remain in the last pose it was sent to.
MoveIt! with the real robot#
In order to run the examples explained above with the real robot the MoveIt! graphical interface has to be launched from a development computer as follows:
export ROS_DOMAIN_ID=<DOMAIN_ID>
ros2 launch tiago_moveit_config moveit_rviz.launch.py
See also#
To continue, you might want to check:
To go further check MoveIt! Documentation
overview-advanced-grasping
customizing-advanced-grasping to learn how to use and customize the Advanced Grasping pipeline in your projects.
advanced-grasping-api