Basic Network Configuration (No Mikrotik / No VPN)
This section describes how to set up the network on PAL Robotics robots that do not have a Mikrotik router or VPN.
These robots have a single onboard computer and manage all network connections (WiFi and Ethernet) directly. Examples include: TIAGo, TIAGo++, PMB-2, PMB-3, and Omni-base.
These robots have a single onboard computer that handles network connections directly via Ethernet or WiFi. Configuration is performed either through the robot’s WebGUI or via the PAL CLI tools.
You will learn:
How to connect to the robot directly (Access Point or Ethernet cable)
How to connect the robot to your infrastructure (WiFi or wired client)
How to manage and switch network profiles
How to recover access if the network is misconfigured
The guide includes default network settings, a connection selection flowchart, and troubleshooting advice.
1. Introduction and Security Notice
Robots in this category use ROS 2, which exposes services to all devices on the same network.
By default, ROS 2 does not provide encryption or authentication. Anyone on the same LAN can interact with the robot.
Attention
Connecting a robot to a shared or public network without restrictions may expose critical services.
To keep your system safe, we recommend:
Use VLANs or private networks dedicated to robot operation.
Protect WiFi credentials and Ethernet ports from unauthorized access.
These robots are designed for research, prototyping, and internal deployment in trusted environments. It is your responsibility to integrate them safely into your infrastructure.
2. Overview of Network Modes
Robots without a router manage all networking through their internal PC, via WiFi or Ethernet.
You can connect:
Directly to the robot (no infrastructure required).
Through your network (WiFi or LAN).
Depending on your use case (e.g. dev, teleop, remote access, updates), different configs can be applied.
The robot supports the following modes:
A. Internal Connections (direct to the robot)
These modes allow a standalone connection between your laptop and the robot, without requiring an existing network:
WiFi Access Point Mode The robot acts as a wireless hotspot, broadcasting a specific SSID (e.g.,
tiago-0-Hotspot). Your laptop connects directly to the robot over WiFi.Wired Server Mode Connect an Ethernet cable directly between your computer and the robot. The robot assigns a static IP address to your computer in the
10.68.0.200–210range.
These are ideal for: - Initial setup and development - Environments without WiFi or internet - Safe, isolated testing
B. External Connections (robot joins your network)
In these modes, the robot joins an existing LAN or WiFi, allowing access from any other device on that network.
WiFi Client Mode The robot joins a WiFi network using its internal wireless interface. It will receive an IP address via DHCP.
Wired Client Mode The robot connects to your LAN using an Ethernet cable and receives its IP address via DHCP.
These modes are useful for: - Multi-robot setups - Remote access - Internet connectivity (e.g., for software updates)
Note
Only one wireless and one wired mode can be used at the same time. For example, you cannot use both WiFi Access Point and WiFi Client simultaneously.
3. Network Setup Flowchart
The following flowchart helps you decide how to connect to your robot based on your setup and goals.
        graph TD;
   A{"How do you want to connect to the robot?"};

   B["Access Point Mode (robot creates WiFi hotspot)"];
   C["Wired Server Mode (connect PC to robot with Ethernet)"];
   D["WiFi Client Mode (robot joins your WiFi network)"];
   E["Wired Client Mode (robot connects to LAN via Ethernet)"];

   F["Connect your PC to the robot’s SSID (e.g., tiago-0-Hotspot)"];
   G["Plug in Ethernet. Robot gives IP (e.g., 10.68.0.200)"];
   H["Robot joins infrastructure WiFi. IP via DHCP"];
   I["Robot connects to LAN. IP assigned via DHCP"];

   J["Use ROS 2 or SSH with the robot once connection is active"];

   A --> |"No infrastructure (direct)"| B;
   A --> |"No infrastructure (direct)"| C;
   A --> |"Via infrastructure"| D;
   A --> |"Via infrastructure"| E;

   B --> F --> J;
   C --> G --> J;
   D --> H --> J;
   E --> I --> J;
- See the sections below for detailed instructions on each connection type.
4. Default Configuration
Robots without Mikrotik are shipped in Access Point mode and can be used directly out of the box.
In this mode, the robot creates a WiFi network that your PC can join for initial setup or direct control.
The default configuration includes:
SSID |
<robot>-<SN>-Hotspot |
Default password |
PAL-H0tsp0t |
Robot IP |
10.42.0.1 |
This mode uses the subnet 10.42.0.1/24. Your PC will receive a dynamic IP within this range.
The network stack is managed by Netplan, with NetworkManager as the backend.
More details are available in the Netplan docs.
5. Managing Network Profiles
To modify the robot’s network settings via the WebGUI, open the Networking App at: Robot Networking.
Web Interface
When you first access the interface, the following screen will be displayed:
Profile groups
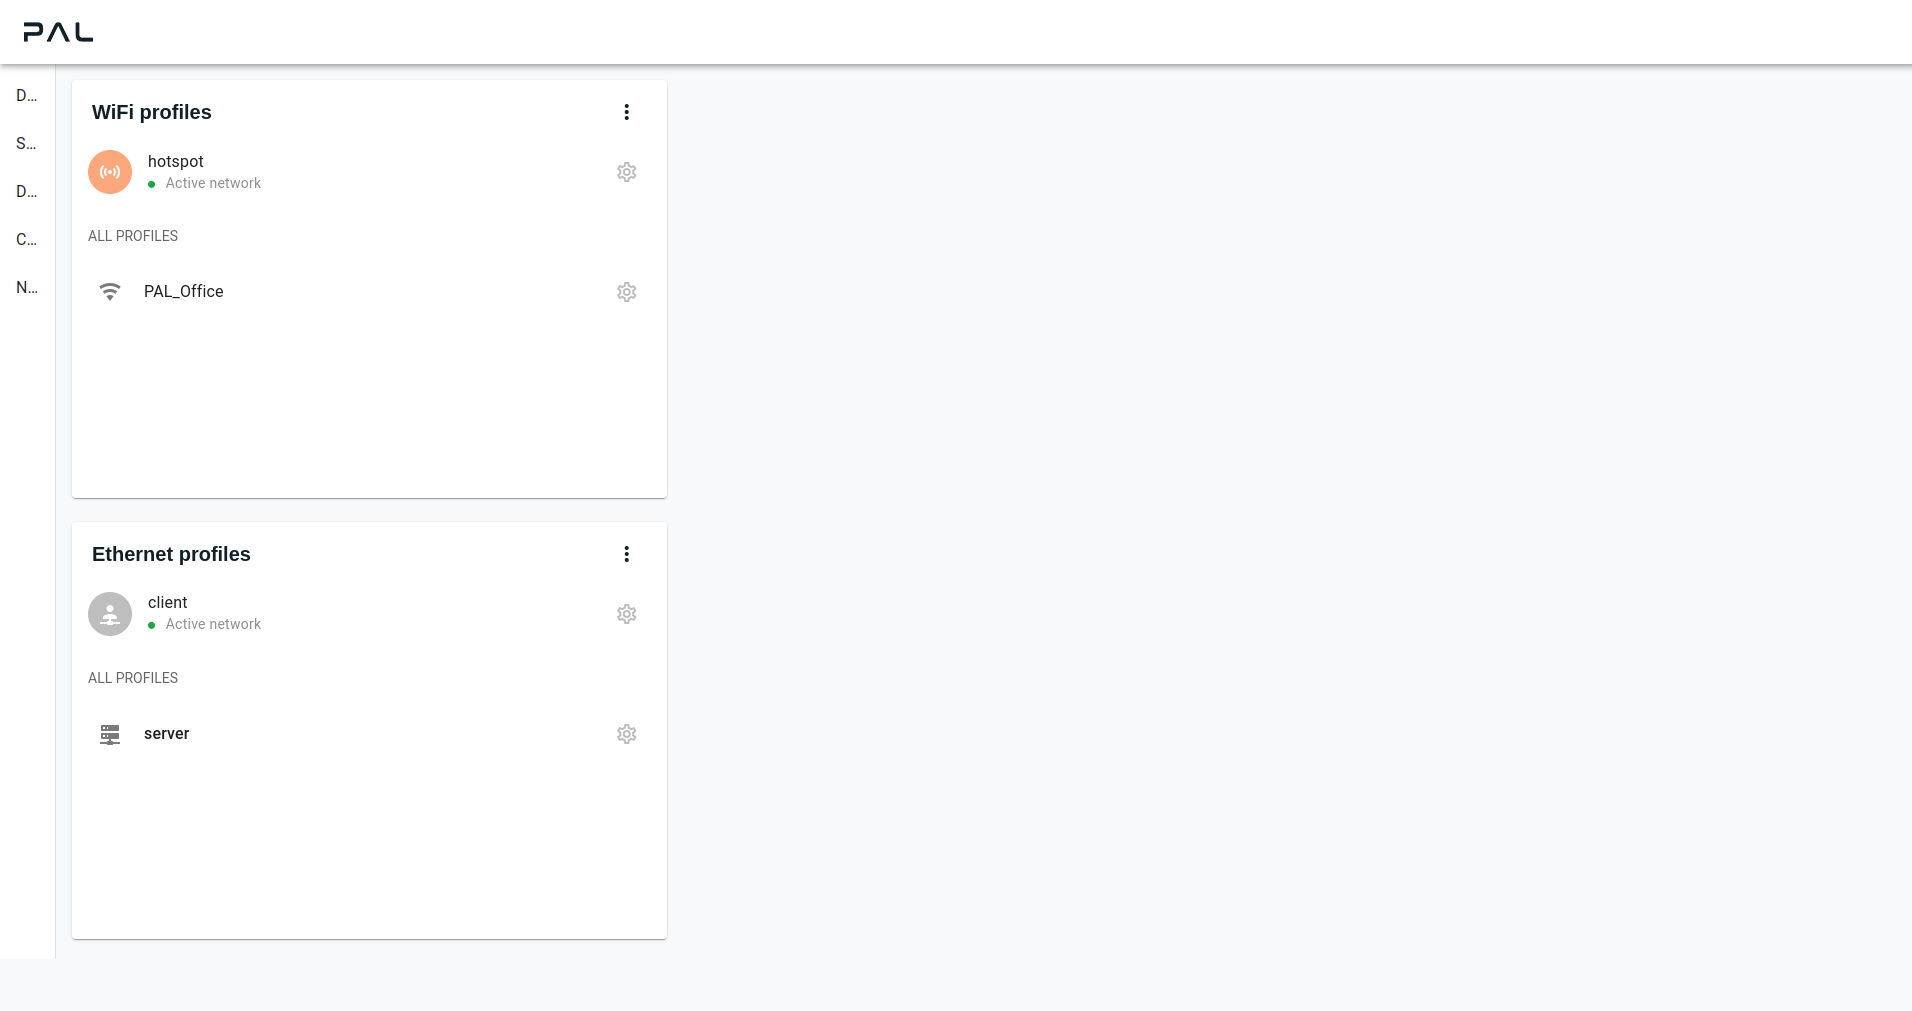
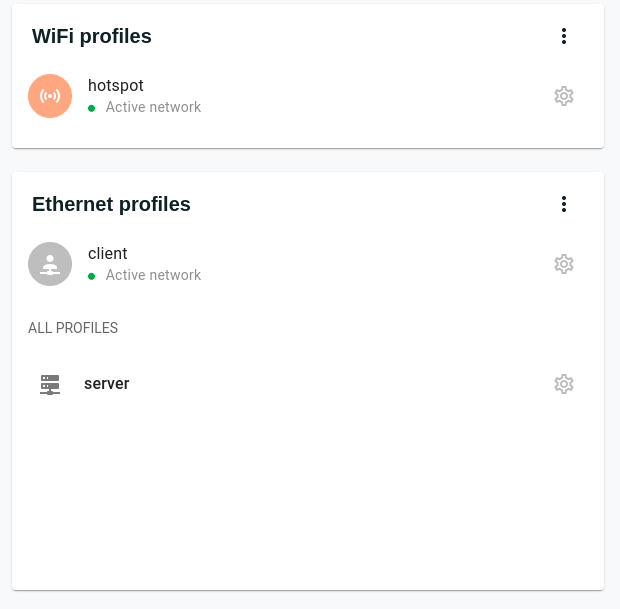
The interface displays two types of profile groups:
WiFi Profiles
Wired Profiles
A profile is a saved network configuration that can be created, edited, and managed by the user. You can activate any profile to apply its settings to the corresponding network group.
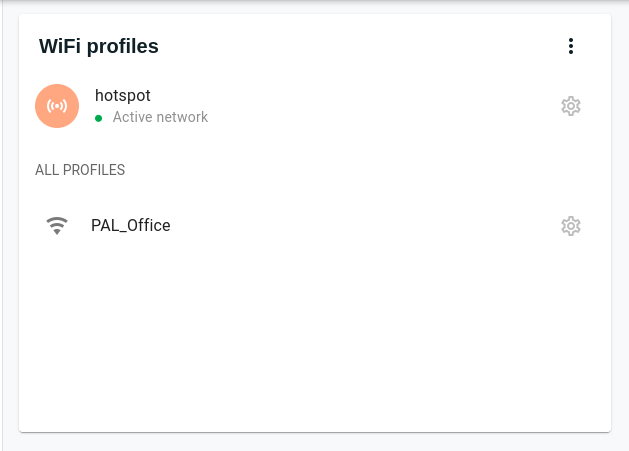
Below is an example showing the WiFi profiles group:
Note
The elements described below apply to both WiFi and Wired groups. Their structure and available options are the same.
Each network group (e.g., WiFi) contains the following elements:
Group title: Displays the name of the group, e.g., WiFi Profiles.
Group context menu: Accessible by clicking the three-dot icon in the corner of the group. From here, you can:
Add new profile: Opens the editor to create a new profile.
Disable WiFi network: Prompts you to confirm disabling the network group. For example, this would disable WiFi if selected on the WiFi group.
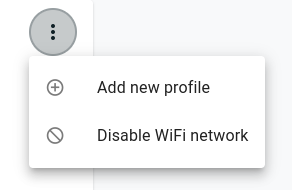
Context menu for the WiFi profile group.
Warning
Disabling the WiFi network will turn it off permanently until manually re-enabled. If you disable both the WiFi and Wired networks, you will lose all remote access to the robot. In that case, you must connect a keyboard and screen directly to the robot to restore network access.
- Active profile: Displays the currently enabled profile for the selected network group (WiFi or Wired).
Each group can have one active profile at a time, which means the group is enabled.
- Mode identification icons: Each profile displays an icon to indicate its configuration mode.
Custom mode : Indicates the profile was created using advanced editing (YAML). The configuration may contain fields that the parser doesn’t fully recognize.
WiFi Access Point mode : The robot acts as a WiFi hotspot, allowing other devices to connect.
WiFi Client mode : The robot connects to an existing WiFi network as a client to access the internet or internal infrastructure.
Wired Client mode : The robot connects to a network using an Ethernet cable, operating as a regular network client.
Wired Server mode : The robot bridges network segments through Ethernet. This mode is used to route and manage traffic between interfaces.
All profiles: Displays a list of all available profiles created by the user. The list may be empty if only one active profile exists (see example below).
- Profile list itemEach profile entry includes its name and a context menu with actions.
Set as active: Sets this profile as the currently active one for its network group. You will be prompted to confirm the change.
Note
Switching the active profile may temporarily disconnect your current session. This change is persistent, and you’ll need to reconnect based on the new configuration.
Edit: Opens the profile editor.
Note
System-provided default profiles cannot be edited or deleted. These include: - WiFi: hotspot - Wired: server, client
Copy and edit: Creates a new profile by duplicating the current one. You can then modify and save it as a new profile.
Delete: Permanently deletes the selected profile. You will be prompted to confirm this action.

Profile context menu options
Editor
The editor allows you to create or modify a profile. You can access it through several actions:
Add new profile: Select this from the group context menu to create a new configuration.
Edit: Choose this option from a profile’s context menu to modify its configuration.
Copy and edit: Duplicate an existing profile and edit the copy.
Click on a profile: Opens the editor in view-only mode. A button will appear allowing you to enter edit mode.
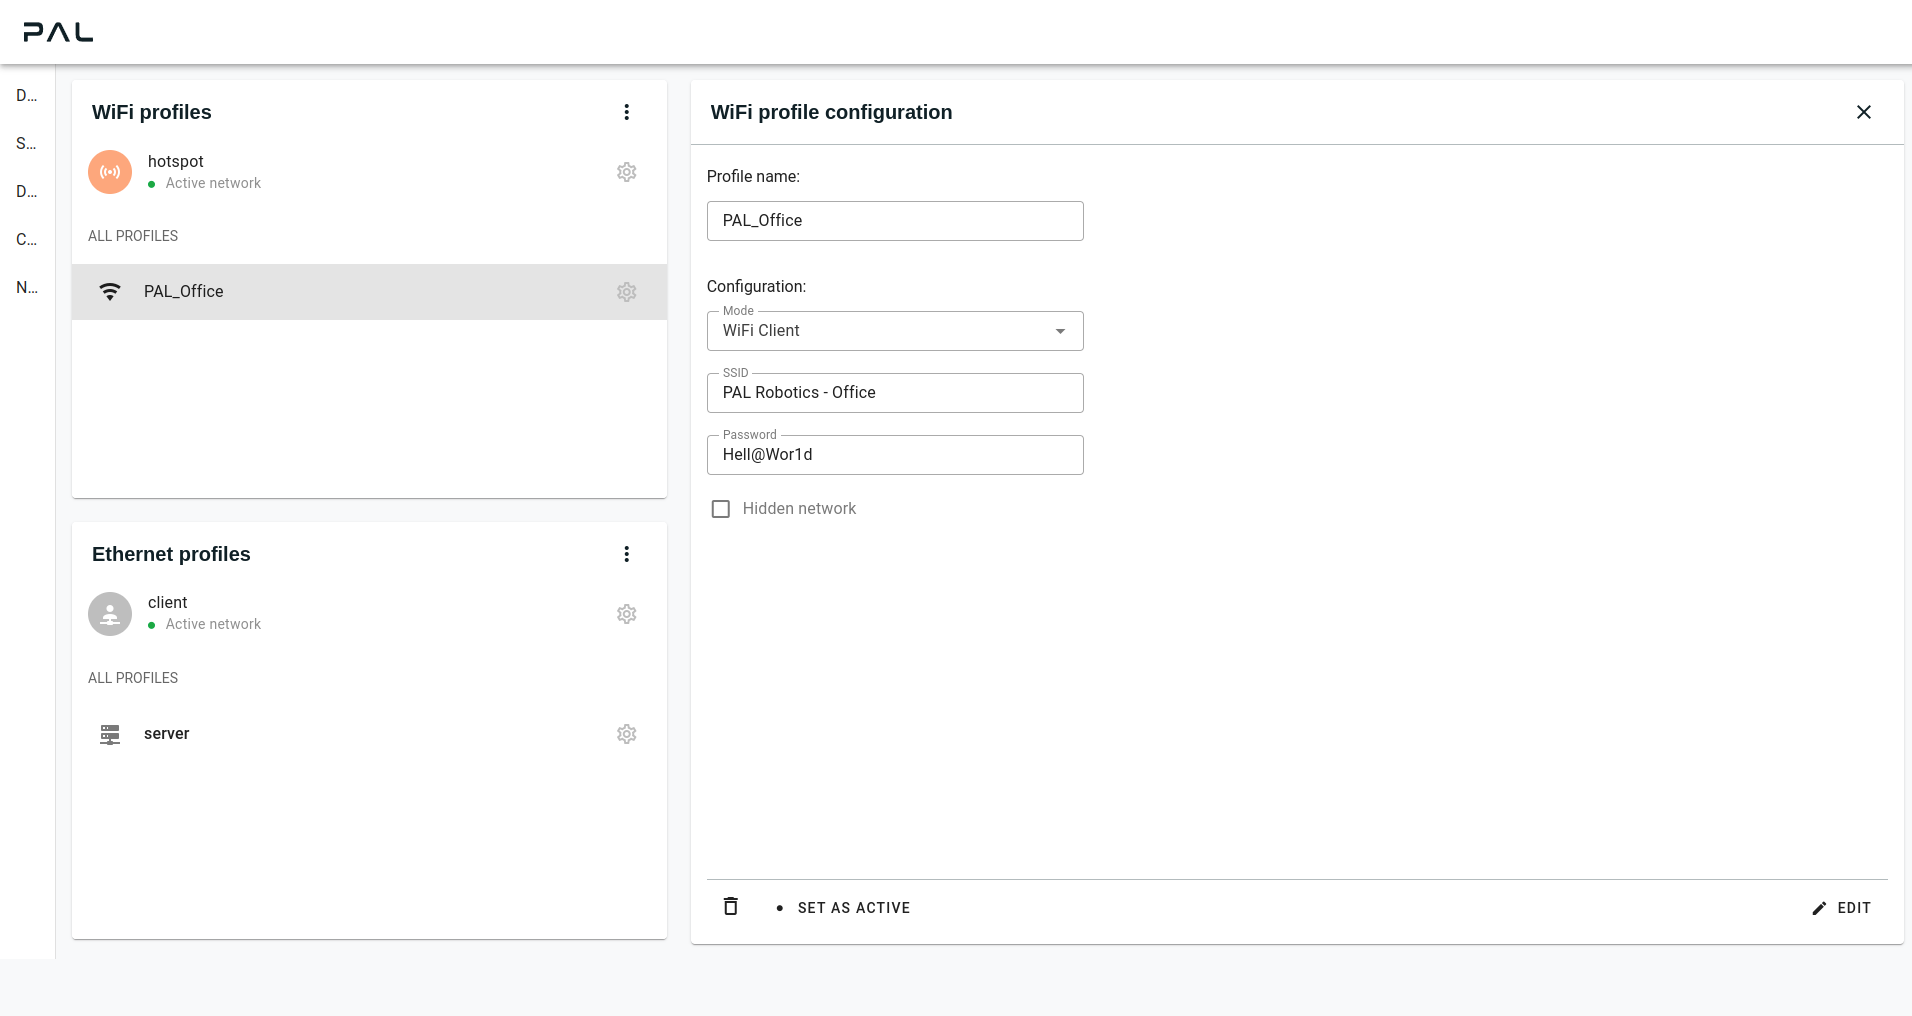
Profile editor in view mode
Adding a new profile
WiFi
To create a new WiFi profile, click on Add new profile in the group context menu. This opens the editor in form mode, where you’ll find fields on the left and a SAVE button at the bottom-right.
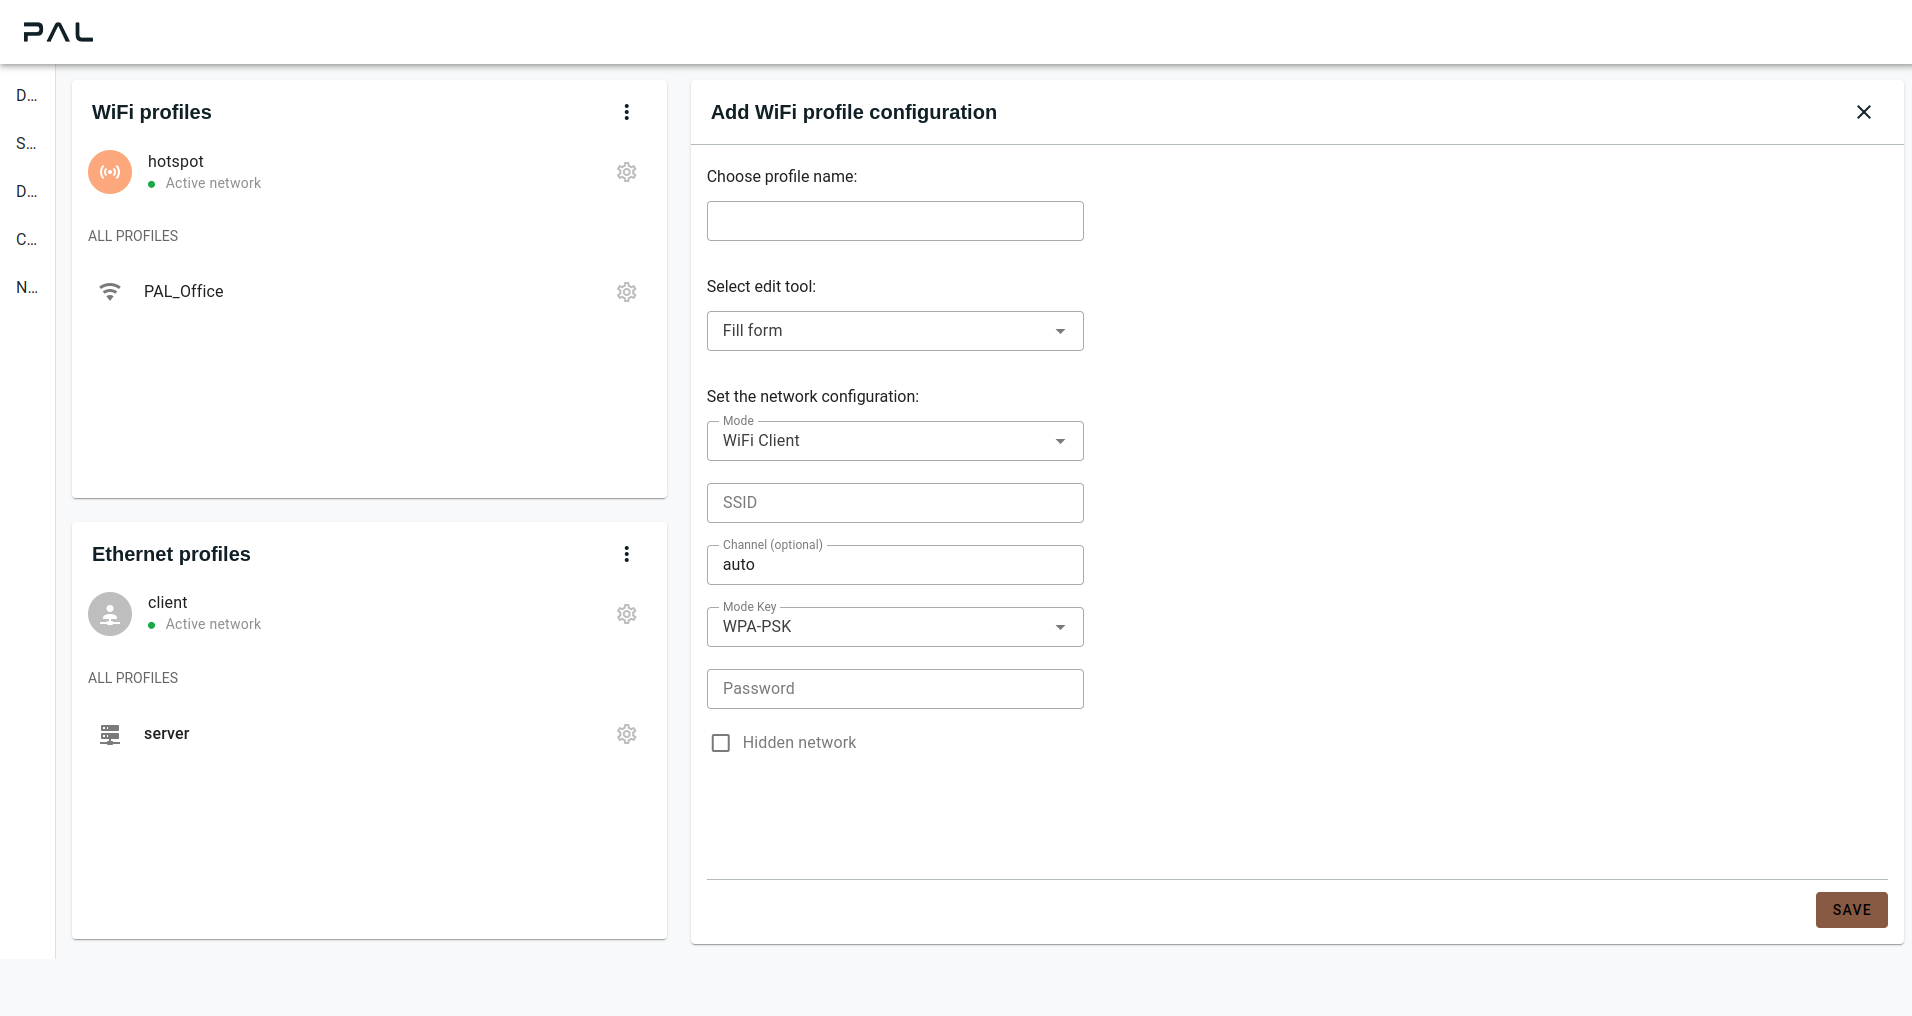
Below is a breakdown of the configuration fields:
Profile Name: Name shown in the profiles list.
Edit tool: Choose between two modes:
Fill form (Recommended for most users):
Mode: Select either WiFi Client or Access Point.
SSID: Name of the client WiFi or name with which the access point will be discoverable.
Mode key: Security type (e.g., WPA2).
- Hidden: Check this if the network does not broadcast its SSID.
Hidden networks won’t appear in standard WiFi search results. Example: when setting a robot as an access point and configuring it as a hidden network, the SSID set will not show in the list of your device’s available WiFis list.
- Password: Password for the client network or hotspot. Access point passwords must meet these rules:
≥ 8 characters.
≥ 1 uppercase letter.
≥ 1 lowercase letter.
≥ 1 number.
≥ 1 special character.
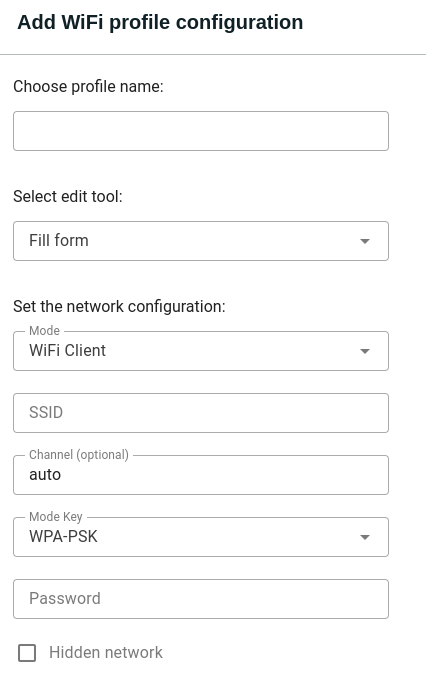
Insert configuration (Advanced users):
- Manually enter a full YAML config or drag-and-drop a .yaml file.
This allows you to define the full Netplan specification. This is intended for advanced users, you are able to use the full available configuration for Netplan.
Warning
The inserted YAML is not validated automatically — make sure it is correct before saving.
See the official Netplan documentation: Netplan YAML configuration for more information about the configuration options.
You can validate YAML at YAML Lint.
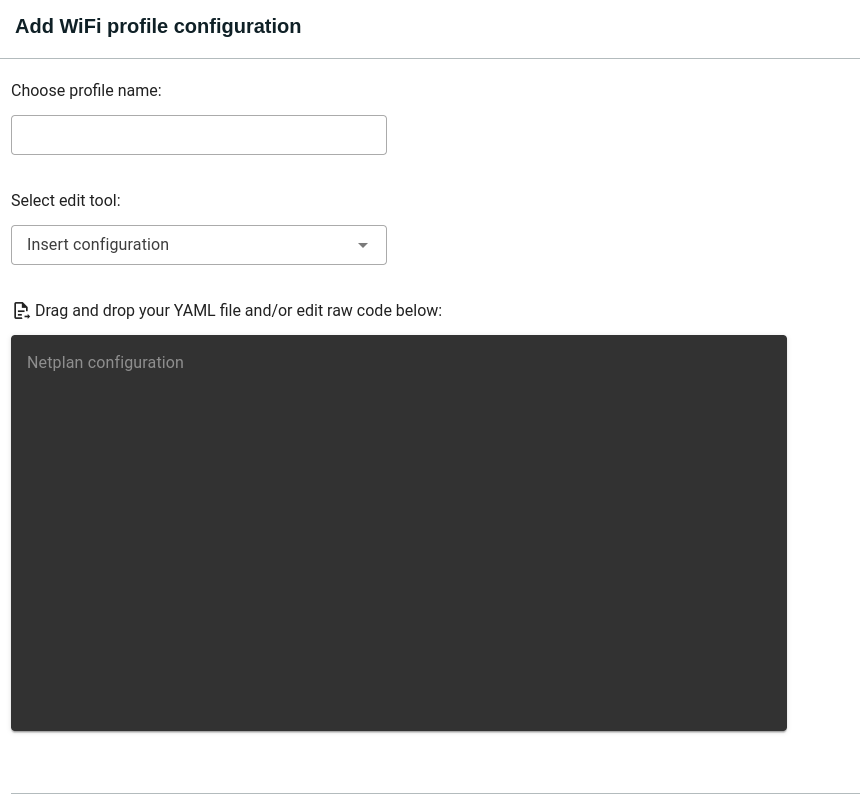
Manual YAML configuration for a WiFi profile
Click SAVE to store the profile.
Wired
To create a new wired profile, only the Insert configuration method is available.
First, enter a name for your profile.
- Then, write or paste a valid Netplan YAML configuration in the text area.
Alternatively, you can drag and drop a .yaml file — it will be treated as plain text.
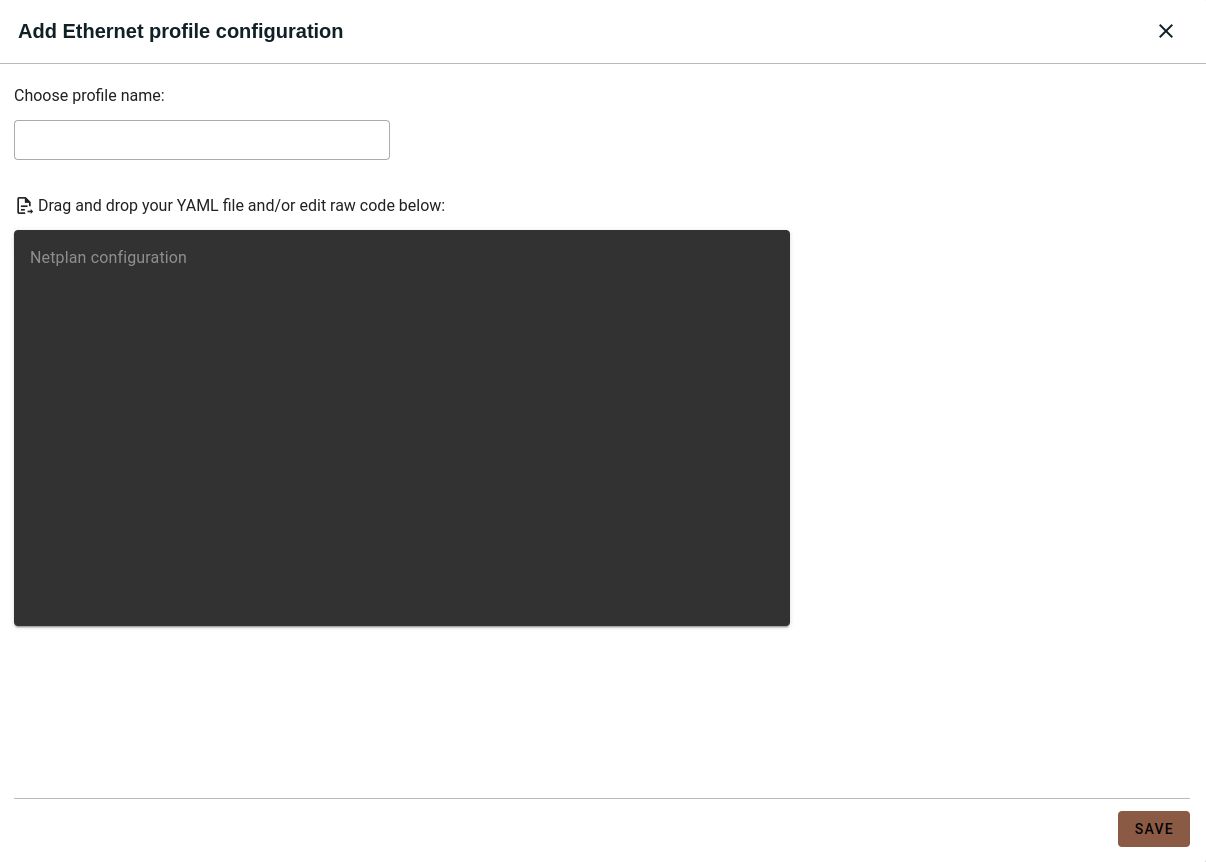
Manual YAML configuration for a wired profile
Click the SAVE button to apply your configuration. To cancel without saving, use the close icon at the top-right corner.
Edit existing profile
You can modify the configuration of an existing profile — unless it is a default profile.
For WiFi profiles created using the Fill form tool, the editable fields will be displayed.
For profiles created using Insert configuration or for wired profiles, the Netplan YAML block will be shown.
After making your changes, click SAVE to apply them. To cancel and exit without saving, use the close icon in the top-right corner.
Create a new profile from an existing one
To duplicate a profile, use the Copy and edit option in the context menu of the desired profile.
The editor will open with all the fields pre-filled based on the original profile. You can modify any values as needed and click SAVE to create the new profile.
View profile
Clicking on a profile opens the editor in view mode, displaying the current configuration.
The type of editor depends on how the profile was created: - If it was created using Fill form, the editor shows the form fields. - If it was created using Insert configuration, the YAML block will be shown. - Wired profiles always use the YAML view.
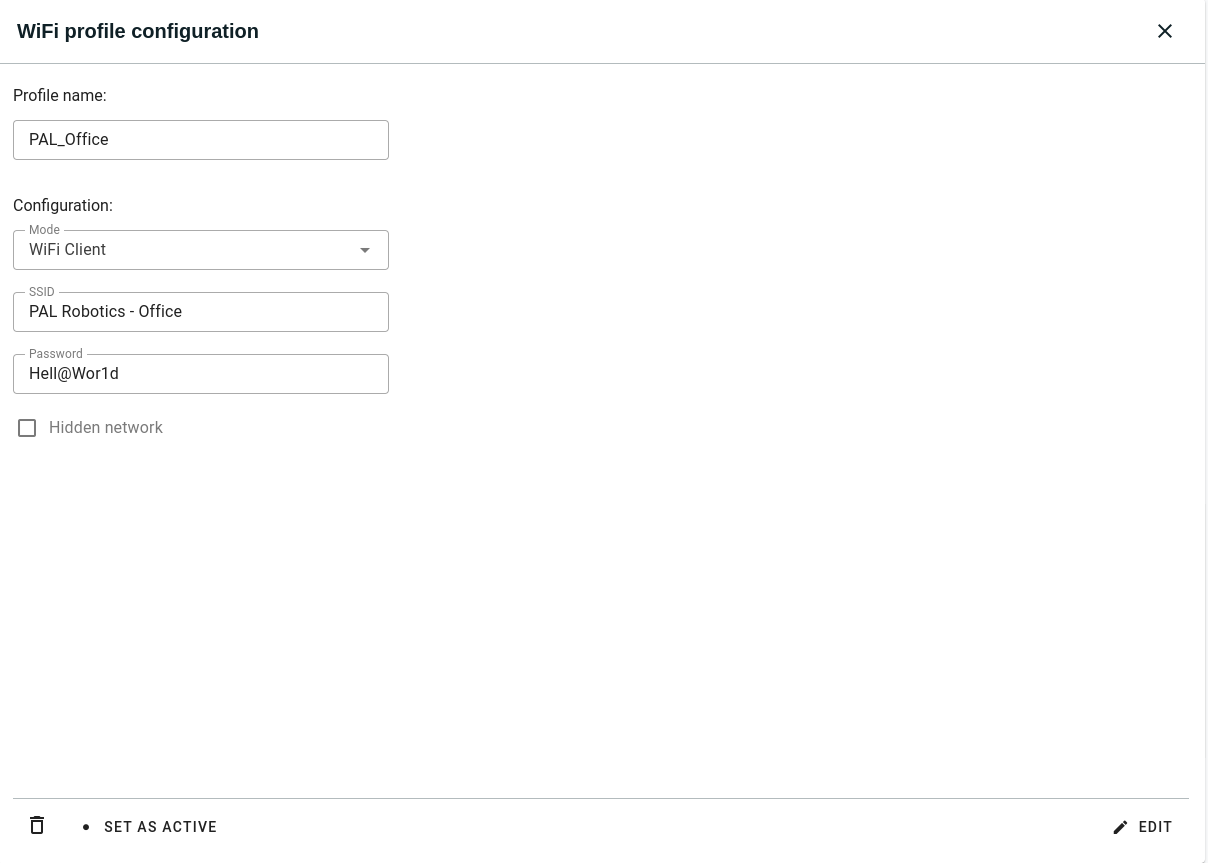
In view mode - Editing is disabled. - You can click the Edit button to switch to edit mode. - You can still set the profile as active or delete it, just like in the profile context menu.
Note
Default profiles (e.g. hotspot, server, client) cannot be edited or deleted from the Web interface.
To exit the editor, click the close icon at the top right corner.
Use pal network to manage profiles from the terminal.
1. Show active profiles
$ pal network show
Active WiFi profile -> hotspot
Active Wired profile -> server

$ pal network show wifi -v
File -> /etc/netplan/pal/50-wifi-hotspot.yaml
↓ Content ↓
# YAML contents shown here
2. List available profiles
$ pal network list
$ pal network list wifi
$ pal network list wired
3. Set active profile
$ pal network set
$ pal network set wifi --profile-path /etc/netplan/user_profiles/editor/my-wifi.yaml
4. Disable a network group
$ pal network disable wifi
Are you sure? [y/n] y
5. Show profile info
$ pal network info
Choose type: wifi / wired
Choose profile: client / server

File -> /etc/netplan/pal/25-bridge-client.yaml
Contents for client ->
network:
version: 2
renderer: NetworkManager
ethernets:
    eth0:
    dhcp4: no
    eth1:
    dhcp4: no
bridges:
    br0:
    dhcp4: yes
    interfaces:
        - eth0
        - eth1
Profile directories
/etc/netplan/pal/: default profiles
/etc/netplan/user_profiles/editor/: created via WebGUI form
/etc/netplan/user_profiles/advanced/: created via YAML editor
6. Access Point Configuration
Robots ship with a default WiFi profile called hotspot, which creates a visible access point for user connection. This mode is ideal for local operation, especially in scenarios where infrastructure WiFi is unavailable.
To use or re-enable the access point mode, follow these steps:
Open the Networking App: http://robot-IP/networking
Find the WiFi Profiles group
Select the default hotspot profile or create a new Access Point profile
Click Set as active to enable it
You may customize the SSID, password, and whether the network is hidden from the WiFi list.
To create a new Access Point profile:
Click the three-dot icon in the WiFi group → Add new profile
Choose “Access Point” as mode
Fill in SSID, password, and optional advanced settings
Once saved, set it as active. The robot will create a hotspot with those settings.
Note
If no other profile is active, the system will fall back to the default hotspot profile.
Open a terminal or SSH into the robot
Use the following command:
$ pal network set wifi --profile-path /etc/netplan/pal/50-wifi-hotspot.yaml
You can verify the result with:
$ pal network show
Note
If hotspot mode does not appear, verify WiFi is not disabled:
$ pal network show wifi
$ pal network enable wifi
For help with editing or creating custom profiles, see section 5: Managing Network Profiles.
7. LAN (Ethernet) Connection
Ethernet connections provide a stable and high-speed network interface for the robot.
This setup is commonly used in labs, production areas, or when WiFi is unreliable or restricted.
To connect the robot to an existing LAN via Ethernet, you must use a Wired Client profile.
Open the Networking App: http://robot-IP/networking
Locate the Wired Profiles group
Click the three-dot menu → Add new profile
Choose Insert configuration
Enter or paste a Netplan YAML configuration matching your LAN setup
Click SAVE and activate the profile
Example Netplan configuration (DHCP client):
network:
version: 2
renderer: NetworkManager
ethernets:
    eth0:
    dhcp4: true
Create or edit a file at: /etc/netplan/user_profiles/editor/my-lan.yaml
Use the following command to activate the profile:
$ pal network set wired --profile-path /etc/netplan/user_profiles/editor/my-lan.yaml
Confirm that the profile is active:
$ pal network show wired
You can use ping, ip addr, or nmcli to verify the connection and check if the IP address is correctly assigned.
8. Troubleshooting
If you are having network issues, the following steps may help you identify and resolve the problem.
Check the active profiles
Use the CLI to verify which profiles are currently active. Use an external screen and keyboard to access the robot if needed:
$ pal network show
Add -v to view profile file paths and YAML content:
$ pal network show wifi -v
Check IP address
Display IPs for each interface:
$ ip addr show
Check for addresses under wlan0, eth0, or br0.
If none appear, the interface may be inactive or DHCP has failed.
Ping the gateway or internet
Check basic network reachability:
$ ping 8.8.8.8
$ ping <gateway-IP>
Verify profile status via WebGUI
Open the Networking App: http://robot-IP/networking
Check that the correct profile is active in each group (WiFi/Wired).
Use Set as active if needed to switch profiles.
Lost access to robot
If both network groups are disabled, you will lose remote access.
In that case:
Connect screen and keyboard to robot
Log in locally
Re-enable network manually:
$ pal network enable wifi
$ pal network enable wired
Apply or debug Netplan manually
To check or reload Netplan configurations:
$ sudo netplan try
$ sudo netplan apply
Inspect connection with ``nmcli``
Check device and connection status:
$ nmcli device status
$ nmcli connection show --active
WiFi not connecting?
Double-check SSID and password
Disable and re-enable the WiFi interface:
$ pal network disable wifi
$ pal network enable wifi
Still no internet?
Try a different LAN or WiFi network
Use a known working wired connection
Check DHCP configuration on upstream router
If all else fails, re-enable the default hotspot profile to restore access.