Swapping end-effectors
Overview
This section explains how to change the end-effectors of TIAGo. The complete procedure to change the end-effector is shown in the following video Demounting and mounting TIAGo’s end-effectors. An overview of the steps is given below.
First, make sure that the robot is completely turned off in order to ensure maximum safety during the procedure.
Locate the fastener that locks the end-effector in the end-effector clamp, as shown in the figure below:
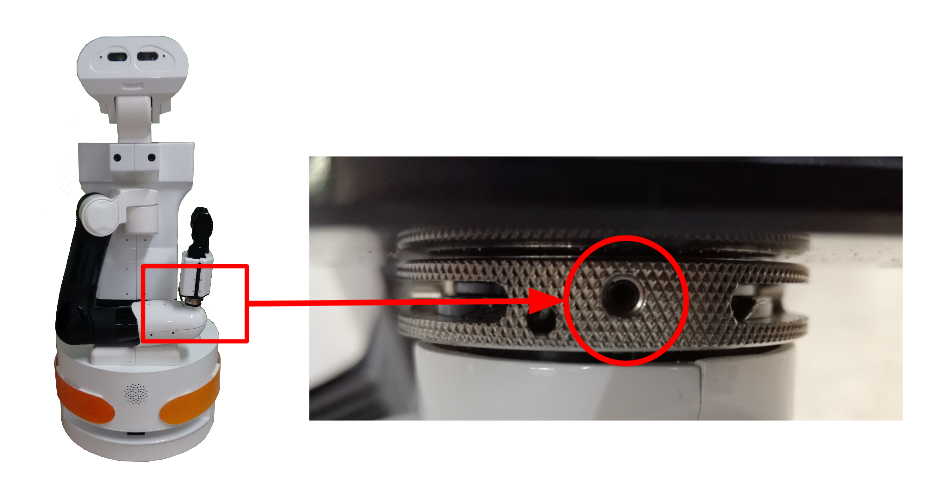
Screw locking the clamp of the end-effector
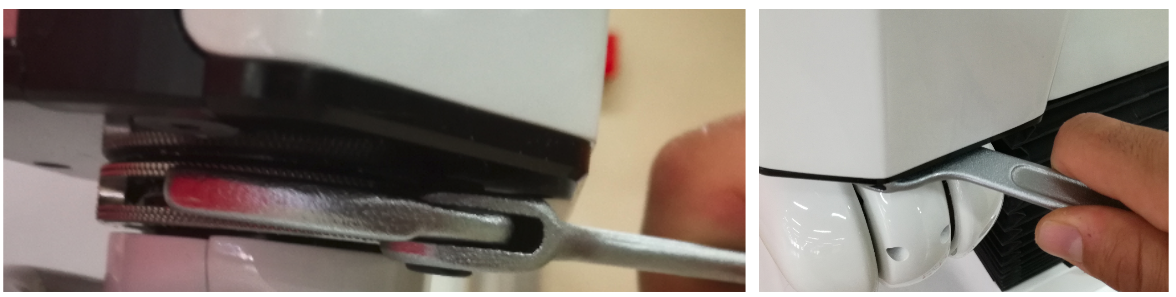
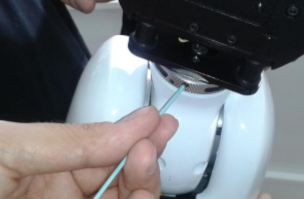
Use an appropriate Allen key to loosen the locking screw of the clamp, as shown in the figure below.
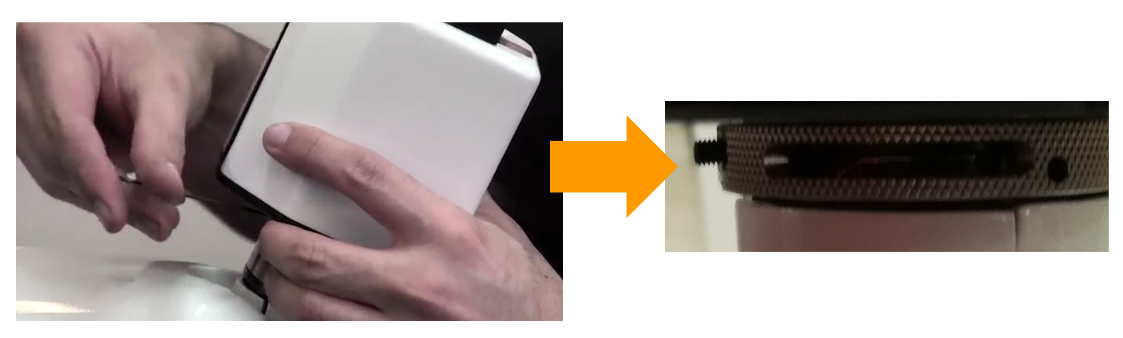
Loosen the locking screw
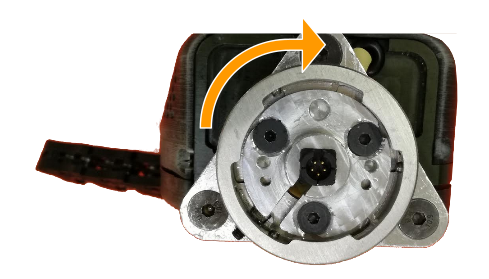
Unlock the clamp by rotating it counterclockwise as shown in the figure below.
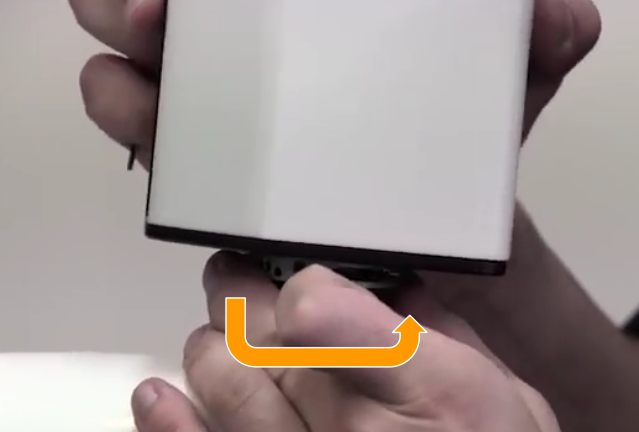
Unlocking the clamp by hand
If the clamp cannot be unlocked by hand, use the tool provided with the spare end-effector, see the figure below. Insert the tool in the groove edge of the clamp and rotate it counterclockwise in order to unlock it, as shown in the figure below.
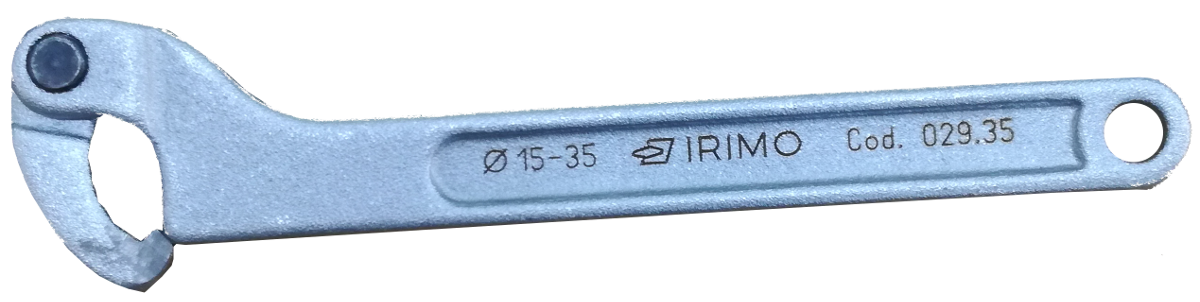
Tool for end-effector clamp
Unlocking the clamp using the tool provided
Once the clamp is unlocked, unmount the end-effector by lightly shaking and pulling it at the same time, see the figure below.
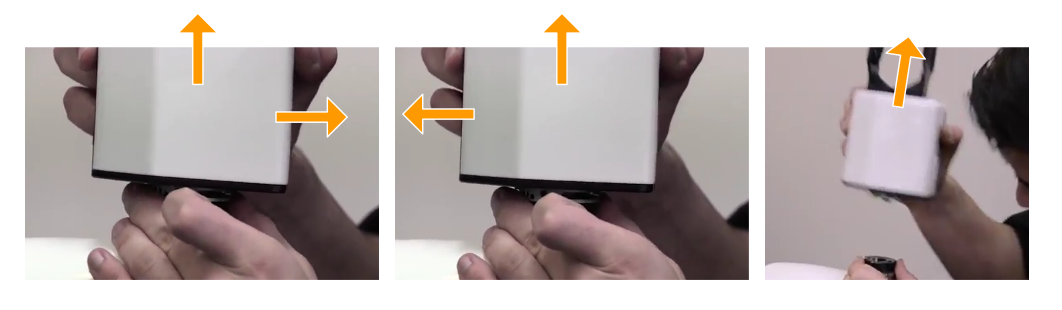
Unmounting the gripper
Align the end-effector and the clamp, as shown in the figure below.
Correct alignment of the clamp
Position the end-effector on top of the wrist mounting plate so the plate pin fits in the corresponding hole of the end-effector plate, see the figure below.
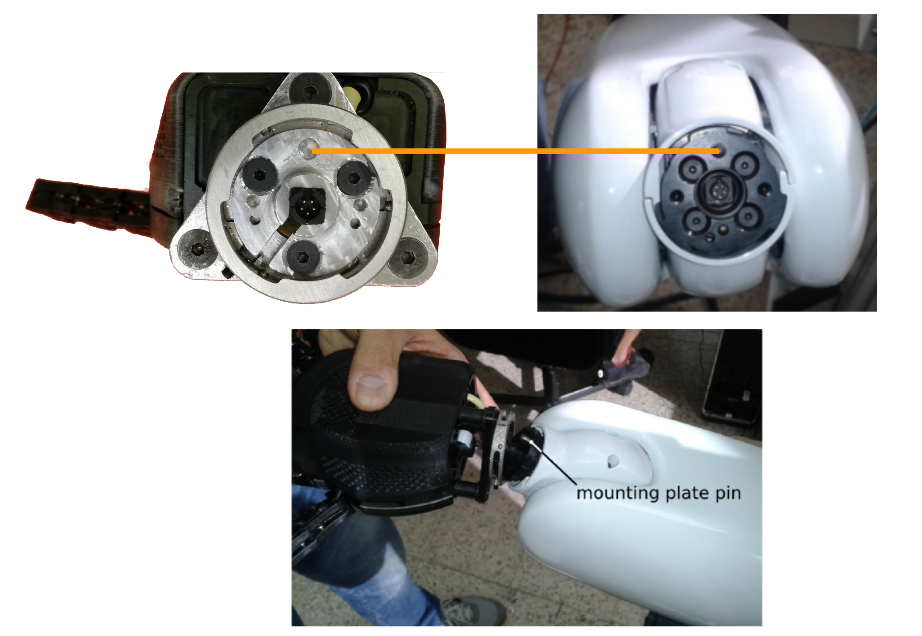
Alignment of the end-effector with the wrist mounting plate
Insert the end-effector by pressing until the mounting plate of the wrist is in contact with the end-effector plate, as shown in the figure below.
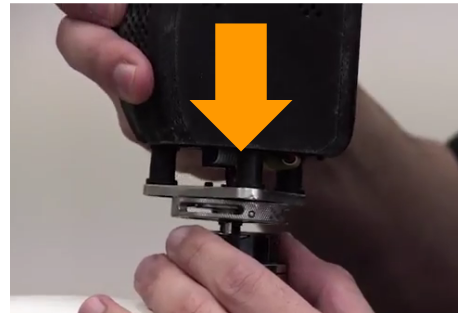
Insertion of the end-effector
Use the tool to twist the clamp clockwise in order to tighten it, as shown in the figure below.
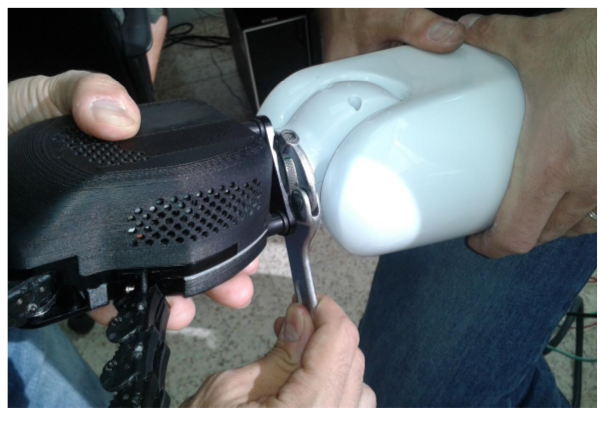
Tightening Hey5 clamp
Now tighten the locking screw, as shown in the figure below.
Tightening Hey5 clamp
In order to validate that the new end-effector has been correctly assembled and its software properly activated, turn on the robot.
When the robot has correctly started up, go to the Diagnostics tab of the WebGUI, and under the Motors sections check that the motors of the end-effector are shown in green.
See also
List of all end-effectors